Canva Beat Sync explained: How to use it?
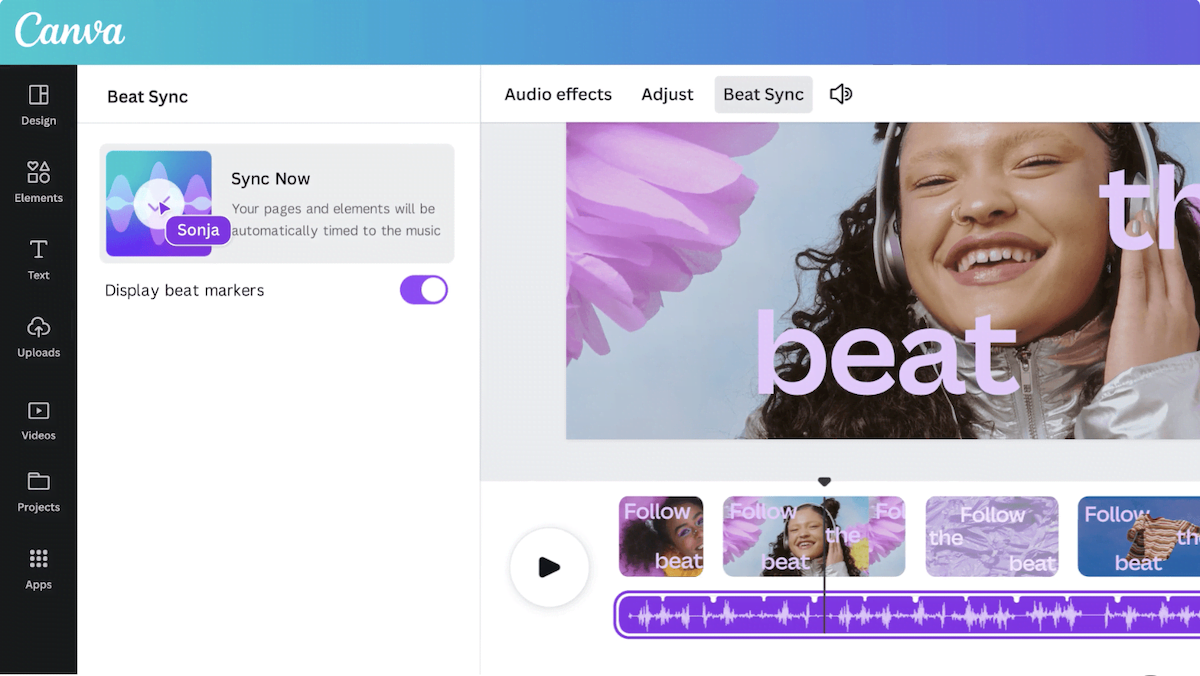
Canva recently held a virtual event and announced its entrance to the AI race with new and useful features. Canva Beat Sync is one of the new features rolled out by the company, and today we will explain its basics and how to use it!
Canva is one of the most popular websites for designers who look for fast, reliable, and up-to-date design solutions. It is known for having around 120 million monthly users and it looks like this number will increase significantly, thanks to the latest AI-powered innovations announced at the virtual event. The company announced multiple features, from a smart presentation designer to a translator. There is one feature that was revealed at the event that surprised everyone at first glance, and that is Canva Beat Sync.
What is Canva Beat Sync?
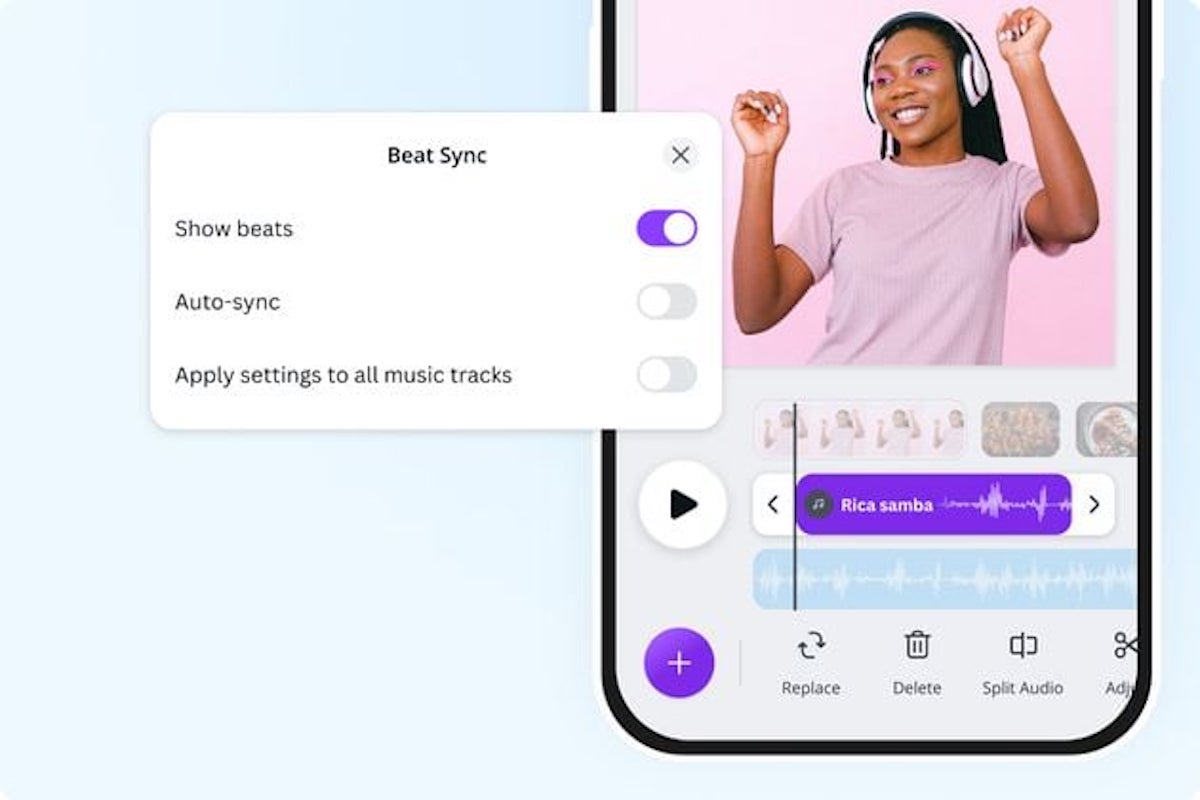
Canva Beat Sync is one of the company's newest AI-powered features. The technology behind it lets you match the video footage to a soundtrack you pick, helping you create a masterpiece with music going up and down at needed points. In other words, it automatically aligns video cuts to the beat of a song. This will help you highlight important parts of a video and fascinate the viewer at the climax by trimming the duration of the page to the first beat in the nearest bar.
For now, it is only available on presentations, social media, and video doctype and has a 10 minutes or less in duration audio track limit.
How to use Canva Beat Sync: Explained
You obviously must have a Canva account. Please start by creating your own account and make sure that you are logged in. Then, follow the steps below to find out how to use Canva Beat Sync:
Step 1: Get everything ready
- Type your preferred template in the search bar in the middle of your Canva home screen. You can also click Custom Size to manually create a canvas according to your needs. Click the little size icon at the top right of the search bar.
- YouTube videos are the most famous one, so we will type in "YouTube video."
- Select the template according to your preference. We will click "Create a blank YouTube video" to show you everything from scratch.
- Upload the video and audio clips to your project. You can also find stock clips and audio in the Elements. section.
- If you need more footage, click the "+" icon to add more videos.
- Add each video by uploading and dragging them to your project.
- Just like adding videos, drag and drop audio files under the related videos.
- You can adjust video and audio clips by clicking on them in your timeline.
- To adjust the portion played in the project, double-click and drag the middle of an audio clip.
- You can also adjust its length by dragging the start or end of an audio clip. You can expand it until the end of the audio clip.
- To apply effects, crop, trim, and just the video, use the toolbar at the top.
- Now that everything is set, it is time to use Canva Beat Sync.
Step 2: Use Canva Beat Sync
It is now time to use the AI-powered tool; follow the steps below to complete your project:
- Select an audio clip that is placed in your timeline.
- You will see the Beat Sync button in the toolbar at the top; click it.
- Enable the toggle for "Display beat markers," and "Sync now."
- Wait for it to work its magic! This will be applied to every audio and video clip in your project.
- To preview the final products, click the "Play" icon.
Step 3: Download
Now that your project is done, it is time to download it.
- Make your last adjustments and add any necessary elements or transitions. (You can add transitions by hovering in the middle of two clips and click "Add transition.")
- If everything is set, click the "Share" icon at the top right of your screen and select "Download."
- Choose your settings, like the video format, and quality.
- Click Download, and you are done!

