Create a 3D logo with The GIMP

Any of you that do any graphic design or web development know how important it is to have tools at your disposal to handle just about any task that might come your way. And even if you don't have graphic design skills you will, someday, have to create something quickly to use for a web site, or presentation, or just about any other media. When that day comes, and you need to create a quick, professional looking logo, be glad you have The GIMP.
With The GIMP, creating rudimentary 3D logos is painless...if you know the steps. And with a good collection of fonts you can make your clients think you have far more skills than you might actually have. With that in mind, let's take a look and see just how simple it is to create a 3D logo with The GIMP.
How it works
The GIMP has a built in feature that helps you to create these logos. We will be working with version 2.6 - which is actually important because the engine that creates these has changed as well as the location of the submenu has changed. So if you don't have 2.6, give upgrading a go.
The process is pretty simple.
- Select the type of logo you want to create from the Create menu.
- Enter all of the necessary information and select the configurations to suit your needs.
- Click OK
- Edit the image to suit your needs.
- Save the file.
Now let's take a look at the process with a bit more detail.
The logo tool

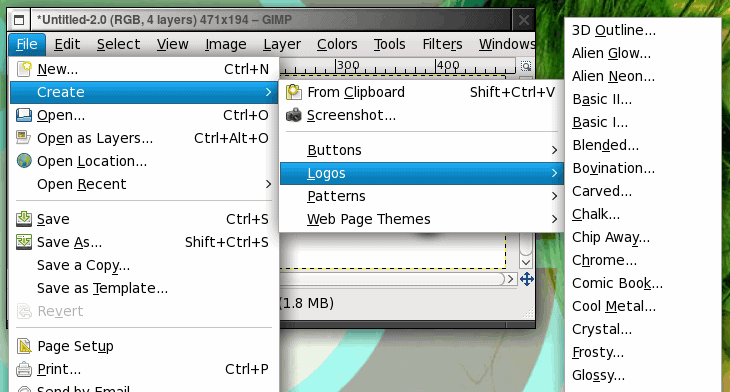
To open up the logo tool go to the File menu and select the Create submenu. From with the Create submenu you will see the Logos submenu, click on that to reveal the different types of logos you can create (see Figure 1).
The different types of logos range from the cartoonish, to the professional, to the nearly-fantastical. There are quite a few choices so your best bet is to play around with them until you find the type of logo you prefer to work with.

Once you click on the logo type you want to create a new window will open. It is within this window that the logo is created. The good news is, you really need zero artistic skills to tackle this task.
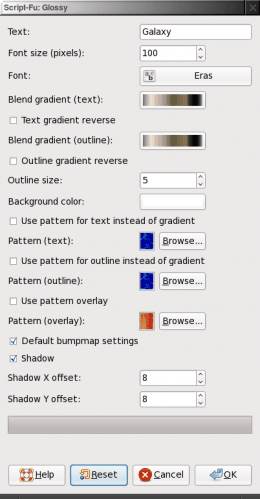
Figure 2 shows all of the configuration options you will have to deal with to create a logo. Don't let amount of options fool you, you really only need to work with a minimum of these to create your logo. Here's what you'll need to work with:
Text: This is what your logo will say.
Font: This is the font you want to use for your logo.
Blend Gradient(s): These will be the gradient colors you will use for your logo. You can create new gradients as well. The included gradients should be plenty to get you started.
Background Color: If you know the color of the background your logo will be going over you can change this here. I usually delete the background color so the logo is surrounded by a transparent border.

And that is the bare minimum you need. Once you have all of that filled out, click OK and the logo will be created.
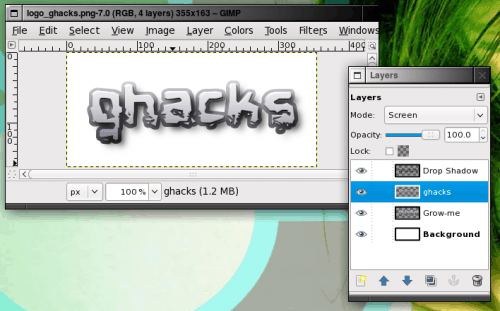
Figure 3 shows a sample logo created using the Glossy logo tool, the Biometric Joe font, and the Cold Steel 2 gradient.
Of course there are plenty more options to configure for your logo - but getting the hang of the basics will give you plenty to do with this tool.
TIP: As I mentioned I tend to remove the background in this logos. What this does is allow my logos to be placed on any color background. To do this go to the layer window of your new logo, select the background layer, and click the delete button in the layer window. When you save this image you will now want to make sure you save it in a format that supports transparency (such as .gif or .png.)
Final thoughts
I have used this method to create logos for plenty of clients. Not only does this make you a more versatile web designer, it also adds to the bottom line as you can now charge design fees.
Advertisement


Nice article Jack, thanks for sharing.
Cool feature. For some reason though this wouldn’t let me choose the font or make any changes. I don’t think I did anything wrong but then again, who knows.
As a freeware volunteer and fan of GIMP, I’ll create a flash demo for this.
http://rapidshare.com/files/236012334/gimp-3d-logo.zip.html