Configure Windows 7 Network Adapter Binding Priority

A computer running Windows 7 may connect to networks with various adapters. Probably the most common example is a notebook or mobile device that can connect to the Internet via a wireless connection or a wired connection. If you have a device that can connect to networks in multiple ways, you may wonder how Windows determines the priority of the installed network adapters.
Say you want to make sure that your computer uses a wired connection when available as the main means of connecting to a network, and a wireless connection otherwise.
Network connection priorities are configured in the Windows Control Panel. The configuration setting is deeply hidden, and you have to click several times before you finally reach the settings.
Open the Windows Control Panel. You can do that with a click on the start orb, and the selection of Control Panel from the Windows start menu.
Locate and click on Network and Internet, and then on Network and Sharing Center on the next screen.
Find Change Adapter Settings under the left sidebar and click the link. This opens a new screen with all of the configured network connections of the operating system.
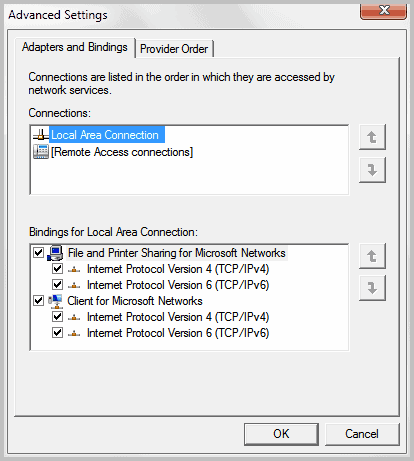
Select Advanced > Advanced Settings from the menubar. This opens the Advanced Settings under Network Connections.
You see a list of your connections under the Adapters and Bindings tab there.

Left-click on of the connections to select it, and use the up and down arrow buttons to move it up or down in the listing. The topmost connection is the default connection used on the computer. This way, you can change the network adapter binding priority under Windows 7.
You need to click on the ok button after making changes to save them. The new network connection priority is active from that moment on.
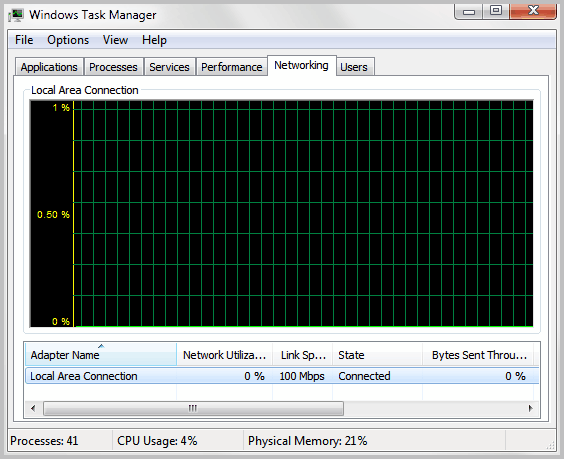
Here is a quick tip how to find out which connection is used on your computer right now. Open the Windows Task Manager with Ctrl-Alt-Esc and switch to the Networking tab.

At the bottom you find adapter names and their connection status and history. Just access a website or service that requires a network or Internet connection and watch the information under Networking in the task manager. The network adapter used to establish the connection should show bandwidth utilization, while other adapters should not show anything.
And that's how you check which network adapter is used on your computer, and how you change the binding priority of all network adapters.


Excellent info
Great. Now how can I push it out to 50+ laptops?
Thanks, needed exactly this information …
For me, there is no menu bar with advanced settings… Please help me ASAP :)
press “alt” or activate “always show menu” in folder options
I did not realize they had hidden the ‘Menu’ option and so did not see the ‘Advanced’ option until I read your note.
Thanks, great tip, clearly explained.
nice article, but its wierd, i did what you have done and both connections are shows activity , like he join forces and use both of the adapters, strange !
I had always a similar problem with my old ISP. I used a virtual adapter to connect through PPPOE to the internet.
But when I was connected to the inernet I couldn’t ping or wakup other computers in my network.
Changing the priorities like mentioned here didn’t work for me.
I had to manually change the interface metrics.
Very useful tip! I was wondering why in my case the WiFi connection was chosen over the LAN when I forgot to turn off wireless.
It’d be nice to assign different networks to different applications…
i.e. surf the net via a wifi adapter connected to a slow dsl, while use a wired nic to connect via a cable modem for tv streaming, etc.
Its shows priority is important, thanks!