How to use Mission Control in macOS
Multitasking is very important for a lot of users. You may want to have several apps open at the same time, but they may not all fit the screen, what do you do then? macOS has a built-in feature that can help you, Mission Control
What is Mission Control?
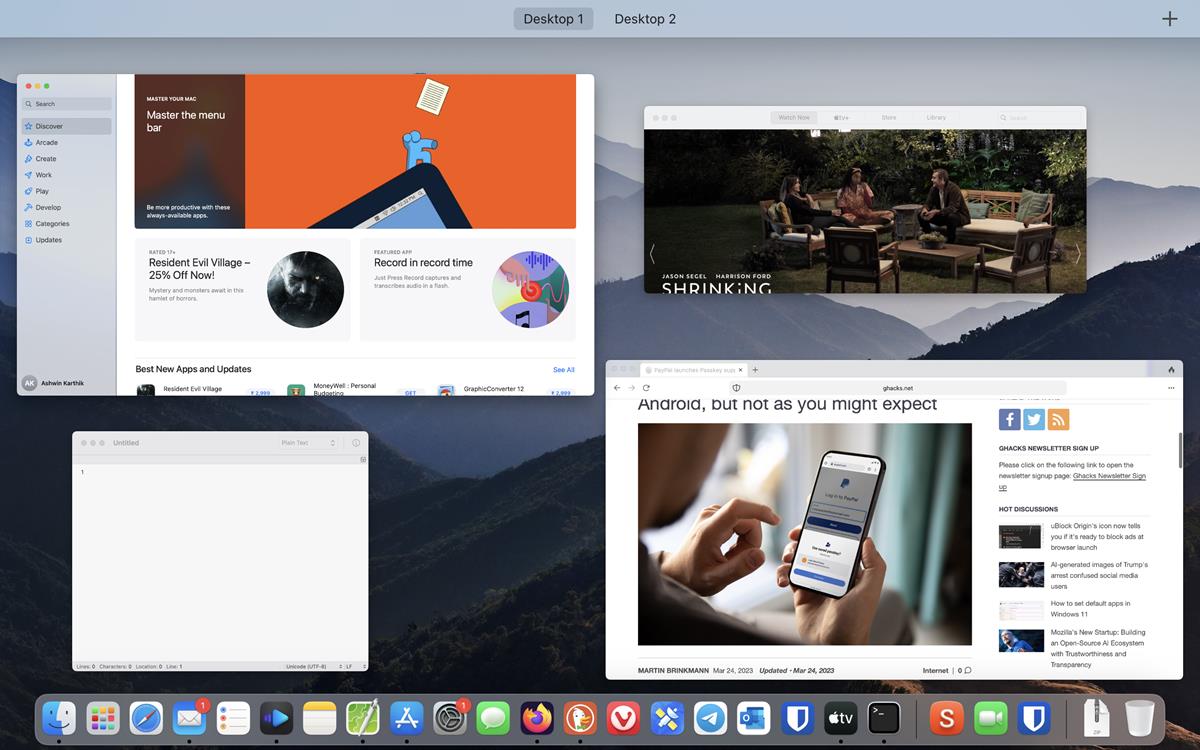
If you have used virtual desktops on Windows computers, Mission Control is essentially the same. The feature displays all the windows that are open on the desktop in a single page. You can have multiple desktops on your machine, these virtual desktops are called Spaces.
How to use Mission Control on macOS?
There are multiple ways to invoke Mission Control. The easiest way is to swipe up on your trackpad using three fingers. Swiping down exits Mission Control. You can also enter Mission Control by pressing the F3 key on your MacBook, hitting F3 a second time closes it. Another keyboard shortcut that you can use is the Control + Up Arrow keys, while Control + Down Arrow exits it, this works even on third-party keyboards, for example those that you use with an iMac or Mac Mini.
If your Mac has a Touch Bar, you can press the button on the right end to view the Control Strip, to access Mission Control.
Tip: There is a Mission Control shortcut in the Applications folder, that you can access from Finder. You can add it to the Dock for quick access.
How to create a new space in Mission Control, switch between spaces
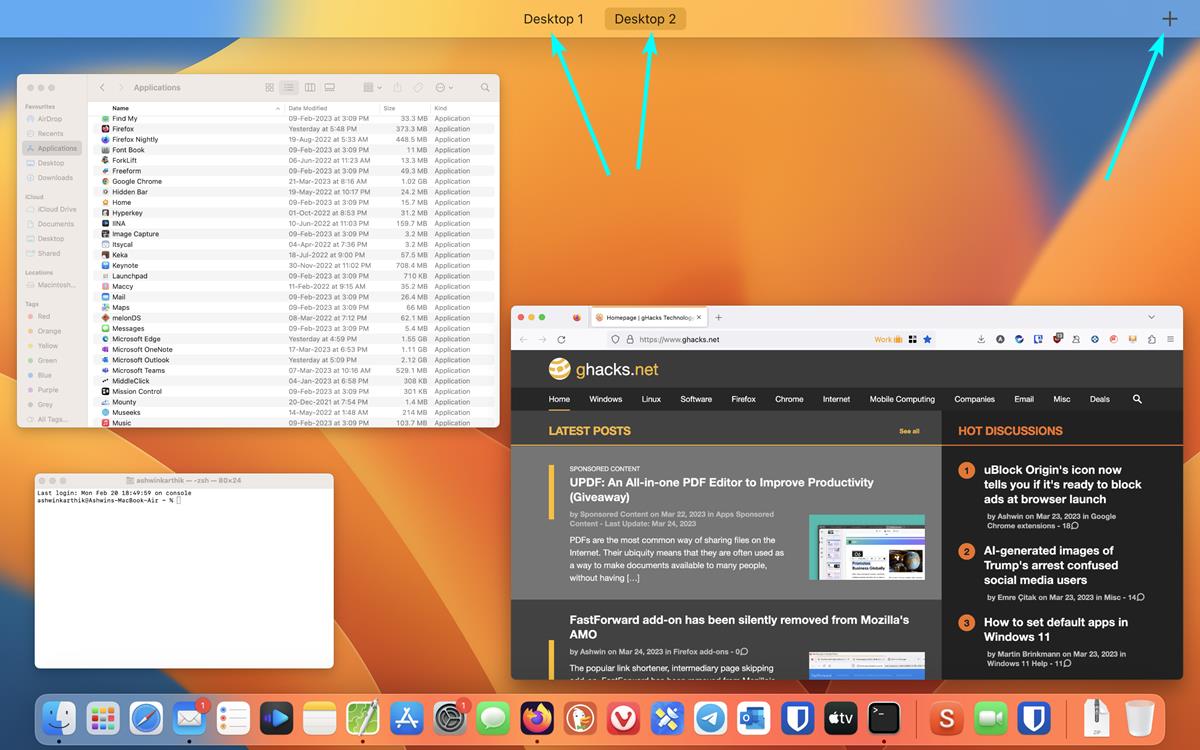
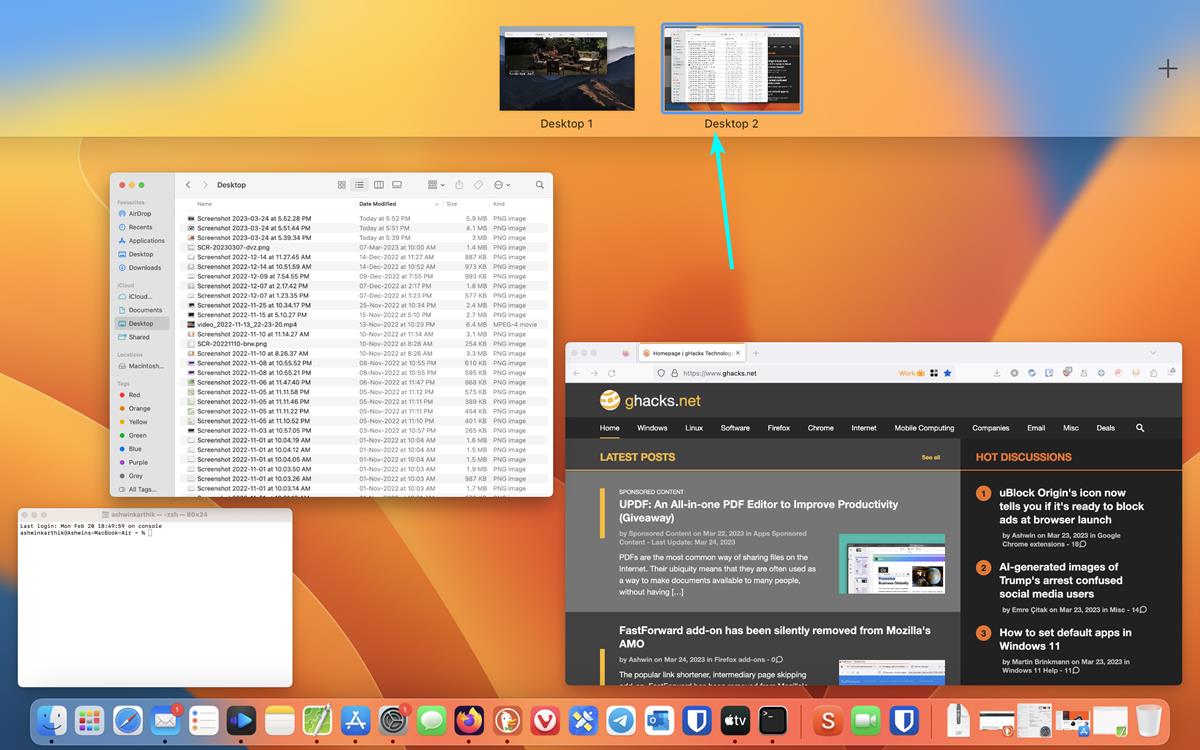
I told you that you can have multiple desktops, spaces. macOS supports up to 16 spaces. To create one, just open Mission Control via one of the methods mentioned above, and click the + button at the top of the screen. This will add a new virtual desktop. Each space has its own thumbnail and name (Desktop 1, Desktop 2, etc.).
Click and drag on a space's thumbnail to rearrange the order they are displayed in, this will be particularly useful when you switch between them.
To switch between spaces on your Mac, swipe left or right with 3 or 4 fingers on your trackpad (2 on Magic Mouse). It's kind of like swiping the home bar (at the bottom) on your iPhone to switch between apps. The keyboard shortcut to move between spaces is the Ctrl + Right or Left arrow key. You may also switch to a difference space from the Mission Control view, by clicking on the desktop that you want to access.
How to open apps in virtual desktops on macOS
Switch to a space and open an app, and its window will be restricted to this space. You can move apps from one space to another by clicking and dragging them in Mission Control view. It also supports full screen apps, if you enable the option after clicking the green button in the top left corner. However, full screen apps are created in a new space, and will take up the entire thumbnail in its space, i.e. you will not be able to view the other app windows in the thumbnail. Similarly, you can also use split view for apps in spaces, from the green button on the title bar, so you can have 2 app windows side-by-side.
Mission Control lets you copy text, images, files and folders between spaces, just use the regular shortcuts like Command + C and Command + V, to paste the content in different apps across virtual desktops. macOS allows you to open apps in a specific space. Let's say you have 2 virtual desktops, one for work, and the other for personal usage. Here's how you can assign an app to a specific one. For example, let's try setting the Messages app to open in the 2nd desktop. To do this, you will need to switch to that space. Then, right-click on the Messages app on the dock and select Options > (Assign to) This Desktop. In case you have multiple monitors, you will need to select the corresponding number to assign it to that display.

Exit the Messages app, switch to the 1st desktop, and try opening the app again. This time, it will automatically switch to the 2nd desktop with the app in focus. To unassign the app from the space, just right-click on it again, select options and set it to None. You can assign an app to open in all desktops too.
Mission Control tips and tricks
You can customize each space with its own wallpaper, to set a different background for a desktop, use the Ctrl + Click menu and select Change wallpaper.
If you use Mission Control, you may be aware that it displays all windows of an app that is open. For example, if you have 2 Safari windows open, Mission Control will show them as 2 windows. You may change this from the Settings app > Desktop & Dock > Mission Control page. Toggle the option that says "Group windows by application", this will place windows from the same app in a cascade style view.
To close a space, access Mission Control and hover the cursor above one of the thumbnails, an X button will appear. Click on it to exit the space, and any open windows in it will be moved to another one, so you don't lose any unsaved work.
Stage Manager
macOS Ventura 13 introduced a new way to multitask called Stage Manager. You can activate it from the Control Center, by clicking on the Stage Manager. It's not the same as virtual desktops, but can be a handy way to work in multiple apps.
Tip: You may want to install the free AltTab app, which lets you use its namesake shortcut that was popularized by Microsoft Windows, on your Mac. It's an excellent alternative to using the Command + Tab hotkey, which only displays an app's icon, but not the app windows. I also recommend downloading the Rectangle app, which is also free, for managing your app windows more efficiently.