How to Customize Icons in Windows 7 the Easy Way
The same old icons can be a little boring after awhile. Users who spend a great deal of time with their PCs often get the urge to tweak their desktop and make it as unique as possible. This is not something that has to be done; it is simply something one gets the urge to do. You can change desktop backgrounds to virtually any image, add gadgets and change themes. What about the icons? Windows 7 has built-in features for changing icons and there are even third party applications that you can use to customize icons. This article will detail the basics of customizing icons in Windows 7.
To start, we will change the Recycle Bin, Computer and Network icons. This is so simple that you may find yourself doing it often just to keep things looking fresh.
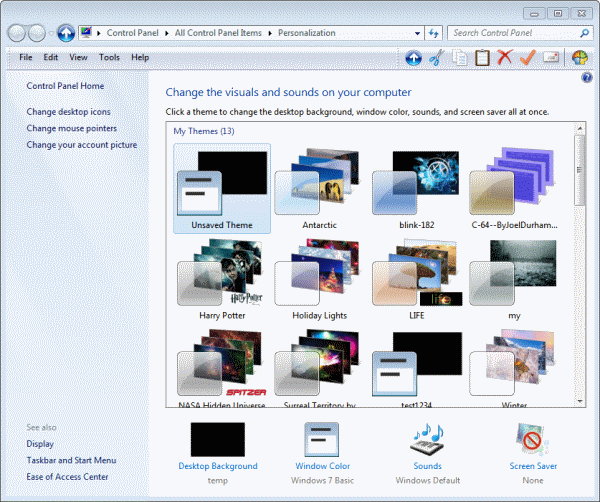
Right-click anywhere on the desktop (except on an icon) and select Personalize
You can also access this window from the Control Panel and click Appearance and Personalization. Click the “Change desktop icons†link in the left sidebar of the window.
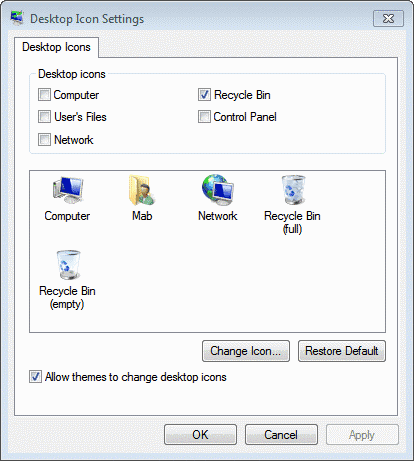
For Vista, the process is actually the same but the window will look different. Choose the icon that you wish to change and click on it once then click the “Change Icon†button. You can check the box next to “Allow themes to change desktop icons†to make this a little more interesting.
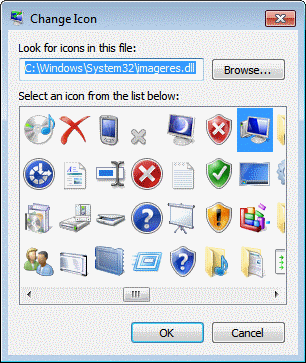
Now you may either select one of the included icons or click Browse and find the icon you wish to use. Click OK when you have selected the desired icon.
Changing Folder Icons
It also takes just a few steps to change the icons for most folders in Windows 7 as well as Vista. Simply right-click on the folder and then click Properties. Click the Customize tab.

Follow the same steps as you did previously to change the basic desktop icons. Choose an icon from the listing or browse for a specific icon image such as a PNG or JPEG image. You can even go to the Pictures folder and choose a picture and use that as the icon. To keep it simple for this demonstration, a preset icon will be selected.
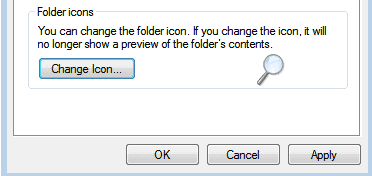
Once the new icon is selected, click Apply and the icon will be set.
In Windows 7, you cannot change the icon for a library folder. If you are browsing the Documents library and you do want to change the icon for a particular folder, right-click the folder and open the folder location. Now you will be able to change the icon using the same steps as above. There are other techniques for changing icons in Windows 7. This is just intended as a simple overview of the method.
Advertisement













EPic faile, THE convert your file to .ico
So, I did all the things above but when I click on the picture I want I get a notice. “There are no icons in this folder”
No kidding. I’m trying to use a picture, not one of the default icons….how do I fix this?
Thanks in advance!
Check this one out, it may help: http://www.howtogeek.com/65291/how-to-make-your-own-custom-windows-7-icons-out-of-any-image/