Track satellites with Gpredict

Are you a space junkie? Do you follow NASA as if it were the only real source of science and information? Or are do you just have a need to know where satellites are positioned at any given moment? For whatever reason, there are plenty of people out there who want or need to track satellites. For those who have never done so, but would like to give it a try, where would you start? A good place to start would be having an application that would allow you to track satellites.
Of course the open source community (having a penchant for the sciences) would have such a tool. One of those tools is Gpredict. Gpredict is an incredibly simple to use tool that will allow anyone to track multiple satellites quickly and easily. In this article I am going to show you just how to install and use this wonderful tool.
Features
Let's first take a look at some of the features of Gpredict.
- Real time satallite tracking.
- No software limits (track as many satellites as you want).
- Easy to read and use GUI.
- Radio and antenna rotator for autonomous tracking.
- Predictions of future satellite passings.
- Cross platform for Linux, Windows, and Mac.
And much, much more.
Now, let's get on with the installation.
Installation
Installing Gpredict is simple. Just follow these steps:
- Open your Add/Remove Software Tool.
- Search for "gpredict" (no quotes).
- Mark Gpredict for installation.
- Click Apply to install.
- When installation is complete, close your Add/Remove Software tool.
You are now ready to track.
Usage

To start Gpredict click on Applications > Science > GNOME Predict which will open up the main window (see Figure 1). Â Right out of the start Gpredict is already tracking satellites. But what if they aren't the satellites you want (or need) to track? Simple. Let's track some specific satellites.

To track satellites you create a module for that group. To do this click File > Â New Module and a new window will open (see Figure 2) where you can then add different satellites to your module. I am creating an Earth/Space Module that will include the satellites: Astrid 2, Calipso, Chipsat, and Cloudsat. To create this I will:
- Give the module a name.
- Select the ground station (this is where you are viewing from).
- Select Space & Earth Science from the Group drop-down.
- Add the available satellites to my group.
- Click OK.
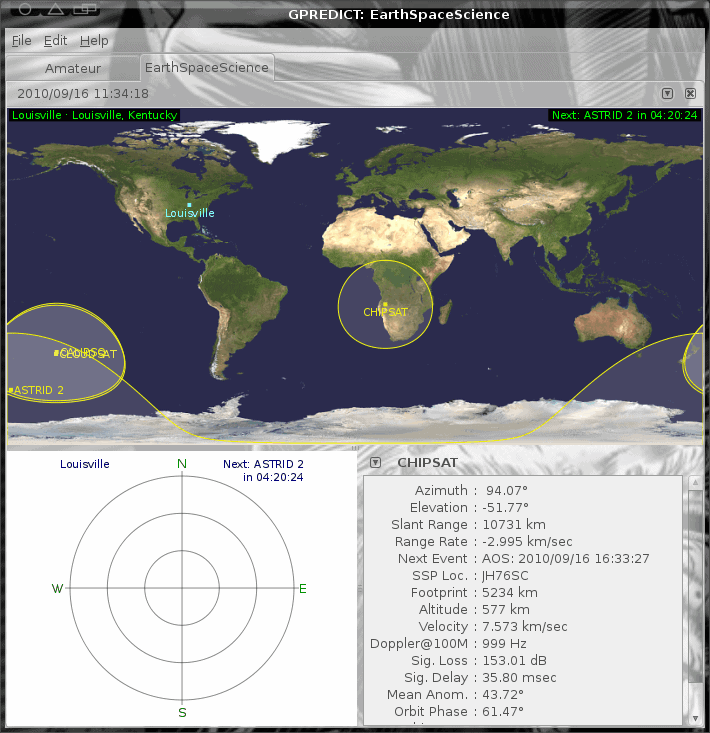
After you've done that the window will update (see Figure 3).
You will notice that Gpredict updates in real time. You will, however, have to update the TLE (Two-Line Elements) manually. To do this click Edit > Update TLE > From Network. This will automatically update that information for you.
Final thoughts
If you are into space, or military, or any other pursuit that would require the tracking of satellites, you can't get any easier than Gpredict. It's free, it's open source, and it gives you just about every piece of information you could desire about those crucial machines flying high above our heads.
Advertisement


This is neat. Thanks.