How to Set Up a VPN on Windows 7
This is a basic tutorial on how to set up a VPN, or Virtual Private Network on Windows 7. You can use this to set up your own VPN server. This assumes you are using a router to connect to the Internet, and you have permissions to add port forwarding to the settings. You’ll also need access to a second computer to test if your VPN is working correctly.
Firstly, start by going to your control panel in Windows 7. You should see an option called “Network and Internetâ€. Click on this and then click on “Network and Sharing Centerâ€. You will then be at a screen where you can view all your network information, and set up connections to other networks and computers. On the left hand side, you should see a link called “Change Adapter Settingsâ€. Click on this and you’ll see a list of network connections. There may only be one connection at the moment, the connection you are using to access your existing network.
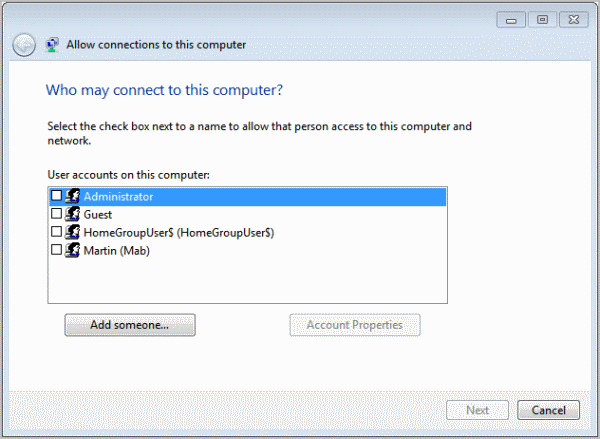
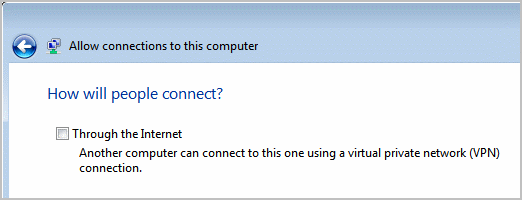
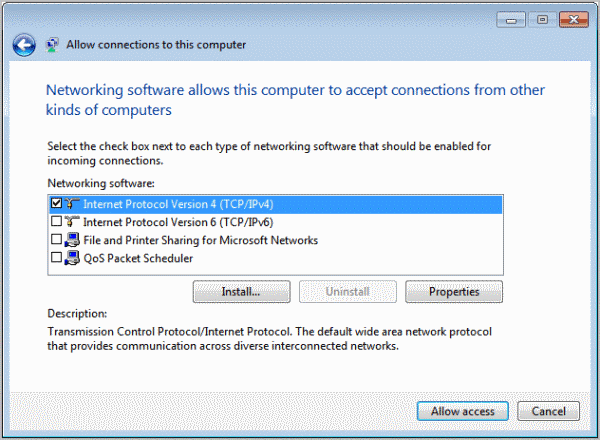
There should be a menu bar at the top of the screen. If not, press ALT on your keyboard and it should appear. Next, click on “file†and then on “New Incoming Connectionâ€. This will start a wizard, and the first step is to decide whom you’re going to give access to. You may just want to give yourself access, but it might also be a good idea to also select the computer administrator. The next step will be to tell the computer how people will connect to the computer – there’s only one option, and that’s through the Internet. The final page concerns allowing access to different types of computers such as Unix servers and Macs. Just leave the default settings alone and click “Allow Accessâ€.

Your computer will now spend a little time setting up the connection for you, and will tell you the name of the connection. The name could be anything, depending on the name of your computer, but remember to note it down, as you’ll need it later. You’ll then be taken back to the network connections screen, and you’ll see your new connection as an icon, called “incoming connectionâ€.
You’ll now need to know the IP address of your computer. The easiest way to find this out if you don’t already know it, is to type “cmd†into the run box on the start menu, and then type “ipconfig†into the DOS window. This will tell you your IP address. It may be something like 192.168.0.1. Also note down the IP address of your default gateway, this is the address of your router.
The next thing you’ll need to do is add a port forwarding on your router. So log into your router by typing it’s IP address into your browser. All router consoles are different, so you may need to hunt around for a bit to find the right settings, but there should be a section called “port forwardingâ€. What you need to do is create a new forwarding for port 1723, which is the port VPNs use to connect. You need to point that port to the IP address of your computer, which we found out earlier. At this point, you may need to reboot your router once you’ve saved the port forwarding in order to active the new settings. Once this is done, you should have a working VPN server set up on your computer.
Testing your VPN Connection
In Part 1, you will have gone through the steps to set up a VPN server on your Windows 7 computer. The next step is to configure a client machine to connect to your newly created server to check that it’s working correctly.
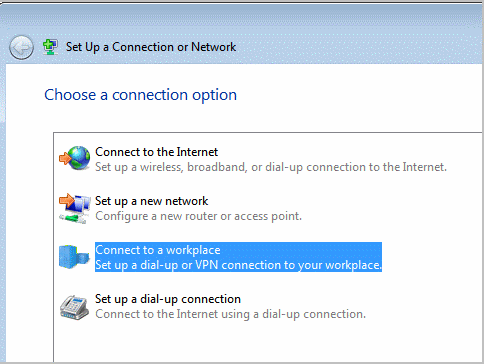
In order to do this you need to go to the machine you’re going to use to test your VPN and bring up the control panel. Inside the control panel you need to click on “Network and Internetâ€. Once in the next screen, click on “Network and Sharing Centerâ€. As in Part 1, you’ll be presented with a screen where you can set up new connections and edit existing ones. You’re looking for a setting near the middle of the screen called “Set Up New Connection or Networkâ€. Click on this and you’ll start a wizard. The third option down will be the one you need next, and this is called “Connect To A Workplaceâ€. You’ll need to click “nextâ€, and then you’ll be asked how you want to connect to your VPN. The option to choose is via an Internet connection, and on the following screen you’ll need to enter the IP address of your VPN server.
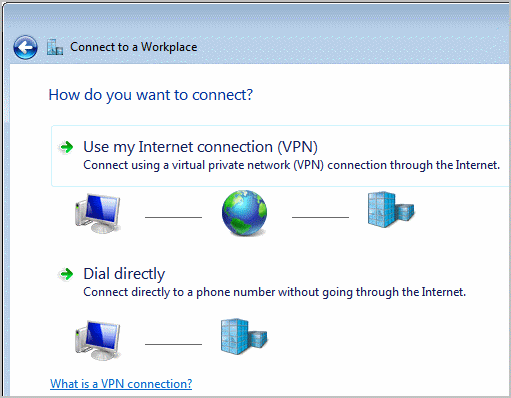
The IP address of your VPN server is whatever IP address you found in Part 1, but in case you forgot, you can check by going back to your server and typing “cmd†into the run box on the start menu, and then “ipconfig†in the DOS box.. If your client machine is not on the same local network as the server, you’ll need to know the Internet IP address of the server. You can find this out from logging into the router again, or from the server computer you can go to https://www.ghacks.net/ip/. Armed with your server’s IP address, you can now enter this into your wizard, and click next to go onto the next screen.
This next screen will be asking you the username and password in order to connect to your VPN. You should already know these details, as you need them to log into your server locally. So enter your credentials here and click on “connectâ€.
Your client computer will now be talking to your server and setting up your new VPN connection. First it will verify your username and password, and after a few seconds it should connect. You have successfully set up a VPN between your two computers.
You might now want to check to see if you can access shared folders. This can be done by going to the run box on your client-computer’s start menu, and typing \\SERVER (if server is the name of your VPN server, if not substitute it for your server’s name). If all is well, you will see a list of files and folders and you’ll be all set for using your new VPN. Congratulations!






I’m usually to running a blog and i actually respect your content. The article has really peaks my interest. I’m going to bookmark your website and maintain checking for brand new information.
Thanks for the detailed instructions, I want to try this. Right now I use a software solution I found through vpnexpress.net. Is setting up a VPN this way better than VPN software?
I have made a VPN connection between my home computer and a laptop I travel with. But after I make the connection, it asks for a password to open the files. I do not use a password at login and it doesn’t accept the VPN password. Where am I missing something?
Have you tried hitting return and leaving the password field empty?
I tried to test the VPN by accessing from an outside network. I got the connection to work just fine. Now I am not able to access the folders as I can from inside the network connecting to folders as shares. I have the full My Documents folder (and all the subfolders) set to share, when I try to open one, I get a warning: ” \\Server (?) is not accessable. You might not have permission to use this network resource ….”.
I have the connection but now I can’t get into the folders from outside the network. I feel I am close… but still missing something.
Hi
thanks about this useful topic.
there’s one small!!! problem with me… I don’t use a router!
is still any way to do this.
I have set on my pc but on the client pc its telling me that my pc is not responding. How do i resolve that?
I have set port forwarding on the router too
I have set on my pc but on the client pc its telling me that my pc is not responding. How do i resolve that?
I have set port forwarding on the router too
If you are a basic user of windows and do not know about windows tweaks then I suggest you to use a VPN software to establish a VPN connection. Visit http://www.vpnforwindows.com to download its free version.
Thanks for the reply and the website, I have no problems playinf and tweaking windows. I asked only for the knowledge and info about VPN.
Hi,
This is so nice to know, but my concerns are if I should have a fixed internet IP address for the server or not as the dynamic internet IP address will change every time I restart the router/modem.
After setting up the VPN, will I be able to connect using remote desktop and fully use the server PC? or just connect to any shared services (files, folders, printer, etc.)?