How to disable Microsoft SpyNet on Windows7
When Microsoft Security Essentials is installed on a computer with Windows 7, you automatically become a member of the Microsoft Security Essentials and Microsoft Defender community and grant Microsoft the ability to automatically collaborate with the your computer through Microsoft SpyNet.
Installing one of the programs adds the user automatically to a membership group which tracks program related activities and how threats are handled on the computer.
Microsoft uses the information to gain a better understanding of threats, and to improve the handling of threats for all users of the applications.
Update: Please note that Microsoft has modified how SpyNet is enabled on user systems in recent versions. You can now disable SpyNet during setup, so that you won't become a member automatically.
Besides gathering activity related information, it is also monitoring the Microsoft Security Essentials and Microsoft Defender services to make sure they are running properly on the computer system.
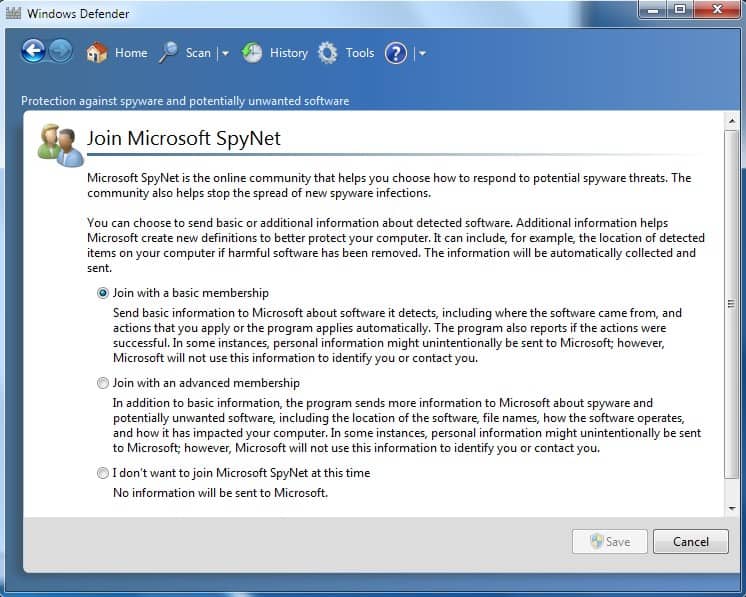
Microsoft Security Essentials offers two types of membership to users: basic and advanced. From basic members, SpyNet obtains information such as the origin of the software, the actions taken by Microsoft Security Essentials or the user, as well as whether the actions were helpful or not. Action in this regard means how detected files were handled, e.g. quarantined.
It also collects some personal activity information. As an advanced member, in addition to the personal information, SpyNet also sends information such as hardware or software type, IP addresses, web browser, operating system, and so on.
Though Microsoft does not use this information for any other purpose, some of you might not wish to have your personal information floating out there for others to see.
Below you will find the information that you need to get access to all of the functionality of Microsoft Security Essentials and Microsoft Defender without having to share your personal details.
You can use the following two methods:
Blocking SpyNet by Changing Registry Entries
Here you will need to change the following Registry entries on your computer using the Registry Editor. Do this by following these simple steps:
- Click on Start menu from your windows desktop. Alternatively, press the Windows key and continue with step 2.
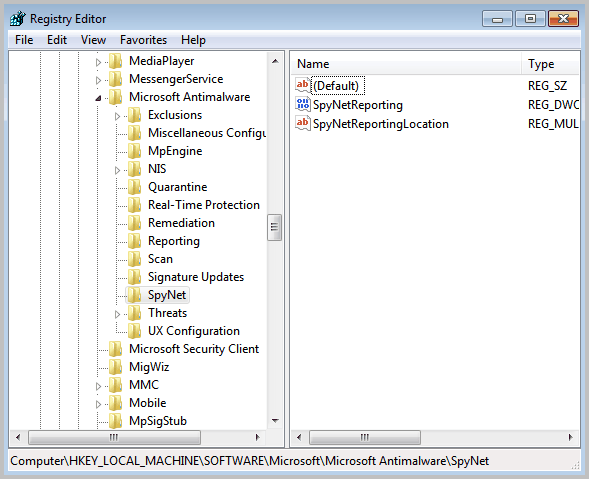
- Go to Run Dialog and type “Regedit†in the open field and click OK. The “Registry Editor†window will open as seen in figure 1.

- In the left pane navigate to the following path,
HKEY_LOCAL_MACHINE\SOFTWARE\Microsoft\Microsoft AntiMalware\SpyNet - Click on “Edit†and then “Permissions†option to open the permissions for SpyNet Dialog box.
- Select the username, for which you want to disable SpyNet, from the “Group or user names†pane.
- Check the “Full Control†box to allow editing. This will give the selected user full control over the SpyNet key.
The dialog box should look like figure 2.

- Click on Apply then OK to save the settings.
- In the Registry Editor’s right pane, Right click on “SpyNetReporting†and select Modify. As seen in figure 3.
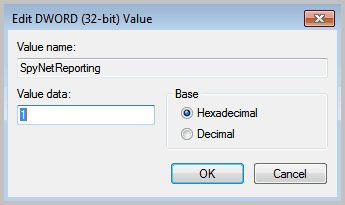
- Change the Value to 0 for enabling no membership to Microsoft SpyNet. Other options are,
Value = 1; for Basic membership, Value = 2; for Advanced membership
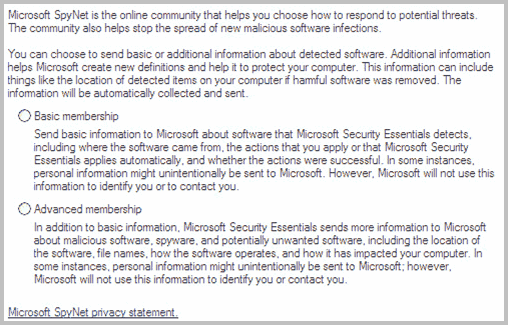
After selecting 0 as the value, the Microsoft SpyNet screen will look like the snapshot as in figure 4. Note that both membership options are not selected.
Blocking SpyNet Using Host Files
Both Microsoft Security Essentials and Windows Defender use the following domains to communicate with the Microsoft server:
- Spynet2.microsoft.com
- Spynettest.microsoft.com
Modify your hosts file by adding the following addresses:
- 127.0.0.1 Spynet2.microsoft.com
- 127.0.0.1 Spynettest.microsoft.com
You can find the hosts file at the following location: C:\WINDOWS\system32\drivers\etc
Open the file using Notepad and follow the instructions given in the file.
This procedure will not affect your spyware definitions or the program's ability to update.





Ik heb Spynet uitgeschakeld want geeft foutcode aan 0x8024001e en verder heb ik volledig aan het scannen, maar het duurde heel erg lang. Het probleem is dat ik geen Windows Update niet meer krijg laat het zo zeggen dat Windows Update niet op zoek was naar updates. Ik heb Windows Vista Home Premium en ben ik maanden lang bezig geweest om op te lossen en het probleem ligt bij Windows Defender 0x8024001e.
Under SYSTEM, it has permissions, but trying to modify to 0 gets the message “cannot edit Spynet Reporting”
You need to modify them for your user name in Windows.
More info. The registry hack didn’t work. When I tried to change the permissions as everyone, user, or adminstrator, I got a message saying permissions could not be changed for Microsoft Spynet.
I just downloaded the latest version off the Microsoft website and it does NOT have the option not to participate.
MSE creates a digital signature of all hardware and software on your computer and sends it to Microsoft. If you are certain that every piece of software is licensed, that’s not a problem. If you have unlicensed software, well, you’ve just turned yourself in.
The latest version (v2.0) of the MSE engine should have the third option not to participate in SpyNet, as some people have seen already.
If creating a firewall rule, do we do it for incoming or outgoing or both ?
My MSE has a third option to disable completely?
Did you write this before updating MSE? or are you using a basic version?
I am on Windows 7 Ultimate
My MSE SpyNetReporting was already set at 0. I did not change anything. It also show another option besides “Basic Membership” and “Advanced Membership”.