Save partitions across a network with Partimage

In my last article I showed you how to save a partition from a drive to a local image file using the Partimage tool (see my article "Copy partitions on your system with Partimage"). And although (as a reader did point out) Partimage is limited by not supporting ext4 file systems, it still has plenty of uses. One of those uses is copying partitions across a networking. In fact, Partimage has a tool, the Partimage Server, that can be used as a storage facility to hold partitions that can then be imaged onto multiple machines. That can save you quite a bit of time when you are imaging numerous systems. This can bring much relief in disaster recovery as well as desktop or server rollout.
In this article I am going to show you how to set up the Partimage Server as well as save an image to it from a remote machine.
Assumptions
You will need to make sure the system you are imaging is NOT an ext4 machine (this would leave out Ubuntu 10.04 and Fedora 13 for sure). You will also need an IP address for your server as well as super user access in order to run Partimage. Finally you will need to make sure your server has plenty of room to store the image file(s) it is to house.
Installation
You've already installed Partimage in the previous article. But you did not install the server. In order to install the server on Ubuntu do the following:
- Open up a terminal window.
- Issue the command sudo apt-get install partimage-server
- Enter your sudo password.
That's it. If you are installing on Fedora you would have to su to the root user and issue the command yum install partimage-server. On OpenSuSE that command would be zypper install partimage-server.
Configuring the server
There is very little to configure for the server. What you will need to do is open up the file /etc/partimaged/partimagedusers and add a user to that file that will be used to authenticate from the clients. The user you add MUST have an account on the Partimage server machine. There is nothing fancy about the user setup, you just add the user (or users) one per line in the file, save, and close the file.
Once you have added that user it's time to start the server. Do this with the command /etc/init.d/partimaged restart. The server will start and you are ready to go.
Connecting to the server
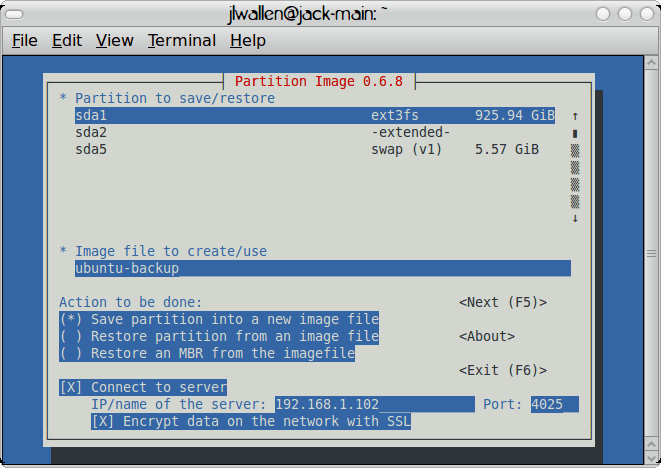
If you refer back to the original article you will see how to get to this step. It is very similar to creating the image on the local machine, only you will select the option for Connect to server (see Figure 1).
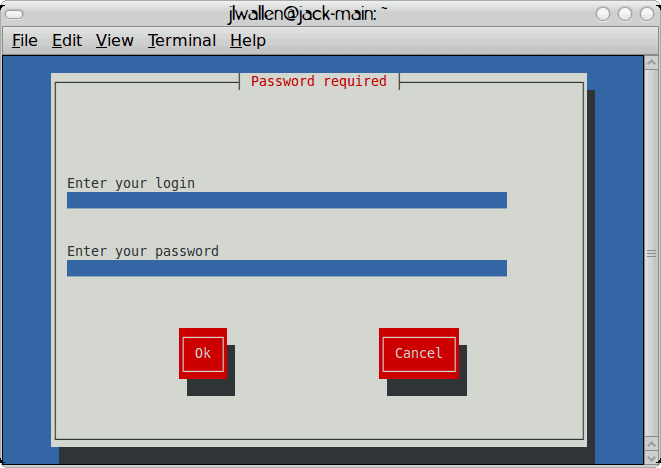
Once you have filled out that information, click F5 to continue one. You will then be asked for the username/password for the user you added to the partimagedusers file. After you enter that information (see Figure 2), tab down to the OK button and hit Enter to continue on.
After the login succeeds Partimage will continue on as it did when you were saving that partition to the local drive. And when it completes, you will have an image of that system stored on your Partimage Server.
Final thoughts
Even though there is no support for ext4 file systems, Partimage does support many other types, making it a very useful tool. I would like to think that ext4 would be rolled into the system in the future, but there is not much indicating this is the case. That would also make me believe newer file systems will also not be supported. If this is the case, I hope a new tool like Partimage will arrive on the scene that will support ext4 and btrfs file systems.
Advertisement