How to make sure that Gmail notifications on Android are not delayed

Gmail is the default email app on many Android devices, especially since a Google account is required or at least used on most devices.
The email app uses the Android notification system to inform users about new emails, but this may not work on all devices. If you experience delayed Gmail notifications on Android, you may find this guide useful, as it offers step-by-step instructions to resolve the issue.
The guide may also be useful to Gmail users who don't want notifications for each email they receive.
Note that you may use most of the tips below for other apps, e.g., another email client or messaging app, as well.
As a rule of thumb, it is important to keep the Gmail app up to date, as using older versions of it may cause issues.
1. Gmail's Notification Settings
The notification settings of the Gmail application are the best place to start. Here, you may define several core parameters regarding notifications. If these are not set up properly, notifications may be delayed or disabled entirely.
- Open the Gmail application on the Android device to get started.
- Select Menu and then Settings in the sidebar when it opens.
- Select the email address that you want to check notification settings for on the next page.
- Tap on Notifications and make sure that All is selected.
- Tap on Inbox notifications next, and check the "notify for every message" checkbox.
These two settings ensure that Gmail will notify you about all new messages immediately when they arrive. The setting may not be the best for email accounts with hundreds or even thousands of incoming messages per day, as you'd be bombarded with notifications around the clock.
2. Configure Android notification settings for the Gmail app
Now that the notification settings have been checked in Gmail itself, it is time to take a look at Android's notification settings for the Gmail application.
- Open the Settings on the Android device.
- Select Notifications > App notifications. Please note that the menu location and name may be different, depending on the device.
- Locate the Gmail app in the list and make sure notifications are enabled for it.
- Tap on the Gmail name next to open all notification preferences.
- On the page that opens, activate Notification categories.
- Check or uncheck notifications for different events on the page based on your preferences. Make sure that Emails is selected and that allow notifications is enabled as well.
3. Making sure that Gmail runs in the background
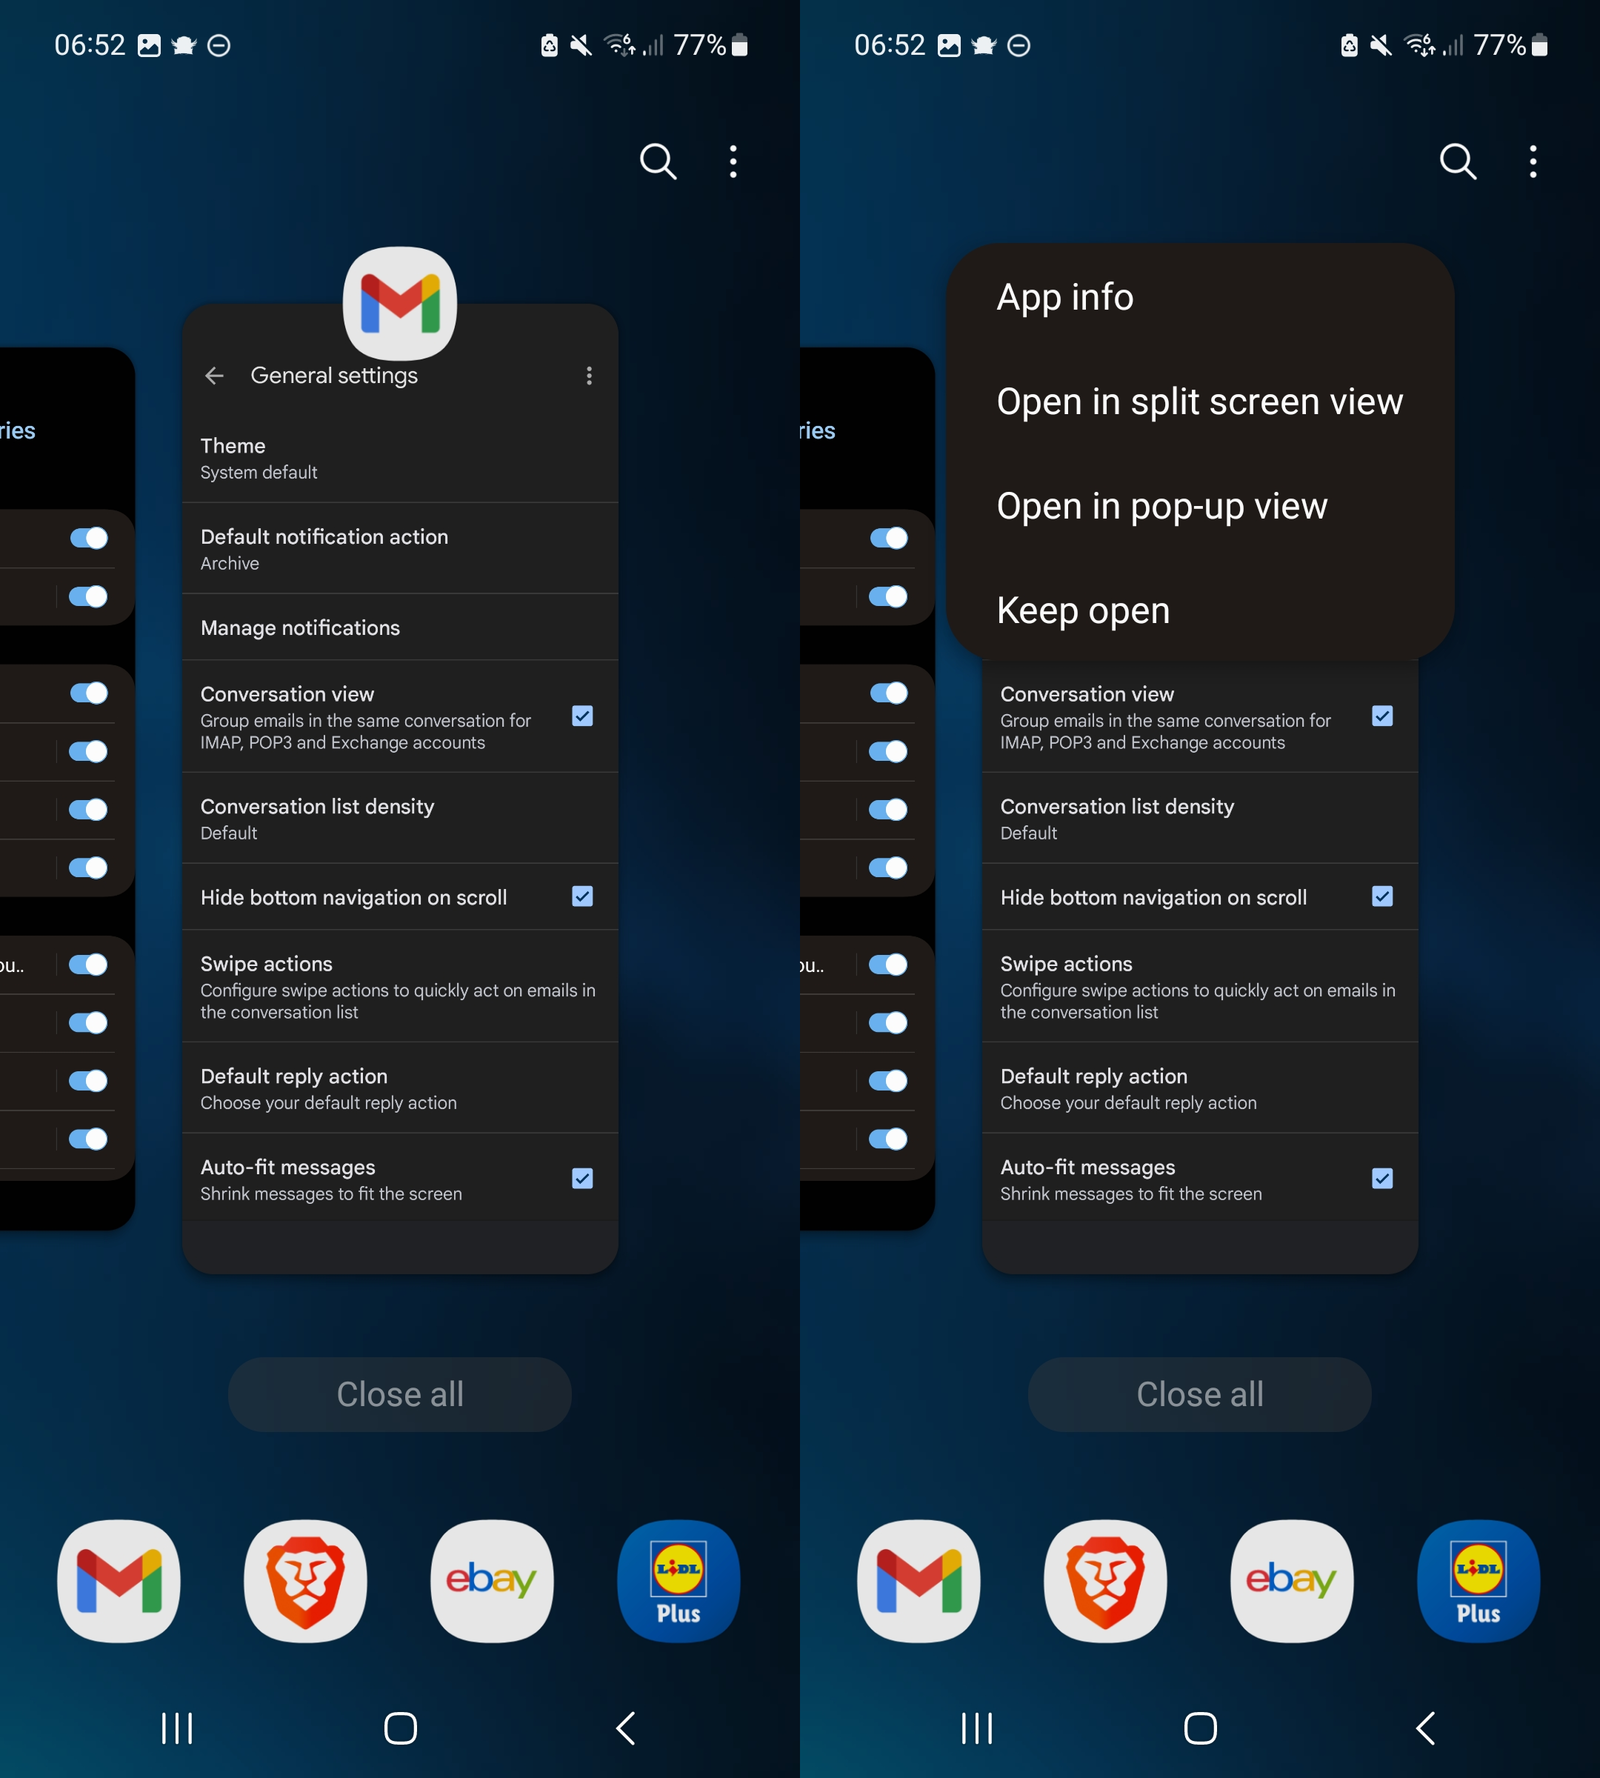
Gmail can only inform you about new emails if it is allowed to run in the background when it is not a foreground app.
- Make sure Gmail is open on the Android device.
- Open the list of apps that are open on the device.
- Swipe to the Gmail app so that it is displayed, but not opened fully.
- Tap on the Gmail icon once.
- Select Keep Open from the menu to make sure the app remains open.
4. Check background data usage and battery usage restrictions
Some Android features may restrict applications on the device. Two of them, background data usage and battery usage, may prevent Gmail notifications from arriving immediately.
- Long-tap on the Gmail icon on the Android device (not in recently open apps) and select the i-icon to open App info.
- Select Mobile Data.
- Make sure that "Allow background data usage" and "allow data usage while Data saver is on" are enabled. Note that this may increase Gmail's data usage.
- Go back to the main App info page.
- Select Battery this time.
- Enable "unrestricted" to allow Gmail to use battery without restriction on the device. Note that this may drain the battery faster.
5. Make an exception for Gmail when Do Not Disturb is on
If Do Not Disturb is configured on the device, it may prevent notifications from being displayed during the scheduled period.
- Open the Settings app on the Android device and select the Notifications option.
- Open Do not disturb.
- Activate "app notifications" on the page.
- Select "add apps" and check the Gmail application when the list of available apps is displayed.
Gmail is now allowed to use the notification system while Do Not Disturb is enabled.
Now You: have another tip?


I hope to get setting in and run in to back ground. Thank you.