Jellyfin is an open source alternative for Plex, and here's how to setup a server on Windows
v and tech savvy users may be aware of what a media server is. Here is a brief explanation for those who are new to the concept.
When you install a media server program on your computer, it becomes your host server. You can connect to it from your phone and stream the media that's stored on your computer's hard drive. Think of it like YouTube or Spotify, but your computer is the server and the content that is available is based on the media files on the computer.

We're going to be taking a look at Jellyfin, a free and open source alternative for Plex. The Jellyfin server is available for Linux distros, macOS and Windows and we'll be using Windows for this guide.
Tip: check out our list of top Windows Media Center alternatives for other options.
The process is a bit long but it's fairly easy and you don't need any technical skills. I'll try to keep it as simple as possible.
You will need the following:
- A computer connected to your router. Doesn't matter if it's wired/wireless, but you will need Wi-Fi to stream content to devices that connect to the network wireless.
- A media server program (Jellyfin)
- A phone or streaming device with a client app (Jellyfin mobile app or Plex app)
How to install Jellyfin on Windows
1. Download the latest Jellyfin server from the official website.
2. Extract the archive and run Jellyfin.exe
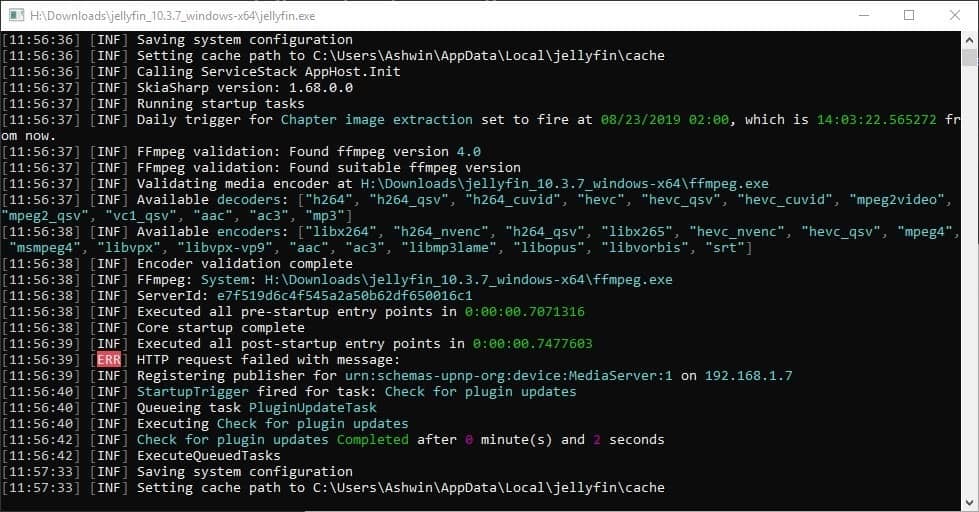
3. A command prompt window should open and install the required services. Keep this window open, it is the server app.
4. The program opens a new browser tab, and displays the Jellyfin quick start guide.
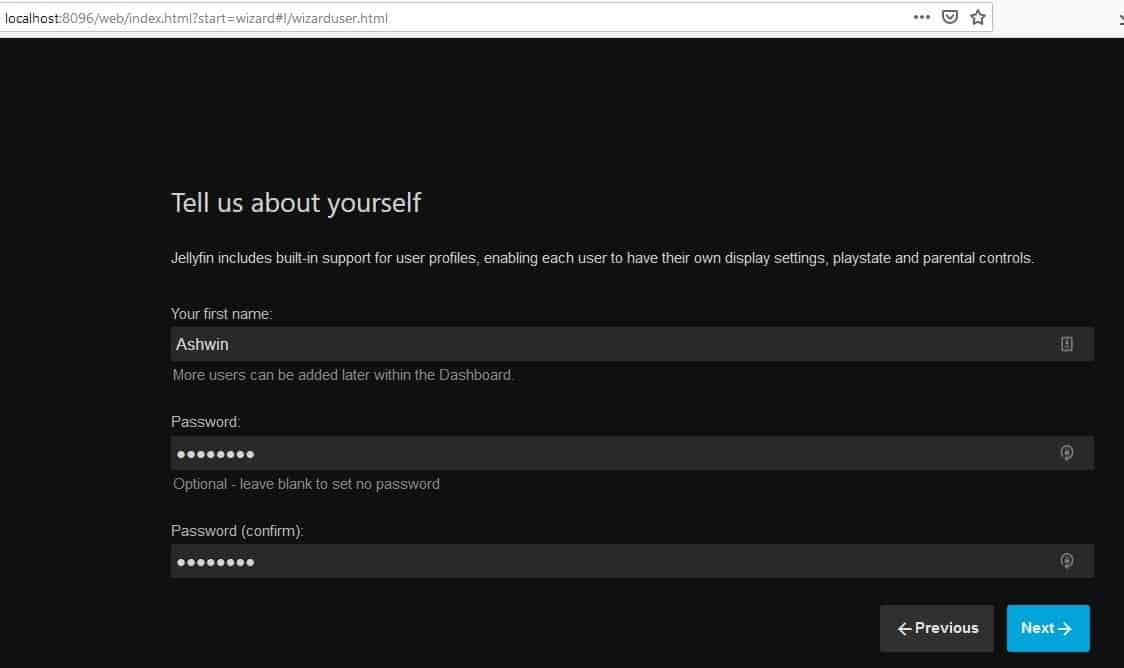
5. Follow the on-screen instructions to setup your local server's account name and password.
6. Next, you'll be asked to add your media library. Select the folders on your computer (or a USB external HDD) which has the movies, tv shows, music, that you want to stream.
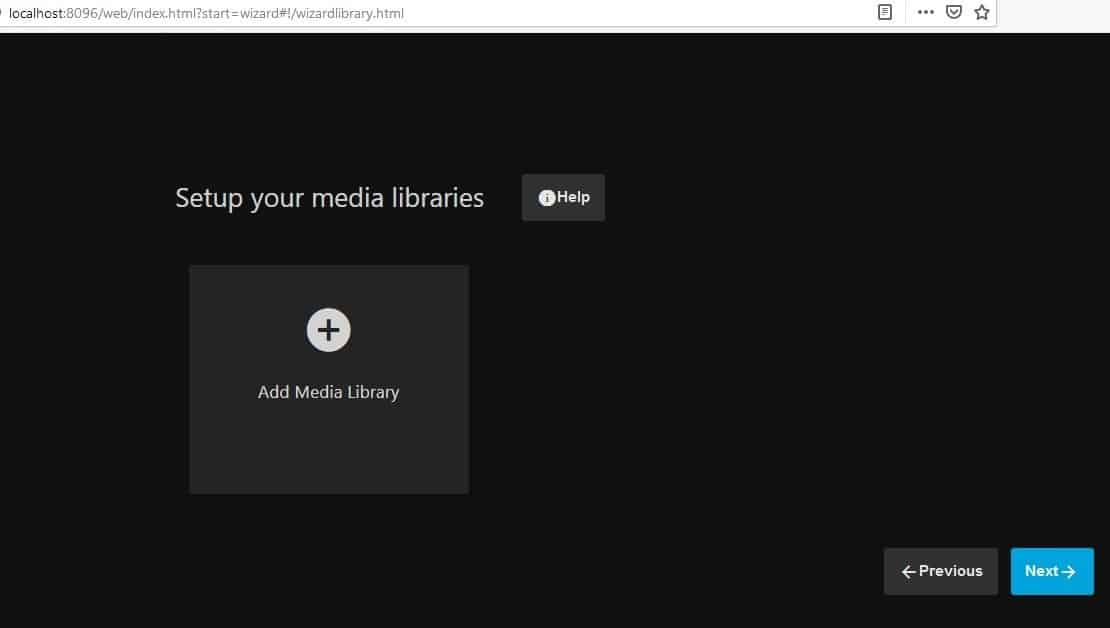
Note: Choose the appropriate category for each folder, i.e. TV shows category for your TV series folder, Movies for the movies folder. It may sound obvious, but there is a reason why you should select the corresponding category. The program pulls metadata/art from corresponding resources on the internet and displays them in the client device app.
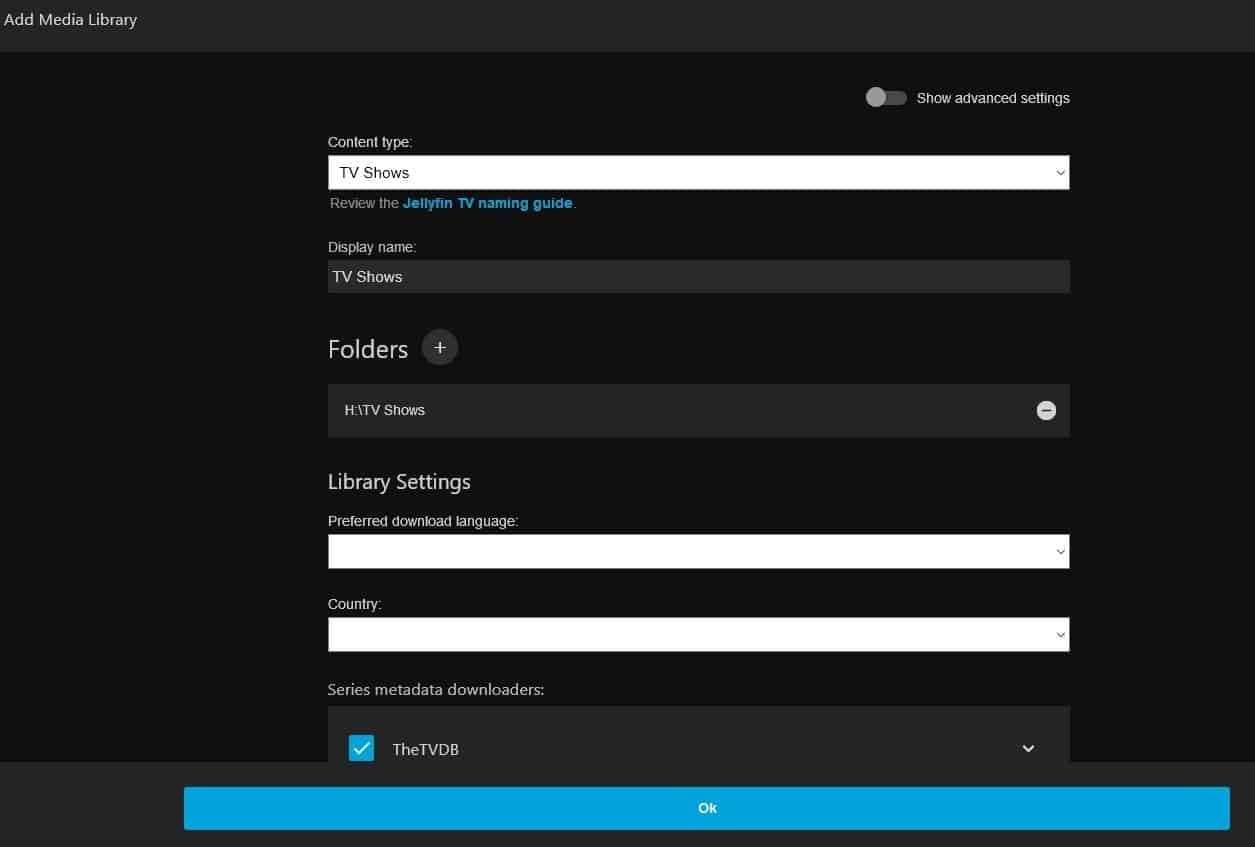
7. You will see some extra settings while selecting the folder, but apart from selecting the language and region, most of these settings are optional. We are half-way there.
How to connect to your Jellyfin server
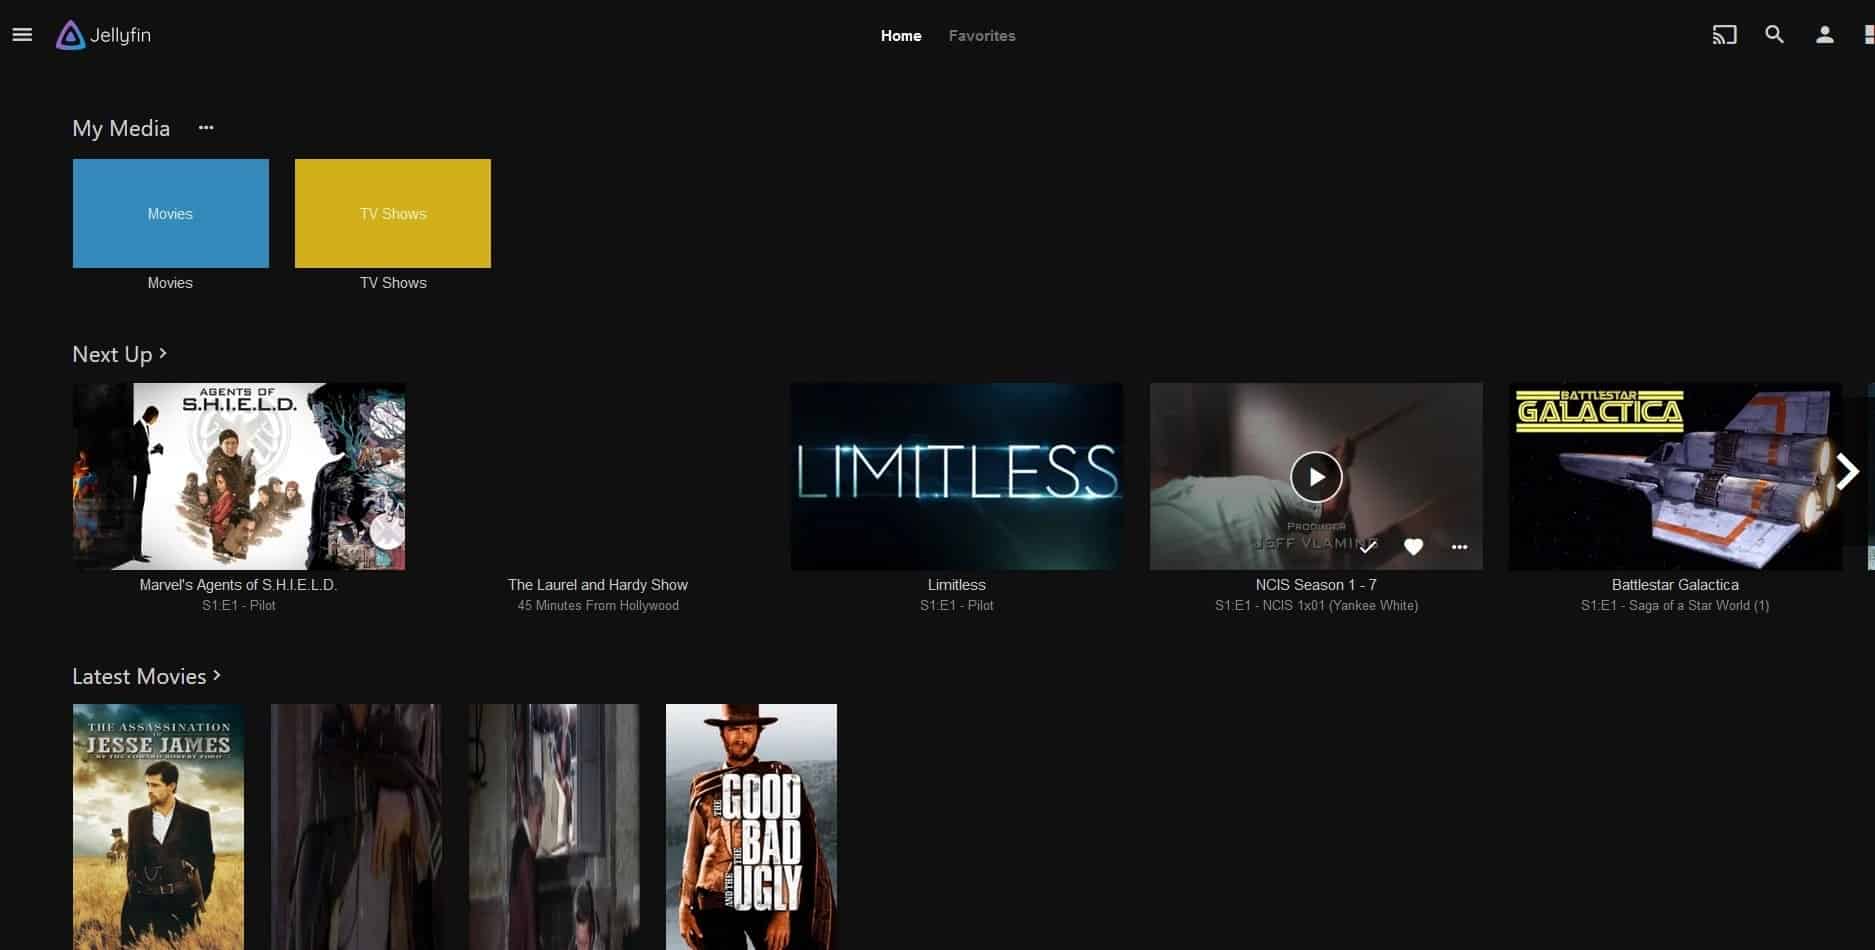
1. Once you have set up the media library, you'll be taken to the server's homepage. (refer to the first screenshot).
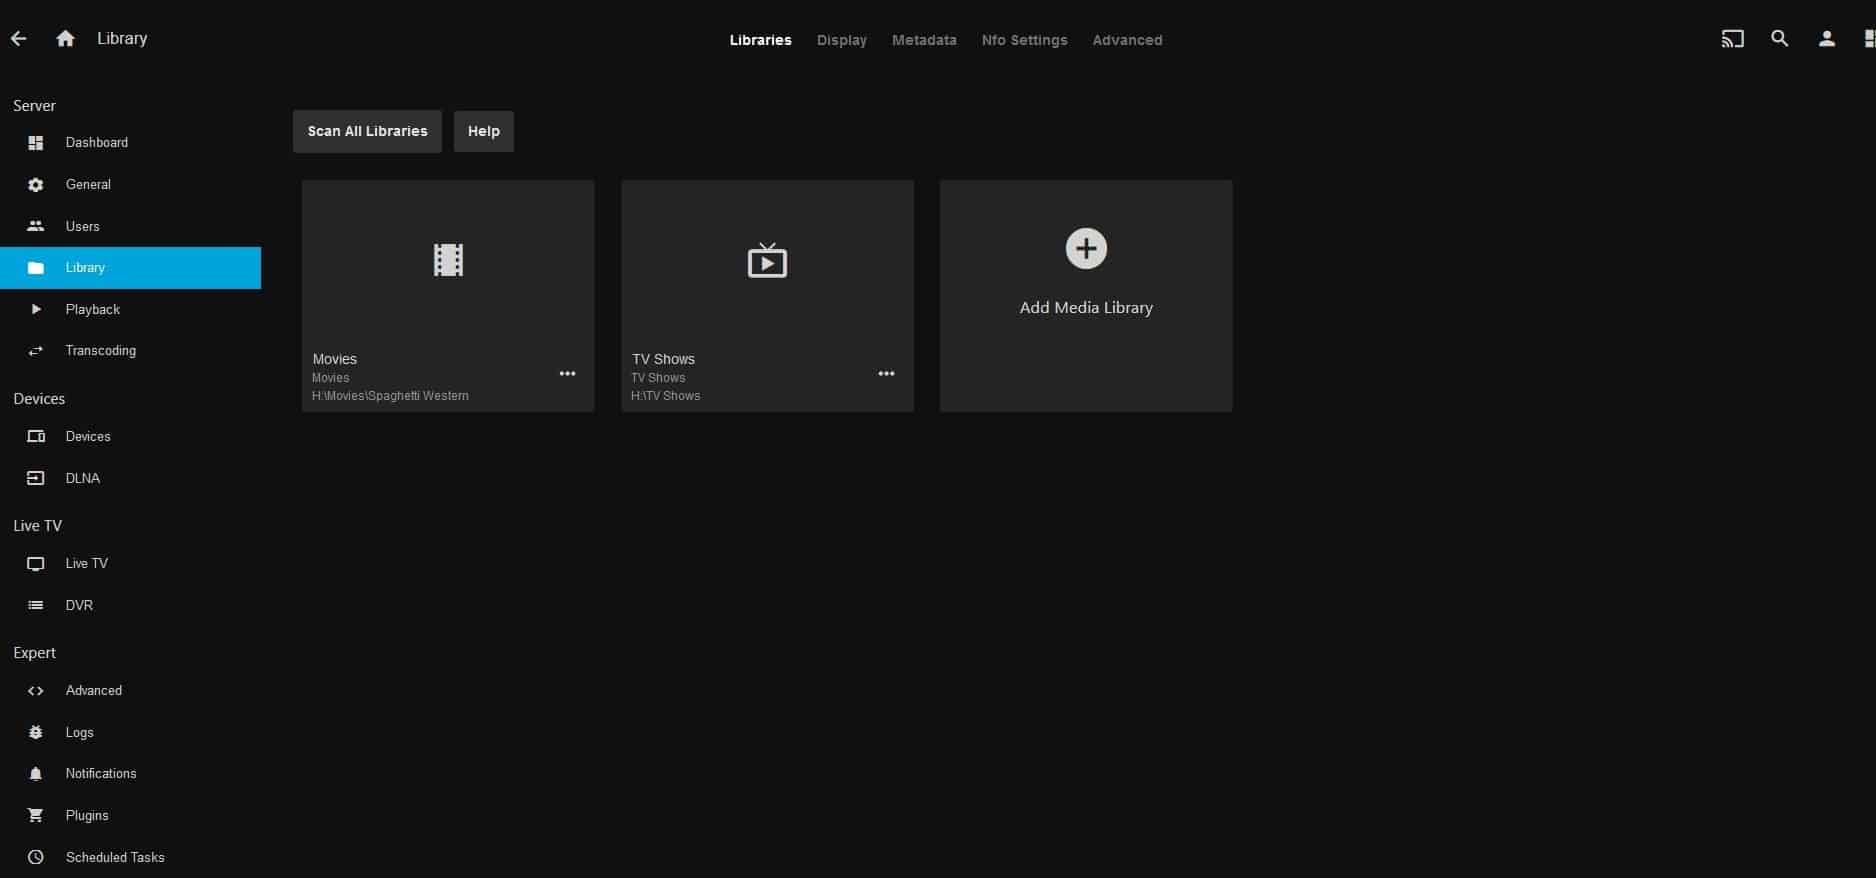
2. Click the menu icon on the left and select the "Dashboard" option. (Admin section).
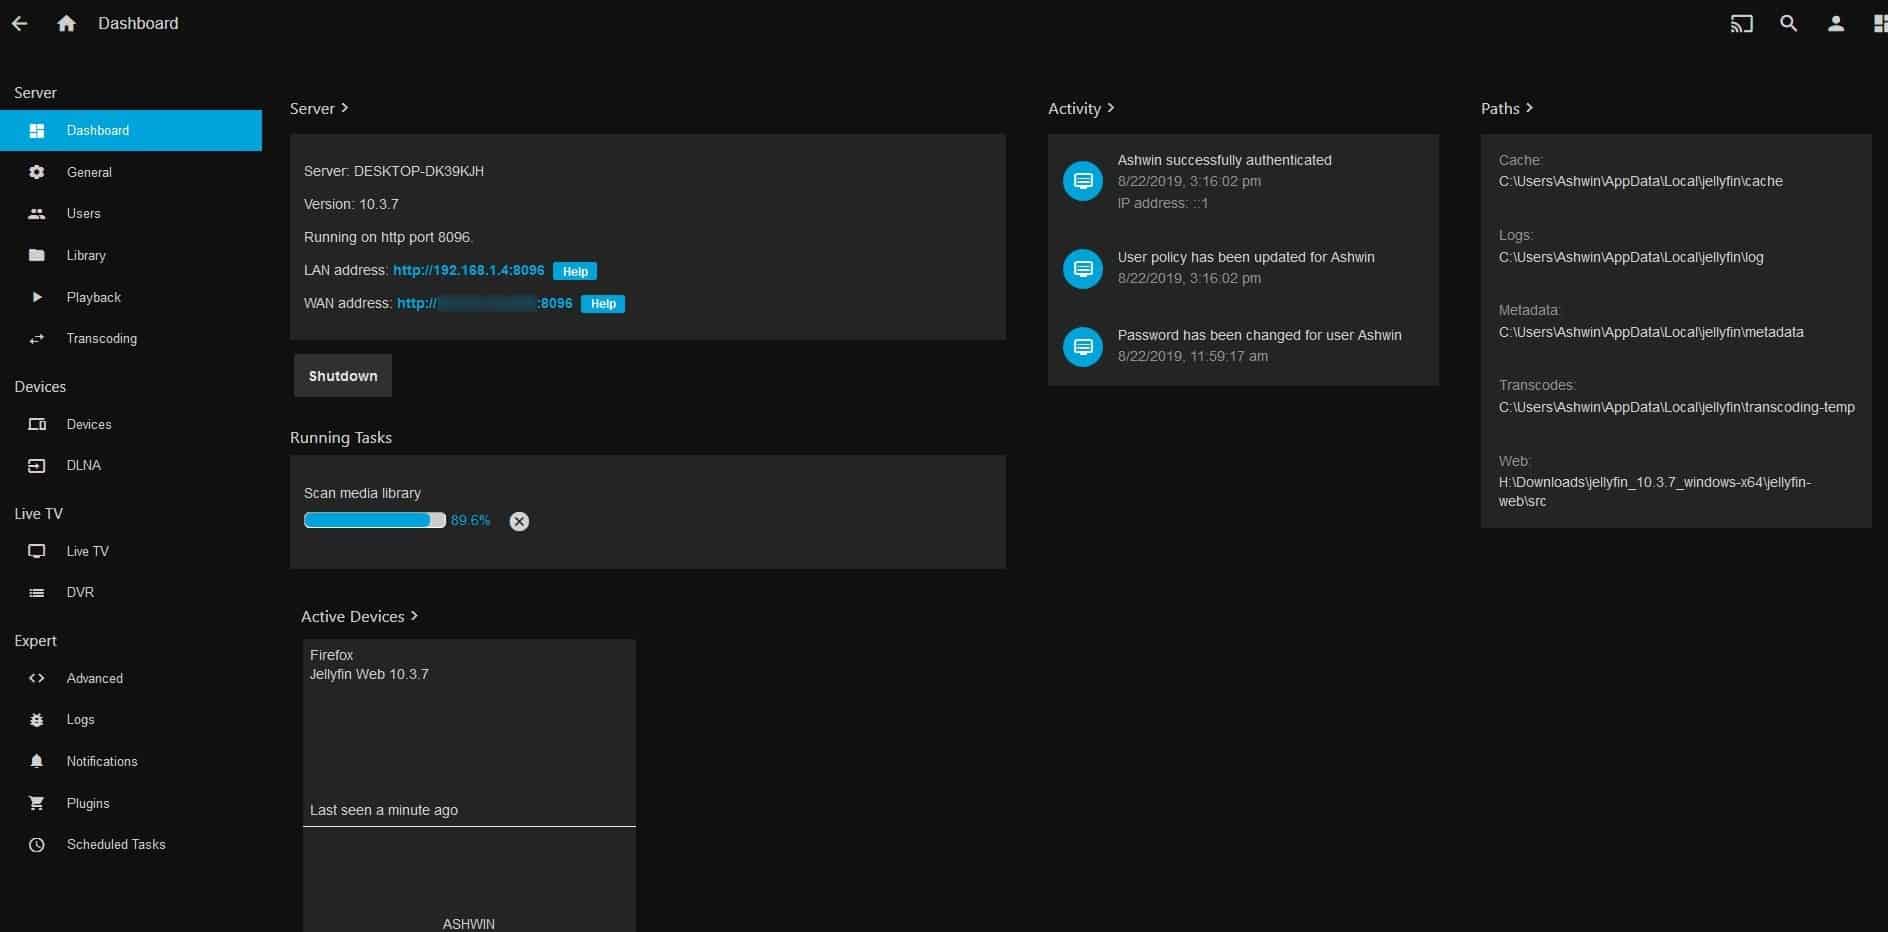
3. Here you will see your server's name, version number (of Jellyfin), port number (8096) and 2 URLs; LAN Address and WAN address.
The LAN address is the local host URL i.e., To be used when your server and the client device are in the same network. (For e.g. Your home network where your PC and phone are connected to the same Wi-Fi).
The WAN address is the URL that you can use to connect to the server from a remote network. (When you're away from home and want to stream media from your server).
4. Download the Jellyfin client app on the device that you want to use for streaming: Android phone (Google Playstore) or Android TV (Amazon FireStick, Google Chromecast) or Kodi.
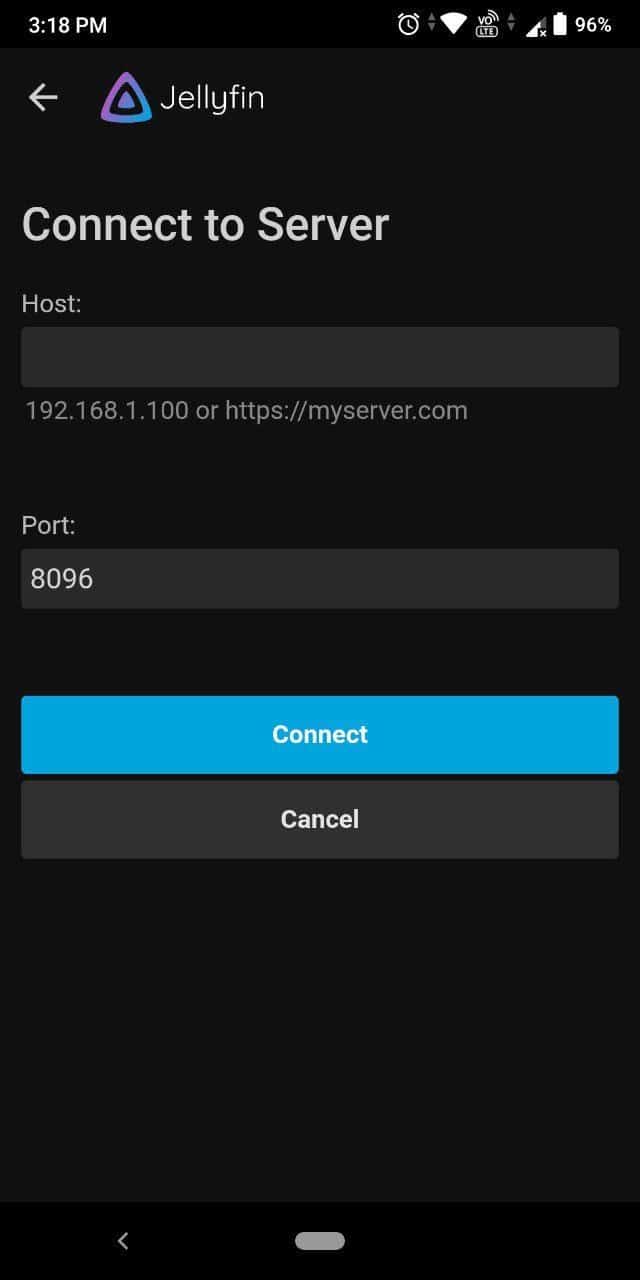
5. Open the client app and you'll be prompted to enter the URL of the server to connect to. Refer to step 3 to get the URL. Type it without adding the port number at the end. For e.g. I had to type 192.168.1.4
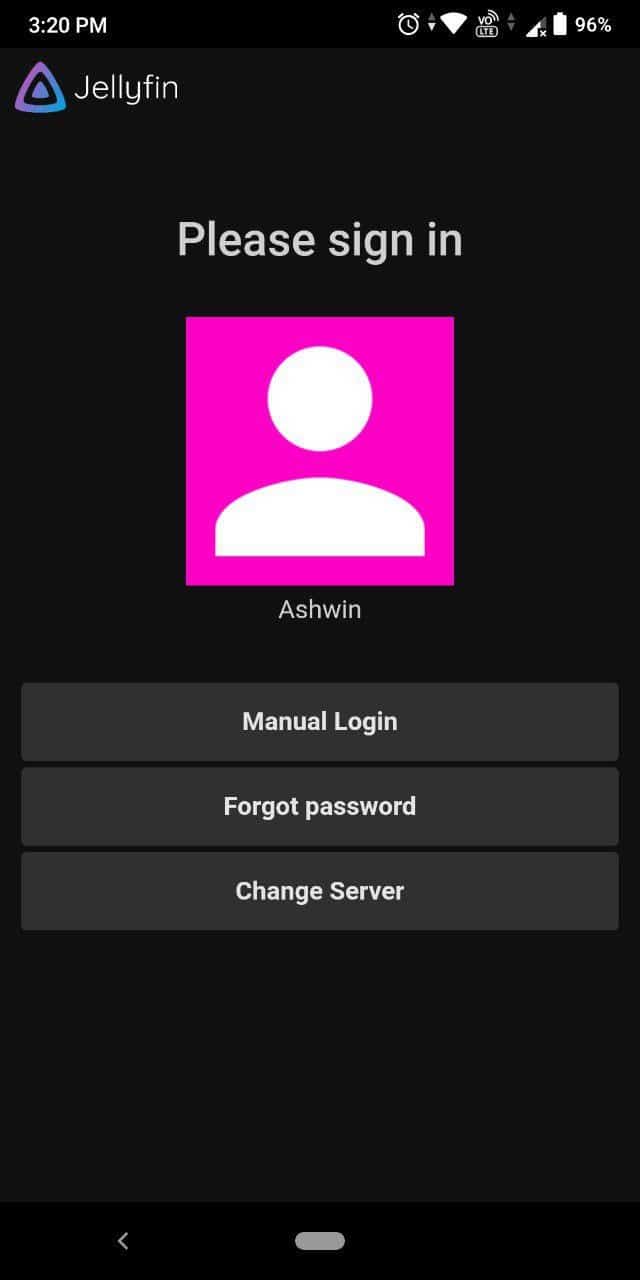
6. Enter the password you set while configuring the server to authenticate your connection.
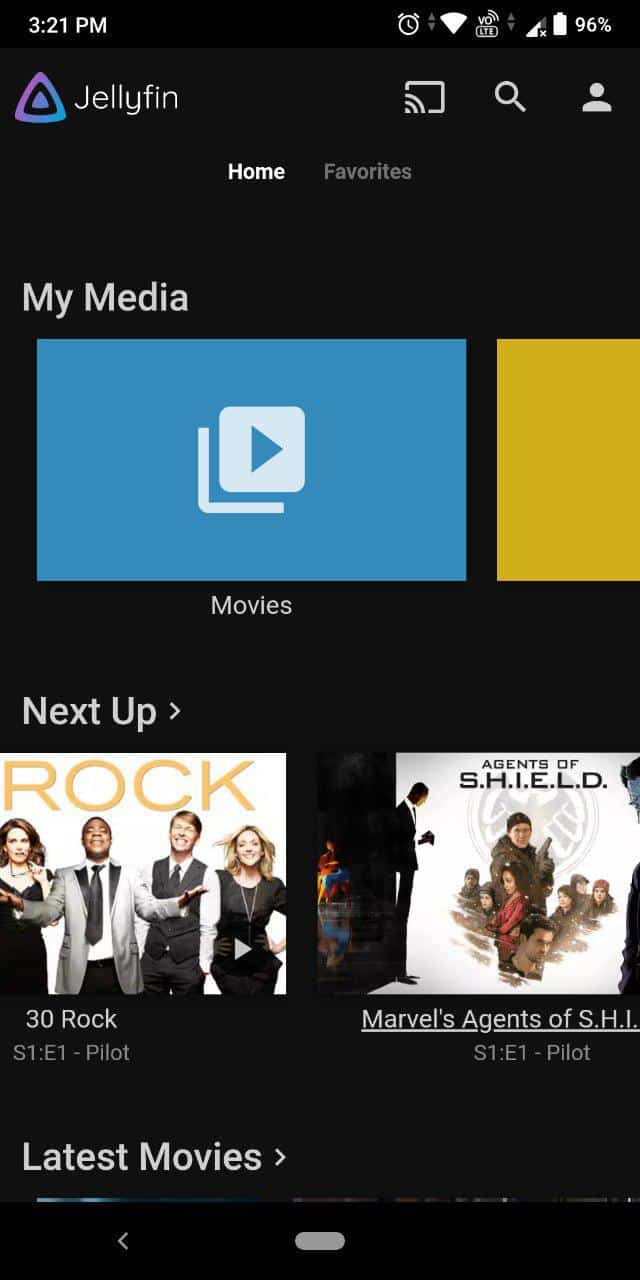
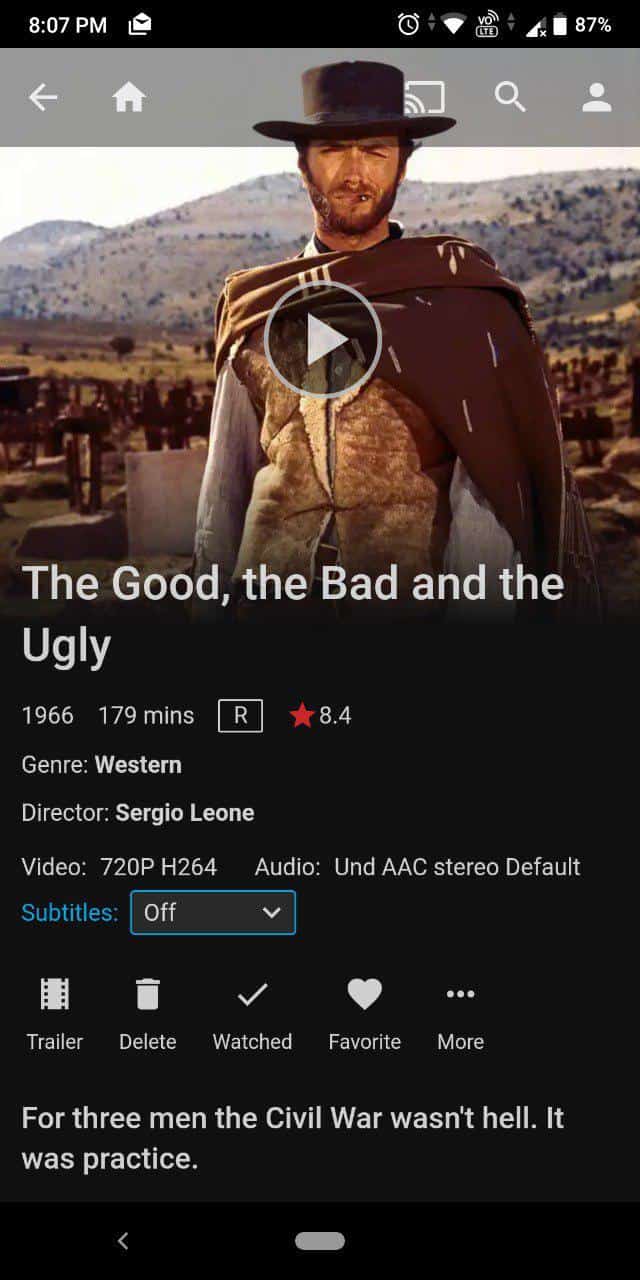
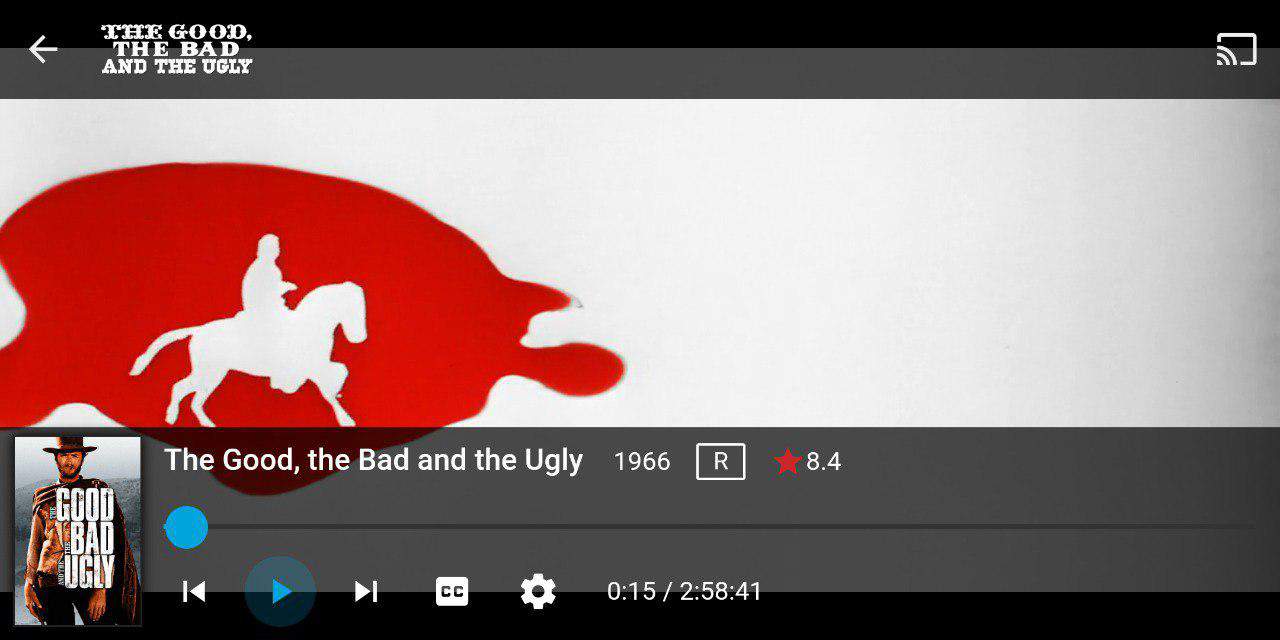
That's all there is to it. I use the Jellyfin app on my Android phone to connect to my Jellyfin server hosted on my laptop. The mobile app syncs to the library, and I can watch the videos on my PC, on the phone.
Closing Words
I don't use media servers often, but when I did I used Plex. I stumbled upon Emby when looking for an alternative and then discovered it was violating the GPL. They stopped releasing the source code and then went proprietary.
You can find premium options on the official website and the same site says the program is licensed under GPL v2. The GitHub page shows the last commit was made on Sep 20, 2018. The developers confirmed at one point that only part of the app was using closed source. That definitely breaches the license.
I kept looking for alternatives and that's how I learnt about Jellyfin which is a free fork of Emby and an open source application. The development of it took a hit temporarily when Emby claimed "licensing issues" in Jellyfin's code (oh, the irony).
That made the choice easy for me, and I went with Jellyfin. I will be trying the new Plex desktop app to keep an eye on any potential improvements. ICYMI, Plex has announced the end of life for the Plex Media Player (January 30th, 2020), and is now focusing on standalone programs for macOS, Windows 7 SP1 and above.










I am not able to log into the server at all. Installs ok. I have tried my IP with :8096, localhost:8096
with the http and without. Not able to log in using my phone or TV also there is no WAN or LAN the IP address showing is 127.0.0.1
Hi! I just downloaded Jellyfin from Play Store but I can’t make it work since I don’t have any server. Where can I get the server?
Does anyone know where Jellyfin pulls movie art from?
I had it installed on a different server, but I don’t remember.
Thanks in advance.
Running “jellyfin.exe” brings up the Command Prompt window but then it just disappears and no browser window opens. *shrugs*
Thx for this post. The bad thing in Jellyfin is the lack of https support. But anything for me is better than PLEX and their policy. For those who use PLEX for non personal videos (movies, etc…), take a REAL look at the contratc you sign when using PLEX, and think about PLEX relation with their movie sstudios partners. READ ALL THE CONTRACT CARREFULLY…..and then i think you’ll leave plex :o)
I actually really like Emby. I pay for the Premier version which doesn’t cost much and imho gets you the best DVR/Live TV app out there since Windows MCE was in their prime. The DVR is way better and incredibly stable vs Plex. The Fire TV and Roku apps work great. Plus they keep adding great features to the server. Anyway I get if someone wants to be a purist but sometimes you just want a stable easy to use app that your entire family can use. I keep a close eye on Jellyfin and hope they keep improving though. I was glad to see them in the Amazon store. The more competition the better.
I almost gave up on this install, just wouldn’t work and not really any hints why. Turned out I had an old version of Emby still running, after I removed it, worked fine.
Why bother with media servers? Simply use Windows shared folders, or Linux SMB shares, with media files and play them over LAN on Kodi, VLC, etc. Am I missing something?
Is there a way to use Jellyfin for live TV/DVR like Plex on my Nvidia Shield?
That is great! Thanks for pointing this out!
Very promising, but since there’s no Roku app, it’s not for me. I’ll stick with Plex and my lifetime Plex Pass.
I am a plexpass member also, and I just cant stand how they cant get their act together regarding the UI, they are always changing it and making it more complicated. I have some older family members who have a hard time now just finding the movies or tv shows section. They are really blowing it FAST.
Their website doesn’t seem to mention any TV streaming apps. Does it work with Roku or any device with a hand held remote?
Also the plex users link in the first paragraph is redirecting to a word press login page.
Thank you for bringing this to my attention. I hadn’t heard of it before. I’ve been a loyal plex user for years and I’m wondering if you could elaborate a bit more about the differences between the two? Why should I run jellyfin instead of plex?
I run serviio, plex (lifetime plex pass) and emby to serve to wdtv units, pcs, and roku boxes. I had tried jellyfin, its not bad. I used mediaportal for years.
but when all is said and done emby (I have lifetime premiere) just works best for me. but it is darned nice to have choices.
What’s the point of this? Plex is free to use, I’ve been using it for years. The paid portion allow you to watch movies/listen to music on your phone. Then again who watches movies on their phone? People use Spotify/Apple music to listen on their phone. The free Plex does so much, is rock solid stable, run by a company and not a bunch of free time coders and it runs on smart TVs, Roku, Apple TV, etc. I really don’t get why someone would waste their time cloning Plex.
Plex is free, but buggy. We have terrible internet where I live, which is why I want my own media server. Unless I maintain 10mbps or better connection to the internet, plex constantly flaps. Why would I need that kind of connection to view my media, all stored on my local network? I don’t.
Looking for an app that will replace plex that is less buggy, & designed to work for the end user rather than the app seller.
You don’t need to pay to access Plex on your phone,or any internet capable device. I use my phone for music all the time and never bought the pass. Have watched movies on it too which comes in handy when your two year old stuck in hospital on their birthday
The big thing for me is because its open source and NOT run by a company. The company can change things anytime and we may lose the functionality or they may begin collecting data or trying to control how we use the software/media. Jellyfin is the start of something great. It may not have everything that plex has yet, but since it is open source, others can contribute to it and improve it. Its the evolution of software. Nobody can add to Plex but the company. that is not so with Jellyfin. Features can be added and it can be made even better than the alternatives. It is very likely the people ‘wasting’ their time are doing it because they enjoy it. I waste my time all the time doing things I enjoy :)
Your main point still stands, but Jellyfin is more of a clone of Emby. It looks like Emby, acts like Emby, but doesn’t have any of the client apps that Emby has.
It could be interesting to see how it works in a Raspberry pi
One word: Emby
Obviously didn’t read the entire article.
This is why I support ghacks, I need more reviews of good Linux and open-source apps and I need a good media center for my tv and movies on my new Windows-replacement server, running MX Linux, for my TV.
I would have appreciated a little bit more on functionality. Perhaps all that needs be said is “it’s exactly like emby or Plex” but I can’t always remember exactly how those worked.
What I like about Plex is that I don’t have to think about how it works. It just does. I can concentrate on my libraries.
I have Kodi and Plex both running side by side and they are like a hand and a glove. Working perfectly together when each of them are providing it’s own features I like. But together, this combo is unbeatable.
Alternative solution only because it’s open source isn’t excuse to replace my current setup. Functionality over “licensing issues”. I’m watching my media, not my license.
This is probably a good starting point for someone who doesn’t have a solution and is looking for something to play with. For rest of us… not so much.
Tommi, how do you have it set up? Where are you running Kodi? Where are you running the Plex Server? Which Plex clients do you use? How do you connect Kodi and Plex? Do you use the official Plex Kodi add-on?
I’m interested in setting up a similar system, that’s why I’m asking all these questions.
Thanks in advance!
Apparently there’s no uninstaller. You have to do it manually. (Windows)
There’s a PR for an official installer/uninstaller on windows up right now. Next major version should have one.
Thank you for bringing Jellyfin to my attention.
I had been looking for a media server for in-house
use for a client, without licensing issues.
Great article.