Disable Windows 7 Homegroup Feature
Computers running Windows 7 are automatically making use of the Homegroup feature for easier networking between different PCs of a computer network.
Single computer users, and users who do not make use of the homegroup feature may want to consider disabling it completely, to save some system resources in the process.
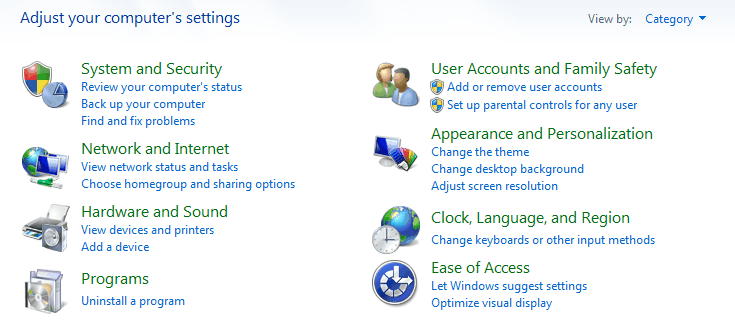
Several steps need to be completed before the Homegroup feature is completely disabled in Windows 7. The easiest way to start is to open the Windows control panel.
This can be done by clicking on the start orb in the lower left corner, and selecting the control panel option from the opening start menu.
A click on Choose homegroup and sharing options opens the Homegroup control panel.

Here it is possible to configure sharing options, and to disable the feature completely.
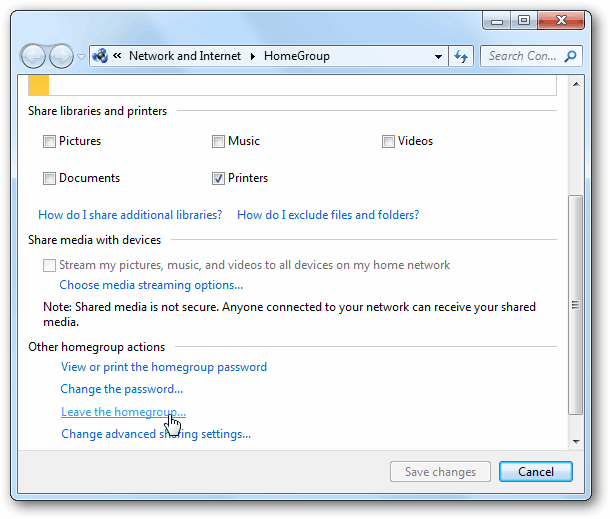
Locate the leave the homegroup action at the bottom of the screen. A click on it and the confirmation to leave the homegroup on the next window disables the homegroup on the computer.
The services on the other hand are still running, and Windows Explorer may also show the Homegroup link in the navigation pane.
The services can be stopped in the Services configuration window. The easiest way to open that is to use the keyboard shortcut Windows-R to open the run command box, enter services.msc and the enter key in the end. This opens the services manager of the operating system which you can use to start, stop and disable services.
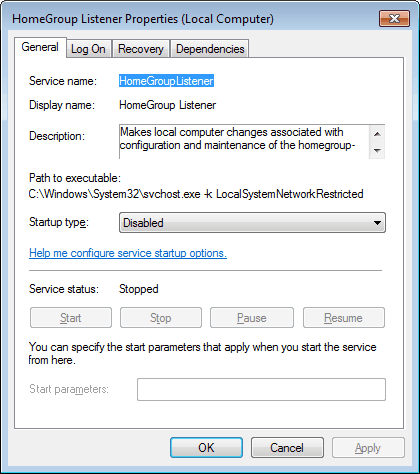
Locate the two services HomeGroup Listener and HomeGroup Provider.
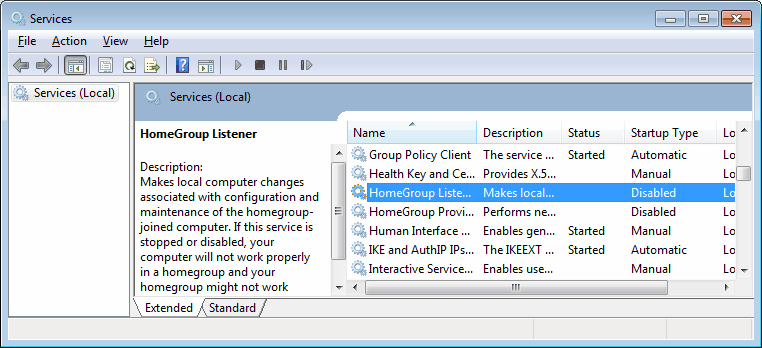
Double-click them and make sure they are not running. you can check that under Service Status. If the service is running click the Stop button to stop it. Then select Disabled as the startup type and click ok.
The Homegroup feature has been completely disabled after this. It won't show up in Windows Explorer, and the services will not start during Windows startup.


