Microsoft Image Composite Editor 2 released

Microsoft's Image Composite Editor received great reviews when the company released it back in 2008.
It was released as a Microsoft Research project back then allowing users to create panoramic images by stitching together multiple photos of the same scene.
All of that was handled automatically by the program which made it very comfortable to use. The application produced great results most of the time as well which helped its rise to popularity.
Image Composite Editor 2
Almost seven years later, Image Composite Editor 2 has been released. The program is available for supported 32-bit or 64-bit versions of the Microsoft Windows operating system.
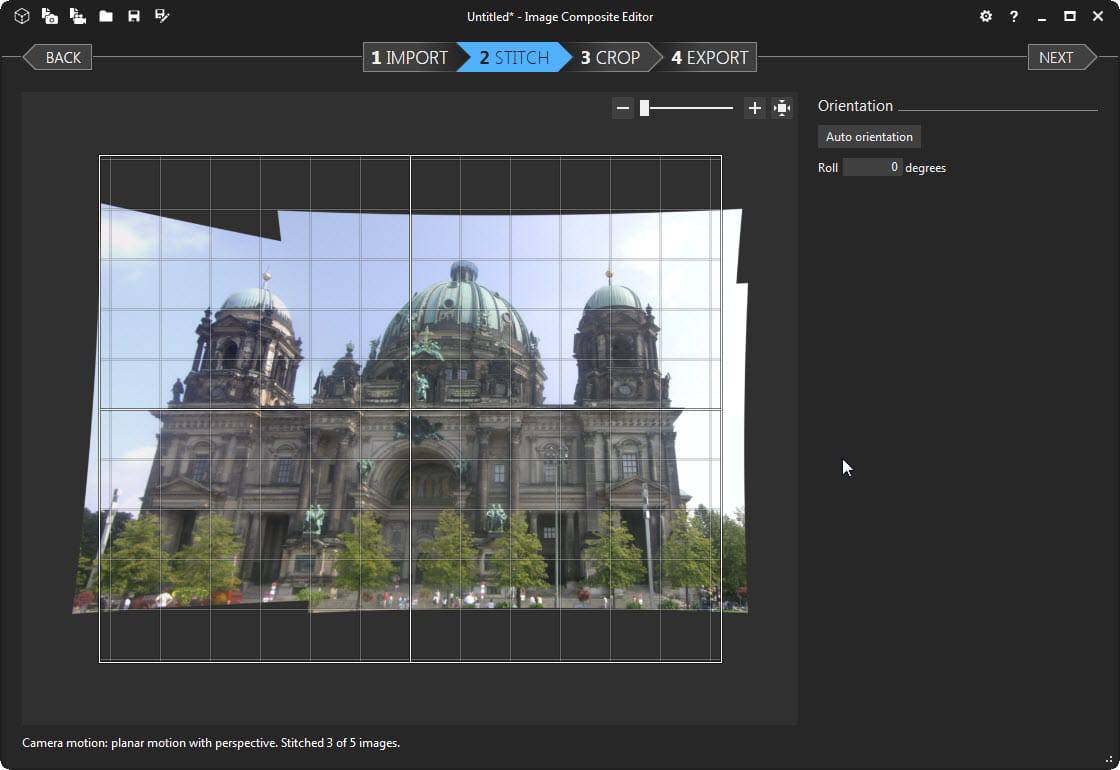
Its basic purpose remains the same: combine overlapping photos from a single location into a single image that combines the original images seamlessly. The method enables you to create larger images of a scene by combining multiple photos that depict it.
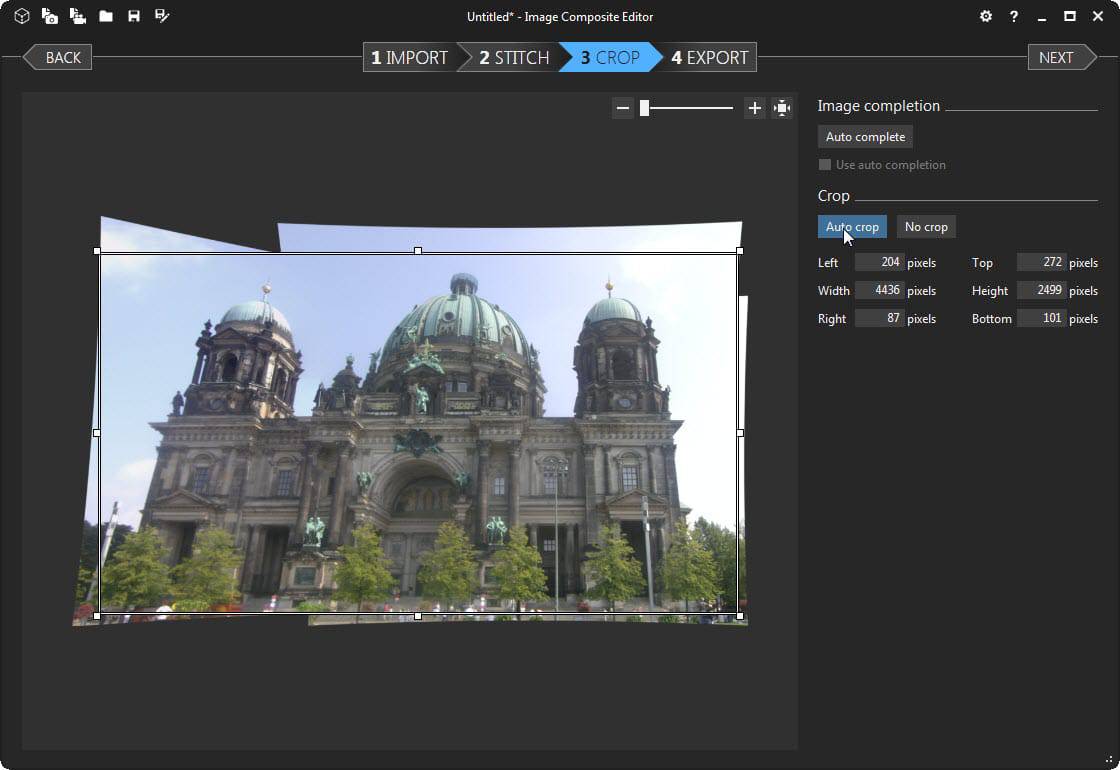
Image Composite Editor 2 ships with several new features that improve the process further. The top feature of the release is without doubt auto-completion which you can use to fill in missing pixels when creating panoramas.
Your only option before was to crop the image so that these missing pixels would not show up in the end result. With auto-complete, you can have Image Composite Editor 2 fill these spots so that you don't have to crop as much from the photo as before.
The process itself is still straightforward.
1. Select at least two images depicting the same scene.
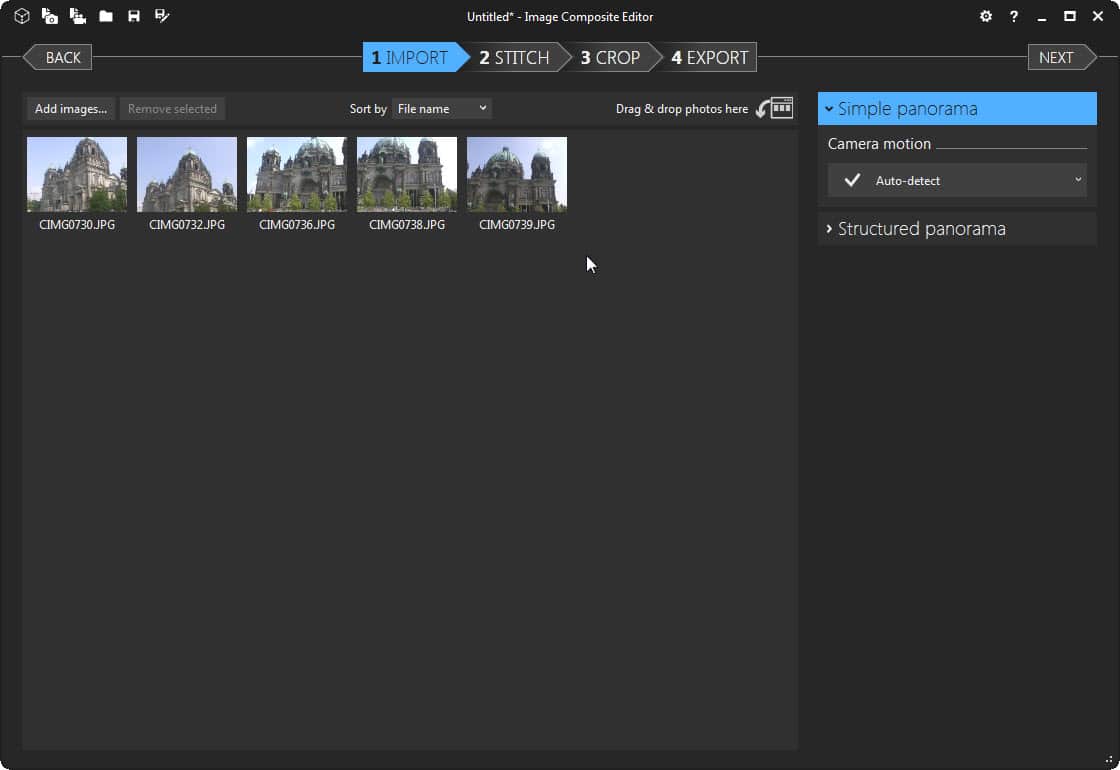
2. Wait for the program to analyze the photos that you have added and compose a resulting image.
3. Crop the resulting image in the third step.
You can use the auto-complete feature here to have ICE fill out blank spots automatically. Other options are to auto-crop the image and to manually crop it.
4. Export the created panoramic image to the local disc or to the Photosynth online service.
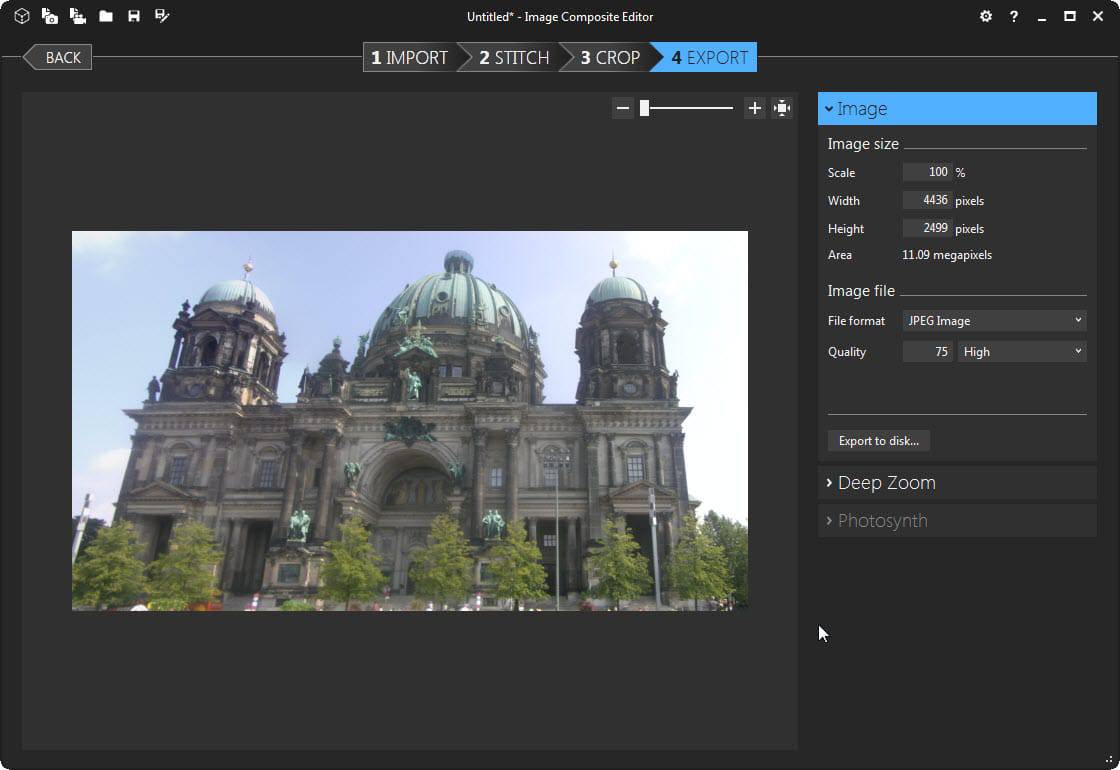
Image Composite Editor supports videos as well and can create panoramas from video files that you load into the program. The feature has been available for some time though and is not new in version 2 of the application.
The latest version of the editor supports new projections. The stereographic projection allows you to turn a 360 degree panorama into a little planet image which also supports auto-completion and cropping.
Take a look at the demo video that Microsoft created for the release.
As far as features are concerned, there are more to explore. ICE supports RAW images for example and has no size limitations according to Microsoft which means that you can use it to create Gigapixel panoramas.
Image Composite Editor is an excellent program for Windows that is easy to use and very powerful at the same time.


V2 is crap. I’ve tried unsuccessfully to get it to work on three different machines and two different operating systems (Vista and 7). I’ve tried fixes from forums, following instructions from various sources and still it does nothing. Again, Microsoft ruins a good product. Remember the days, for instance, when one click would print a document?
This is an excellent tool and its user friendly! But with new softwares being developed i recently stumbled upon lots of image altering and editing apps out there. One of them is Camera360 Online. Try it out and enjoy!
ICE has been a fantastic tool for anybody with vacation photos. We love it! If you haven’t tried ICE, you should.
This is an excellent tool and very easy to use. It produces great panorama images and you can also install a HD viewing tool from Microsoft and that’s a plus. I’ve never heard of this software and I’m pleased to have discovered it here so thanks for the info….
Had to come back and let you guys know how glad I am with Image Composite Editor 2. This is so easy and only 4 steps to create the image that is really excellent. You can do the same with videos and it so easy. I’m surprised that this software is actually free. If you haven’t tried it I suggest that you should do so. You won’t be disappointed ….. enjoy …
i haven’t used ICE in quite a while but it’s nice that they put some interesting new functionality into version 2.
Thanks, I recently downloaded the older version and wouldn’t have known about the latest. It’s a great product.
I stand in the center of an area that I want to shoot, snap a picture, turn slightly to the right, take another, and so on, and then use ICE to stitch them together. After cropping and saving, I add the image to an html page (usually just a local one), and use something called Experience Panorama to view it. It, in a sense, puts you into the scene since you can grab and drag the photo to view it in all directions. It’s actually really cool.
“Experience::Panorama is an image viewer with panning and zooming support so that users don’t have to deal with annoying scrollbars.”
http://experience.sourceforge.net/
That one is several years old but works well. I know that there are others scripts that offer similar 3D type viewing functions, but I like this one.
The demo offered there is just a single image and it doesn’t give you a good idea of how it can be used with panoramic type images.
On this image you’d get a much nicer end product if you had:
– in the IMPORT pane selected camera motion: rotating motion
– in the STITCH pane rotate the image so that the building walls point up