How to switch out of S mode in Windows 10/11

Windows in S Mode is designed to provide enhanced security and performance by allowing only app installations from the Microsoft Store. While this feature is beneficial in preventing malware and ensuring a secure computing environment, it might limit users who want to install applications from sources other than the Microsoft Store.
If you find yourself in this situation and constantly ask yourself how to switch out of S Mode in Windows 10/11, you've come to the right place because we'll walk you through the step on how to switch out of S Mode in Windows 10/11 using two different methods, ensuring you can enjoy the freedom of installing apps from anywhere you choose.
How to switch out of S Mode
By following the steps outlined in this guide, you can easily switch out of S Mode in Windows 10/11, regardless of whether you have a Microsoft Account or not. Remember that the switch is permanent, and once you've made the change, you won't be able to turn S Mode back on.
Switch Out of S Mode using your Microsoft account
To begin the process, click on the Windows menu and select the Settings icon, resembling a gear. Alternatively, you can use the keyboard shortcut Windows key + I to quickly access the Settings panel.
Once you're in the Settings panel follow these steps:
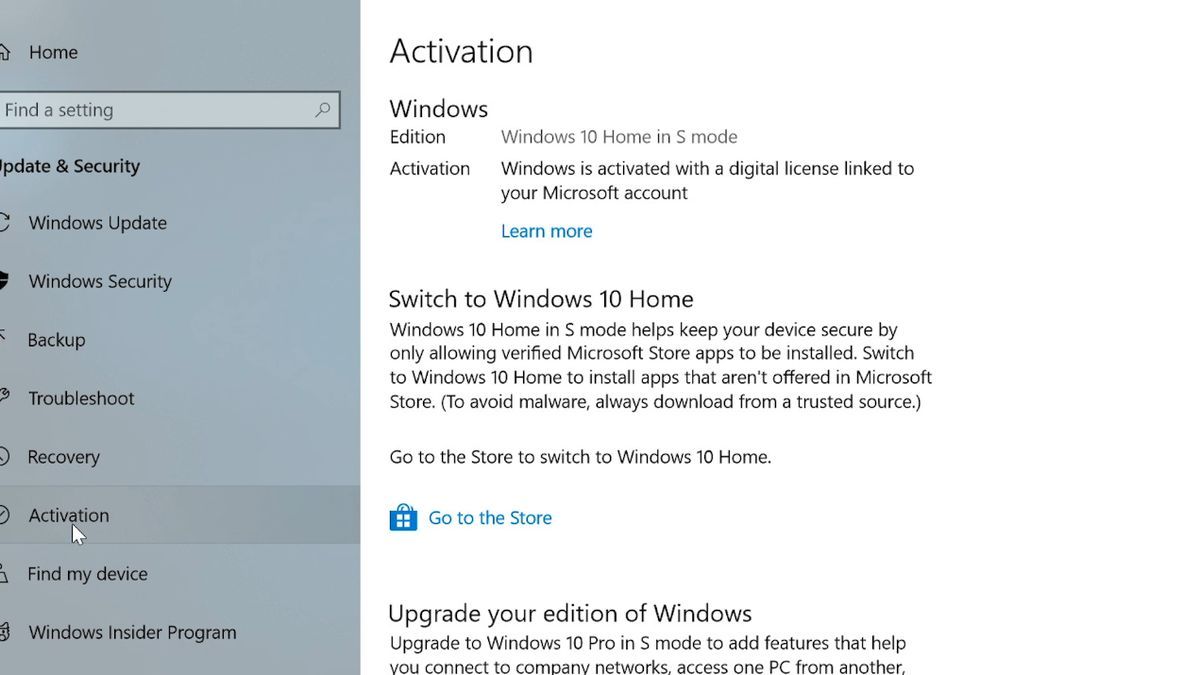
- Locate and select the "Activation" option
- Confirm that you see the "Windows 10/11 Home in S Mode" message, that means your PC is currently in S Mode and eligible for switching
- Select ''Switch to Windows 10/11 Pro'' and choose the ''Go to the Store" link
- Select "Upgrade your edition of Windows"
- Click the "Get" button under the "Switch out of S Mode" banner
After confirming your action, your PC will no longer be in S Mode, and you'll be able to install apps from outside the Microsoft Store.
Switch Out of S Mode using BIOS
If you don't have a Microsoft Account and want to disable S Mode, you'll need to turn off Secure Boot in the UEFI (BIOS).
Start by booting your PC into Advanced Startup following these steps:
- Click on the Start menu, then select "Settings"
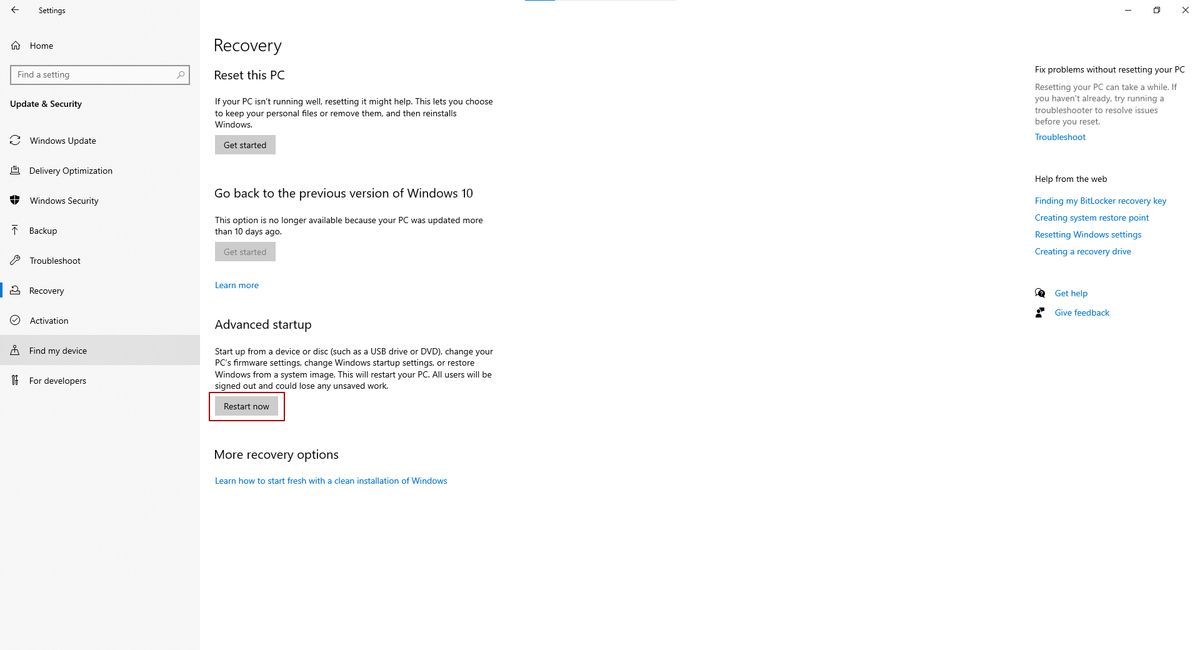
- Go to "System" and click on "Recovery"
- Choose "Restart Now" next to "Advanced Startup"
- Confirm the restart, and your PC will boot to a blue screen with various options
In the Advanced Startup options, click on "Troubleshoot," then select "Advanced Options" followed by "UEFI Firmware Settings". Your PC will now reboot into the UEFI.
The location of the Secure Boot option varies by PC model. For Dell PCs, it may be available in the "Secure Boot" method. For other manufacturers, check the "Boot" or "Boot Options" menu in the UEFI.
Read also: How to Turn Tablet Mode on and off in Windows.
Once you find the Secure Boot option, disable it. This action will also disable features like Windows Hello and Bitlocker, but you can reenable Secure Boot later.
After disabling Secure Boot, save your changes and exit the UEFI. Your PC will boot into the standard version of Windows 10/11 without S Mode.
Advertisement





Honestly this whole thing just seems like a complicated way to keep people from using anything other than Microsoft products
“While this feature is beneficial in preventing malware and ensuring a secure computing environment”
That’s assuming there is more malware outside than inside…