Webmin: One Stop Linux Configuration
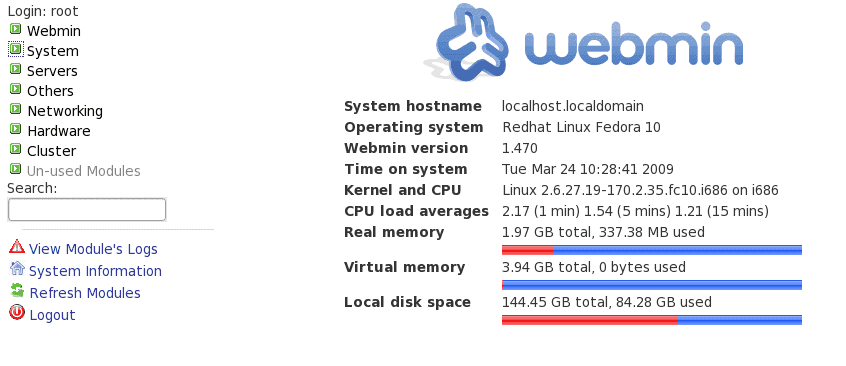
Over the last ten+ years I have seen Linux configuration tools come and go. In the early days there was the tried-and-true, all-powerful linuxconf that many thought would remain the one and only Linux configuration tool until the end of times. Well, we were wrong and linuxconf has pretty much died off. Why did linuxconf die? Because new tools, such as Webmin? came along.
Webmin arrived on the scene in 1997 and pretty much blew away the competition. Webmin is truly a one-stop shop for Linux configuration. It's modular so you can add and remove modules as they are needed. Webmin can configure your system, servers, networking, hardware, clusters, you name it!
Even though Webmin is a web-based utility, it does not require a server to be installed or running. Webmin contains its own built-in server so you will not need Apache running. Webmin does have to be running in order to log in.
The easiest way to install Webmin is to open up your Add/Remove Software utility, do a search for webmin, and install it. Or you can go to the Webmin Site, download the the appropriate binary and let your package manager do the work for you. If you are wanting to install Webmin on a headless server you can do the following:
- Secure shell to your server
- Download the correct installation file using the wget command.
- Issue the command to install Webmin (such as rpm -ivh webmind-XXX.rpm (where XXX is the release number)
After the installation is complete you may have to start Webmin manually (the rpm installation starts the server for you). To start Webmin you will issue the command:
/etc/rc.d/init.d/webmin start
or
/etc/init.d/webmin start
Once you have started Webmin you log into it with with your browser by pointing it to:
http://IP_OR_DOMAIN:10000
Where IP_OR_DOMAIN is the IP address or the domain Webmin is installed on. If you are using it for local configuration you can point your browser to http://localhost:10000.

As you can see, in the image to the left, the default Webmin page is very easy to navigate.Upon installation one of the first links you should click on this page is the Webmin link in the left navigation. When that menu expands you will see a number of entries, of which one is called Webmin Configuration.
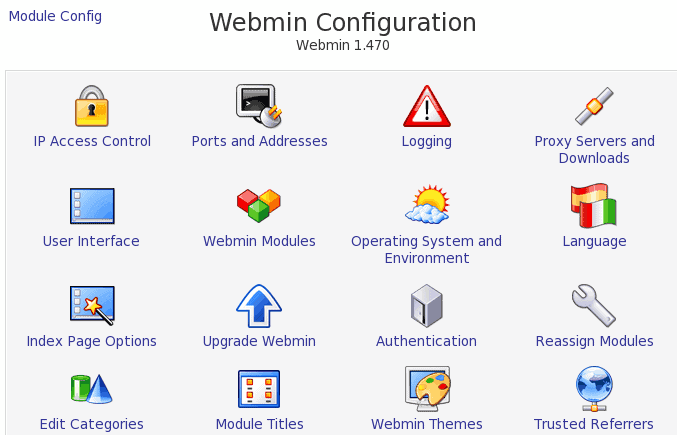
Click on the Webmin Configuration option to reveal a number of possible choices. This section is very important because you will configure access, logging, certificates, categories, and a number of other critical features.
Make sure, however, when you make any changes to Webmin that restart the Webmin server. You can restart Webmin by clicking the Restart Webmin button that is at the bottom of the Webmin Configuration page.
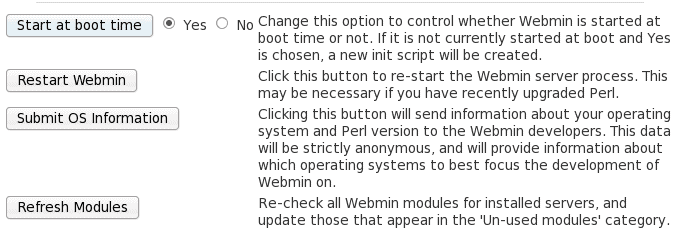
In the same area of the restart button there are a few other important options. If you know you are going to be using Webmin for all of your configuration needs you will want to make sure Webmin starts at boot.
Another important screen to visit, before you jump into various modules, is the Webmin Users screen. In this screen you can define groups and users and their various permissions for the Webmin system. Here you can define what modules a user or group has access to which can be very handy.
Once you get beyond Webmin basic configuration it is time to poke around the various modules. In later articles I will discuss some of the best of the Webmin modules.
Final Thoughts
Webmin is one of the most powerful administration tools available. If you haven't experienced the power that is Webmin, install it now and see how much power you can have at your fingertips.
Advertisement








Thanks!, Webmin rocks.
If your looking for something to get you going, i use this.
http://t3.woodel.com/my-linux-how-to/debian_howto_start_to_finish_using_webmin.pdf
Webmin makes things much easier/intuitive. I’ve used it many times when playing around with linux.