FairUse Wizard 2 Free
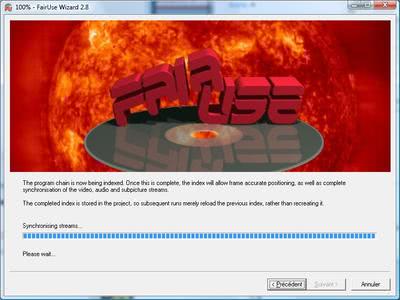
Fair Use Wizard [link, via Download Squad] is an easy to use DVD ripper that is provided as a free and commercial version. The free version has some limitations like a maximum target file size of 700 Megabytes or no multi core support but it does work pretty well nevertheless. The author is offering the full version of FairUse Wizard for free on his homepage which gives you all the advanced features of it.
Three other features that are only in the commercial version of FairUse Wizard are mentioned on his homepage: quality encoding modes, the possibility to remove unnecessary elements of the DVD and encoding profiles for a variety of devices like the iPhone or Apple TV that guarantee best quality. Installation is a breeze, after installing the main program you are asked if you want to install a toolbar. I would suggest to say no to this installation unless you want to try it out.
The main benefit of the software is that you can create DVD rips either from DVD or by selecting an DVD Iso image from the hard drive with just a few clicks that are heavily optimized. No need to fiddle around with performance and quality settings, it's all there already and the defaults are working fine.
And there is still the possibility to use your own settings if you like and know what you are doing. FairUse Wizard 2 can not rip copy protected DVDs which is a severe limitation. The author suggests to use DVD Decrypter to create an ISO image of your DVD.
FairUse Wizard 2.9 Converts DVDs to AVI for PC Storage and Viewing
DVDs are bulky and inconvenient in the current trend of technology. We can easily alter their format and store them in a condensed format on hard drives or removable media. You can essentially compile your DVD library into a single file as AVI files and pack away the hard-copies in the attic. If your computer has a large capacity internal hard drive of 500GB-2TB, they can be stored there easily. If not, removable media can store a DVD collection as well. External hard drives are great for this. Nonetheless, you will still need a convenient way to convert your DVDs into AVI format. FairUse Wizard is a decent solution. There is a free version and a commercial version. The focus of this article is on the free version.
The major difference between the versions is that the free version creates a 700MB file maximum, while the commercial version can create up to 1400MB files. AVI files are fairly compact and it simply depends on your needs. The codecs used are DivX, Xvid and h.264. Copy-protected discs will sometimes pose limitations, but experience has shown that this is only with the latest copy-protection.
Download and install FairUse Wizard 2.9 from the following link:
To make things easier, during the installation, choose to create a desktop or tray icon for easy access.
When the program opens, you will see a new project screen. Here you will name the project and choose the input, etc. Select “Create a new Project†to begin. You will probably want the name of the DVD to be the name of the project. Feel free to give it any name you desire. Select the folder for the output AVI file by either typing in the correct path or clicking the Browse button to identify the path. Here, the example is the movie Four Rooms so the name is “Four Rooms†and the output folder is C:\Users\Public\Videos\Sample\Videos. Insert your DVD into your optical drive.
You will have the options of XviD and x264 as codecs. You can select the “Two pass†option for better resolution and quality. Note that this option will take significantly longer than a single pass. You will see in following examples that the default for English subtitles was left checked. If you do not want subtitles, change the dropdown list to a single dash (-). The subtitles are important for the hearing-impaired so this is an option to consider if necessary. If you want to include all additions to any DVD such as director’s cuts and extra footage, select “Full auto modeâ€, otherwise leave this unchecked. Click Next to proceed.
Choose the drive containing the DVD and then select the language. The conversion will begin with indexing and continue through several steps until it has converted to video. When the video conversion is complete, you will see it like this:
It will then go through audio encoding and the resulting AVI file will be contained in the destination folder specified in the beginning.
A great deal of mess will be left behind in terms of temporary files. Browse the output directory and delete the temporary files after every conversion or your hard drive space will eclipse rapidly.
Advertisement
