How To Place Drives on the Windows Taskbar
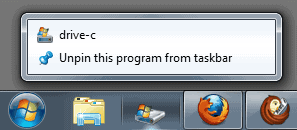
Only specific programs can be pinned to the Windows Taskbar by default; there is no option to pin files, folders or drives to it. We have already demonstrated how to pin files and folders to the Windows 7 taskbar, and today we are going to explain how to add drives to the taskbar as well.
Placing drive shortcuts on the taskbar speeds up the process of accessing those drives. The standard options to open drives in Windows Explorer are to either double-click the computer icon and then the drive or to click the Windows Explorer icon and then the drive. Both operations require more clicks than the taskbar solution.
While you can place drive shortcuts on the desktop as well, it is only as fast as pinning drives to the taskbar plus you get better accessibility most of the time when you add them to the taskbar and not the desktop.
Here is what you need to do to place drive icons in the Windows taskbar
Right-click the computer desktop and select New > Text Document. Rename the document to Drive-X.exe. Make sure the extension is changed to exe. Replace X with the drive letter, e.g. Drive-C.exe.
Now drag the new file to the Windows Taskbar and delete the file on the desktop afterwards.
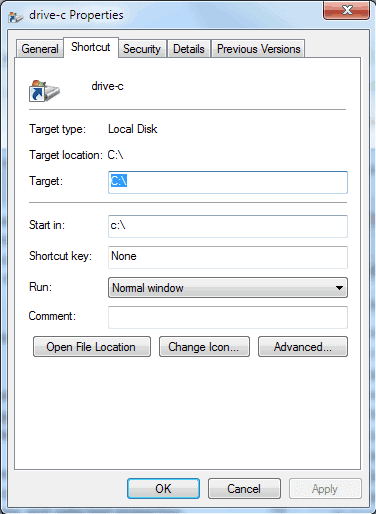
Right-click the icon on the Taskbar, move the mouse over the name, right-click on the name and selected properties.
Now edit both the target and start in fields so that they show only the drive path and no folders, for instance c:\ in both if you want to add a shortcut to the C drive of the computer to the taskbar.

You can optionally change the icon by clicking on change icon. That change however will only become active on the next logon, restart or if the explorer.exe process is restarted.
It is a good idea to select different icons for every drive that is added to the taskbar in Windows 7 to improve its recognition.
You can repeat the process for every drive that you want to add to the taskbar, there is virtually no limit on how many drives you can add to it.
Update: The method works in all newer versions of Windows, including Windows 8 and 10, as well.










Hello – I was able to do this successfully on my computer – thank you! But when I tried to set it up for a co-worker, the file I create on the desktop keeps defaulting back to a .txt file (I.e., I rename it ‘X Drive.exe’ and it renames to ‘X Drive.exe.txt’). I have tried to make the name change from within Windows Explorer but it made no difference. When I tried to change the file type the only options were Notepad, Wordpad and Internet Explorer…maddening! :-(
er… the way i do it is much simpler
right-click on the taskbar and select the top option (toolbars ->New toolbar…
select the drive and press “select folder”
voila!
Thanks a bunch!!
Amazing tip
Thanks for sharing
Never know about it.
how do i pin printers to the windows 7 task bar?
Open the Devices Printers or Control Panel dialog. Right click on the printer desired. Select create shortcut. Drag it to task bar.