How to configure autoplay on Windows 10
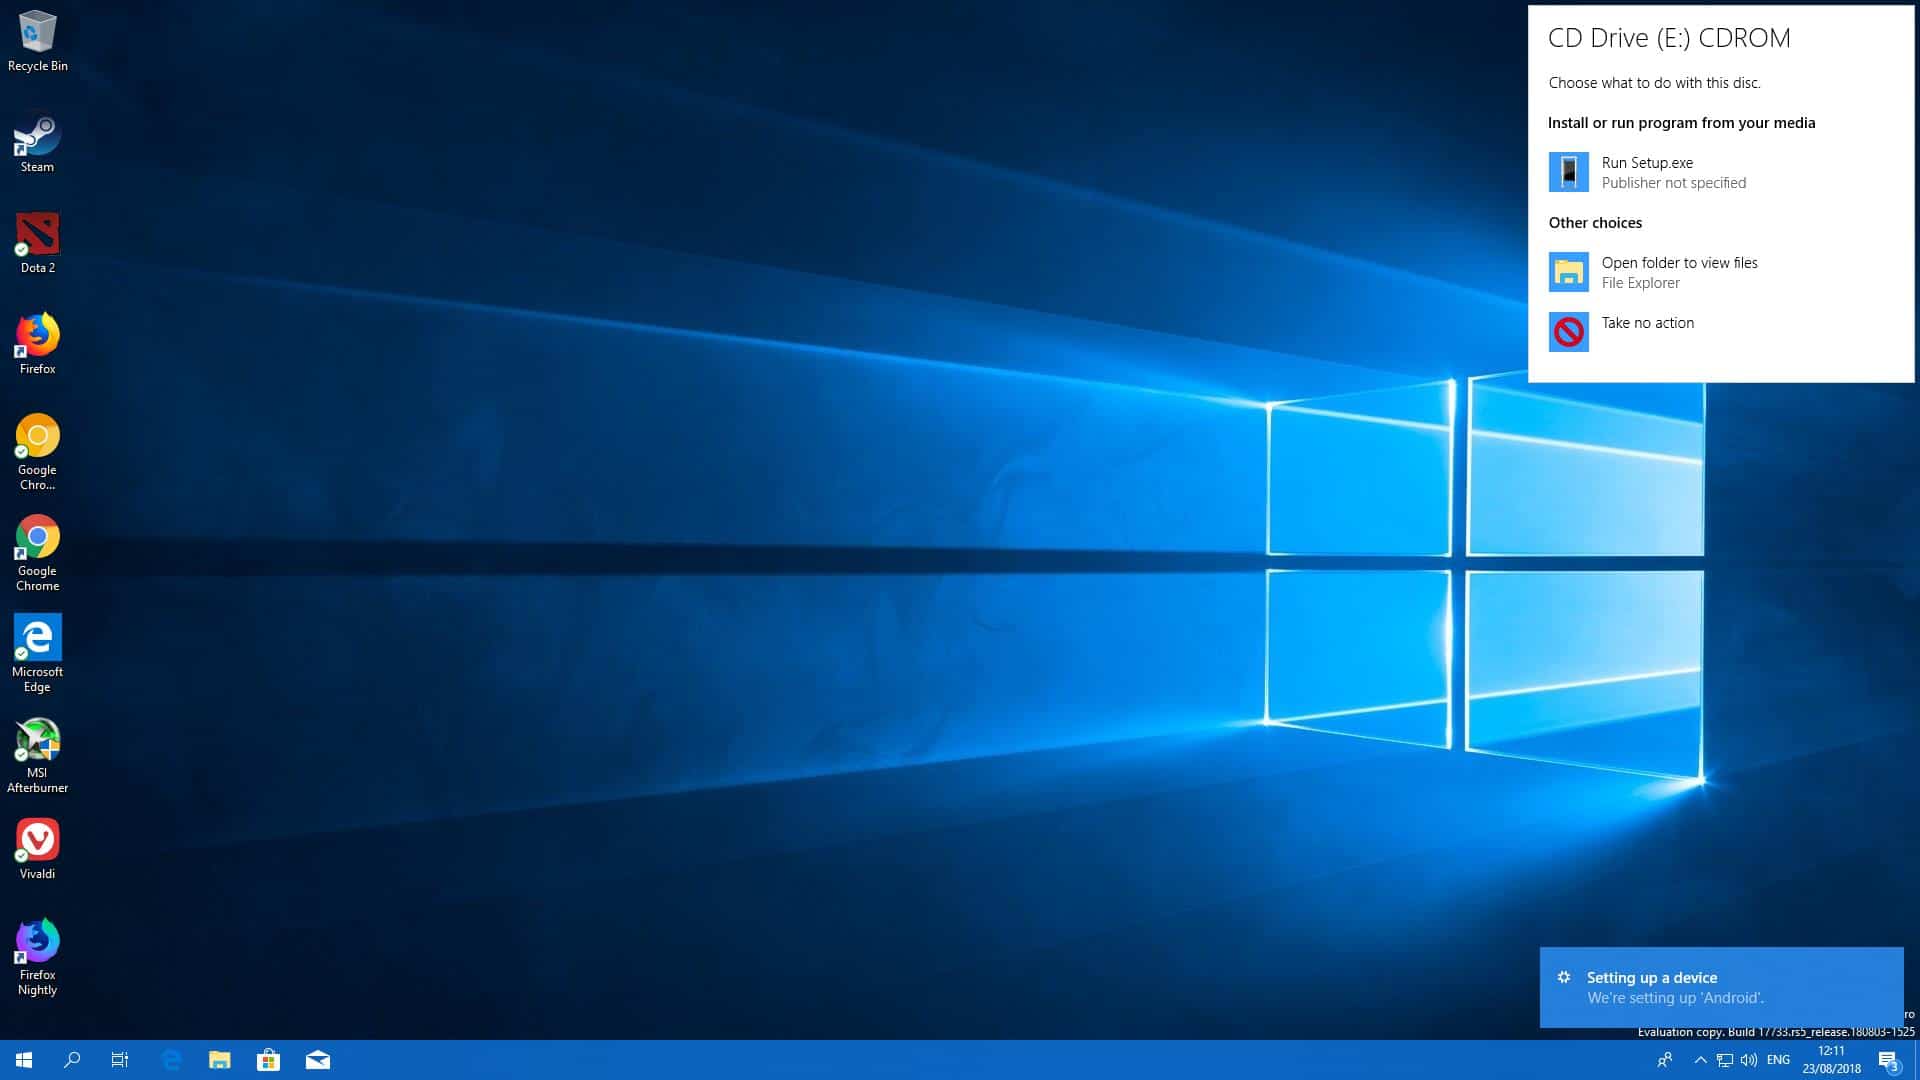
Autoplay is a long-standing feature of the Windows operating system that is also part of Windows 10. Basically, what it does is give users of the operating system options to handle different devices connected to the operating system or media automatically.
Basic examples are automatically copying new photos from the digital camera or smartphone storage to the hard drive of the Windows device, or starting to play a video DVD in the desired media player automatically when it is inserted.
Autoplay functionality is only available for specific device types, e.g. digital cameras, smartphones, or tablets, and media, e.g. audio CDs or video DVDs. It is also available for removable storage devices that you may connect to your computer but there only in limited form.
Windows 10 users have several options when it comes to configuring autoplay functionality:
- Autoplay can be disabled for all devices and media.
- Configure autoplay functionality for individual devices.
Configuring Autoplay on Windows 10

Windows 10 users and administrators find autoplay configuration options in the Settings application and in the legacy Control Panel.
Microsoft revealed plans in 2015 to migrate the Control Panel to the Settings application in Windows 10; the process is still ongoing and judging from the snail-like speed in which it happens, some Control Panel menus will remain available in the coming years.
The Settings app
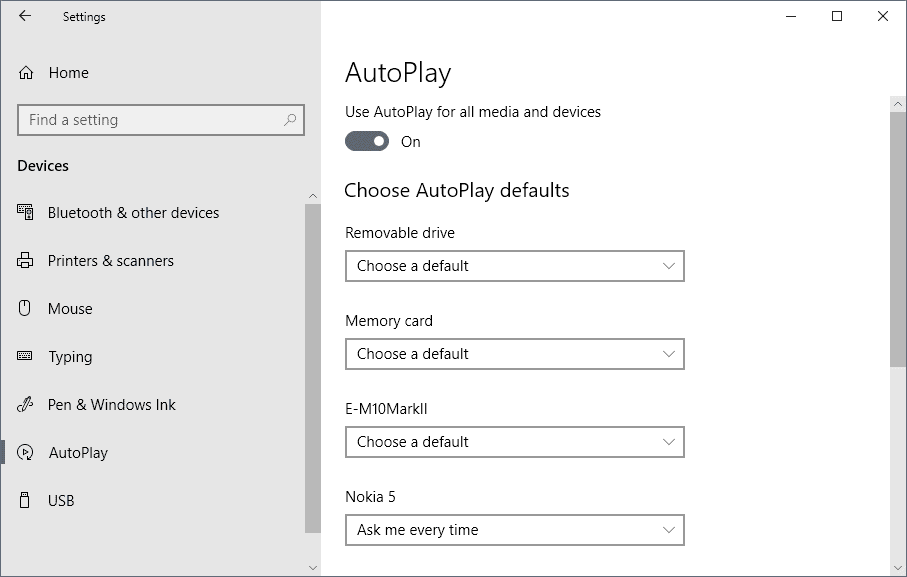
- Launch the Settings application on the Windows 10 device with the Windows-I shortcut.
- Select Devices > Autoplay to open the configuration page.
The Settings application supports two main options: toggle autoplay functionality globally or define autoplay for individual devices.
Note: while you can set up default actions using the Settings application, I have found this to be buggy at times. When a particular setting did not work immediately, selecting a default action from the Action Center prompt helped most of the time to make it the default action for the device or media.
When you disable Autoplay in the Settings application autoplay is turned off globally. Windows does not display autoplay prompts anymore when you turn off the functionality. Note that it is possible to bypass this by holding down the Shift-key while you connect a device to the Windows 10 machine.
You may configure default Autoplay settings for individual devices. Windows 10 should list all devices connected to the PC in the past provided that they are not removable storage devices.
These are the default actions that are available for all device and media types that support autoplay:
- Take No Action -- Autoplay is disabled.
- Ask me every time -- Display a prompt so that you may select the desired action.
The following options may be available as well:
- Import photos and videos (App) -- Import media using the mentioned application, e.g. Photos or Dropbox.
- Sync digital media files to this device (App) -- Sync media with the device using the specified application.
- Open device to view files (App) -- Opens the device's root in File Explorer or another file management program.
- Quickly transfer photos and videos (App) -- Uses a different method to transfer media to the device.
- Configure Storage Settings -- Opens Storage in the Settings application.
You can change the default action at any time in the Settings application.
The Control Panel
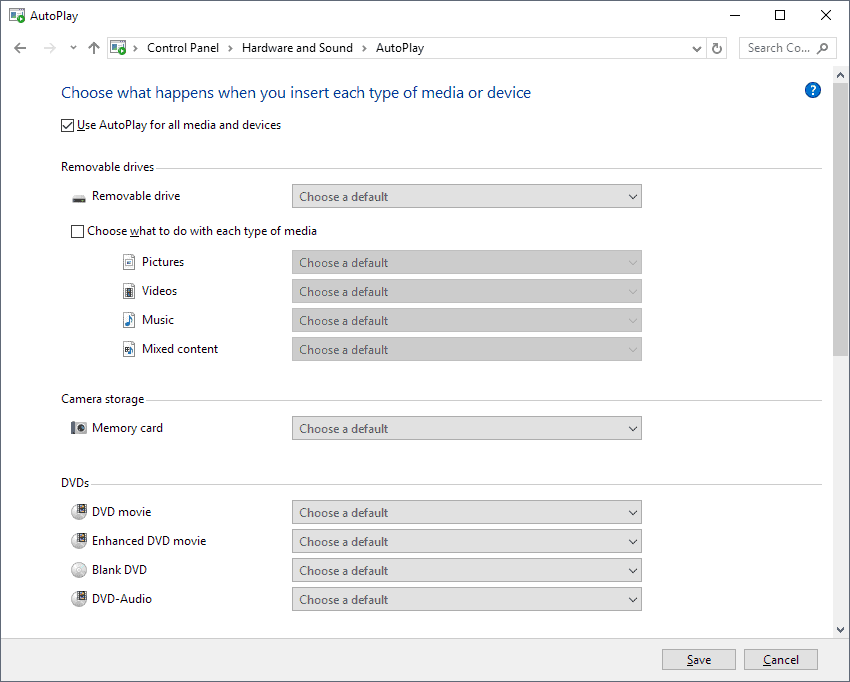
Autoplay settings are still available in the Control Panel as of Windows 10 version 1809.
- Tap on the Windows-key to open Start.
- Type Control Panel and select the result to launch the Windows Control Panel.
- Go to Hardware and Sound > AutoPlay.
The Control Panel settings are more extensive as you find specific types of media, removable drives, and even software listed on the page.
The available options are identical to the ones provided by the Settings applications but it is possible to set actions more granular.
For DVDs for instance, you may select actions for DVD movies, Enhanced DVD movies, Blank DVDs, and DVD-Audio discs separately. The same is true for Blu-Ray and CDs, and removable drives, and there is even an option to configure autoplay for software and games. All of these options are missing from the Settings application.
You do find connected devices listed in the Control Panel as well, and the changes that you may seem to sync with the Settings app and vice versa.
The Group Policy
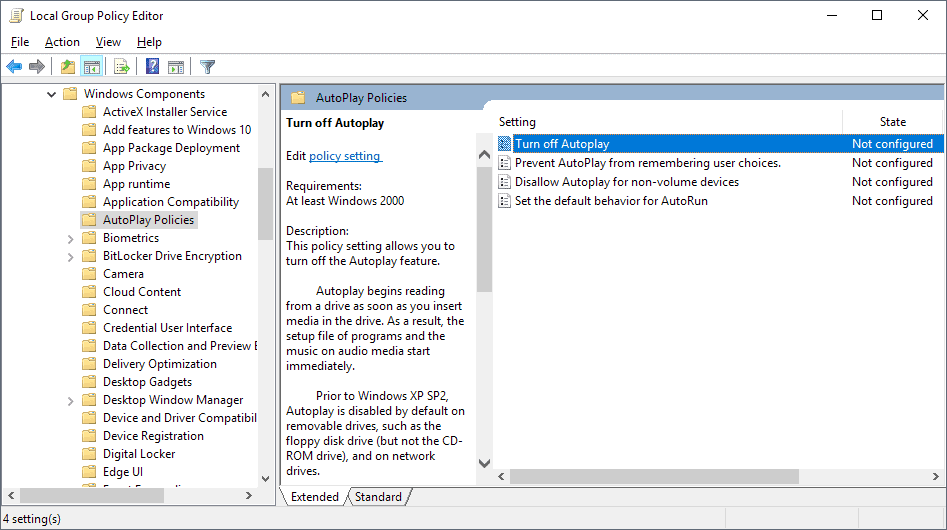
Administrators find Autoplay policies in the Windows Group Policy. Note that the Group Policy is only available on professional editions of Windows 10 and not Home editions.
Tip: Windows 10 Home users and admins can try Policy Plus, a third-party program that brings most of the functionality of the Group Policy to Windows 10 Home devices.
- Tap on the Windows-key to open Start.
- Type gpedit.msc and hit the Enter-key. This starts the Group Policy Editor.
- Go to Computer Configuration > Administrative Templates > Windows Components > AutoPlay Policies.
Note that some policies are found under User Configuration as well to set them for individual users on the system and not globally. If User Configuration and Computer Configuration policies exist, Computer Configuration is selected.
Windows 10 lists four entries there:
- Turn off Autoplay -- Enable the policy to turn off autoplay functionality for all drives or for CD-Rom and removable media drives only.
- Prevent AutoPlay from remembering user choices -- Enable the policy to make Windows forget about previous user selections in autoplay prompts.
- Disallow Autoplay for non-volume devices -- Enable the policy to disable AutoPlay functionality for MTP devices such as cameras or phones.
- Set the default behavior for AutoRun --Â Enable the policy to allow autorun commands to be executed.
Turning off AutoPlay using the Windows Registry
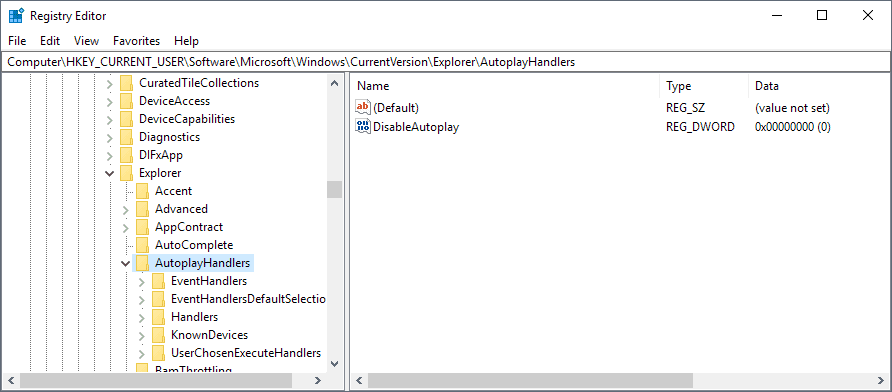
You can disable AutoPlay functionality for individual users in the Registry.
- Tap on the Windows-key to display the Start menu.
- Type regedit.exe and hit the Enter-key.
- Confirm the UAC prompt that is displayed.
- Go to HKEY_CURRENT_USER\Software\Microsoft\Windows\CurrentVersion\Explorer\AutoplayHandlers
- Double-click on DisableAutoplay
- A value of 0 means AutoPlay is enabled.
- A value of 1 means AutoPlay functionality is disabled.
Now You: Do you use AutoPlay functionality on your devices?
Related articles
- AutoplayStopper stops autoplaying videos everywhere
- Finally: Mozilla adds working HTML5 Video autoplay blocking to Firefox
- Firefox gets option to control sites with autoplay sound
- How to control audio and video autoplay in Google Chrome
- How to disable media autoplay in Microsoft Edge





Hi, I want to keep autoplay, but remove most of the options in the list, for my iphone. For example, Paperport. An article about how to do that would be appreciated! I have looked at autoplay handlers cleanup tool, the only option is to completely delete handlers, there is no option to disable the triggers for specific device types
Is there a way to make a usb-stick open faster ? I have autoplay enabled but when I plug in the usb-stick it takes several seconds to open the stick/drive and show the contents. I know a few seconds is still fast but can you manage the speed (in the registry ?).
Cannot get AutoPlay to work for USB’s. Win 10 v.1803 / HP desktop computer
Tried both methods through ‘Settings’ menu and Control Panel..Nada.
Attempted Regedit which only has one entry, as follows:
Name: (Default)
Type: REG-SZ
Data: (value not set)
Double clicked on the name (Default), in the ‘Value Data’ box, I put a value of 0
Nada again, just for the heck of it, I tried a value on 1, still nothing.
Any ideas?
Do you use AutoPlay functionality on your devices: No
Is there a vanilla way to open a custom folder on the SD card of my Android-6
every time plug it in to the USB of Win10?
(after approve the MTB connection on the device itself)
first slider to Off is the only secure setting.