How to change the Windows screen size in VirtualBox?
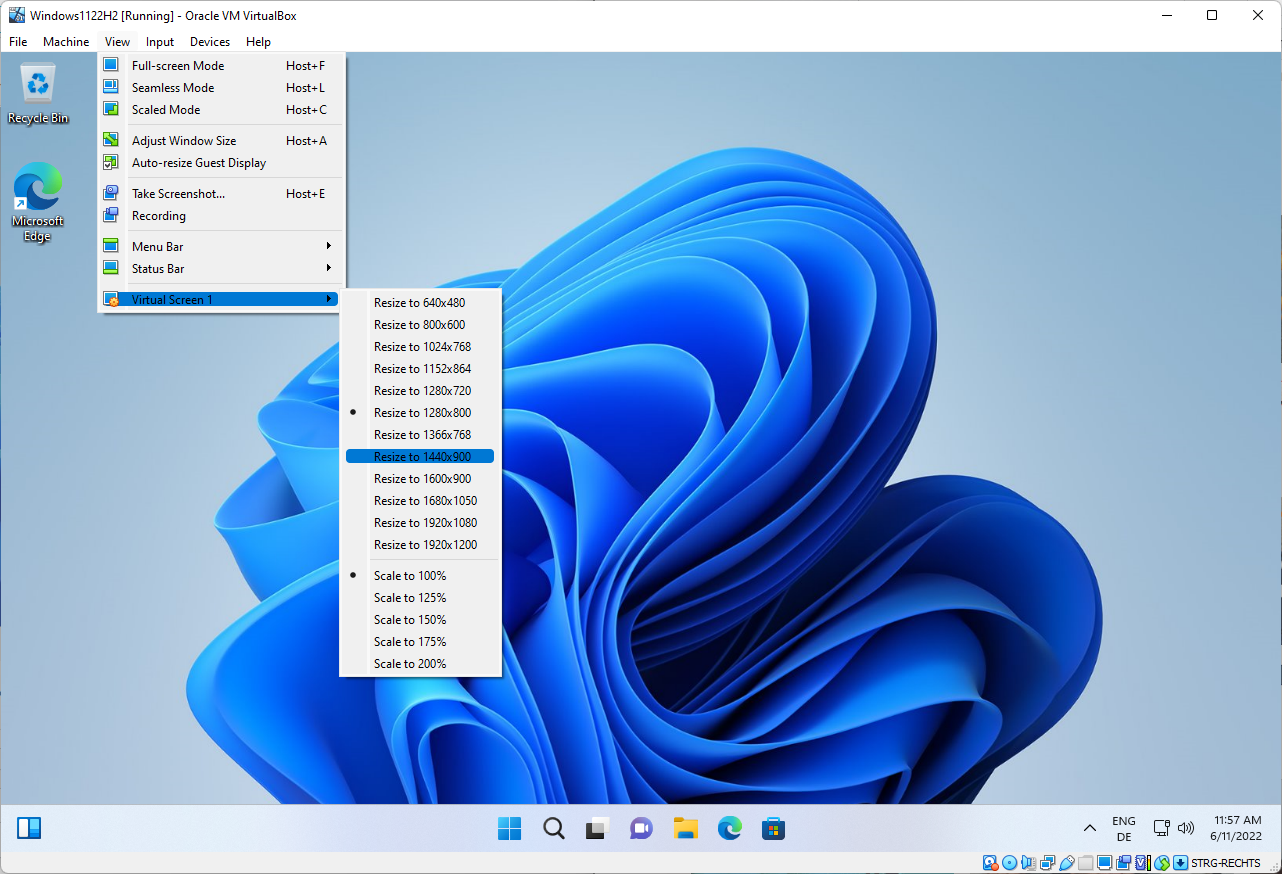
Oracle's VirtualBox virtualization software is a popular choice for users who want to test new operating system versions. If you install Windows in VirtualBox, you may notice that you can't change the default screen resolution of 1024x768.
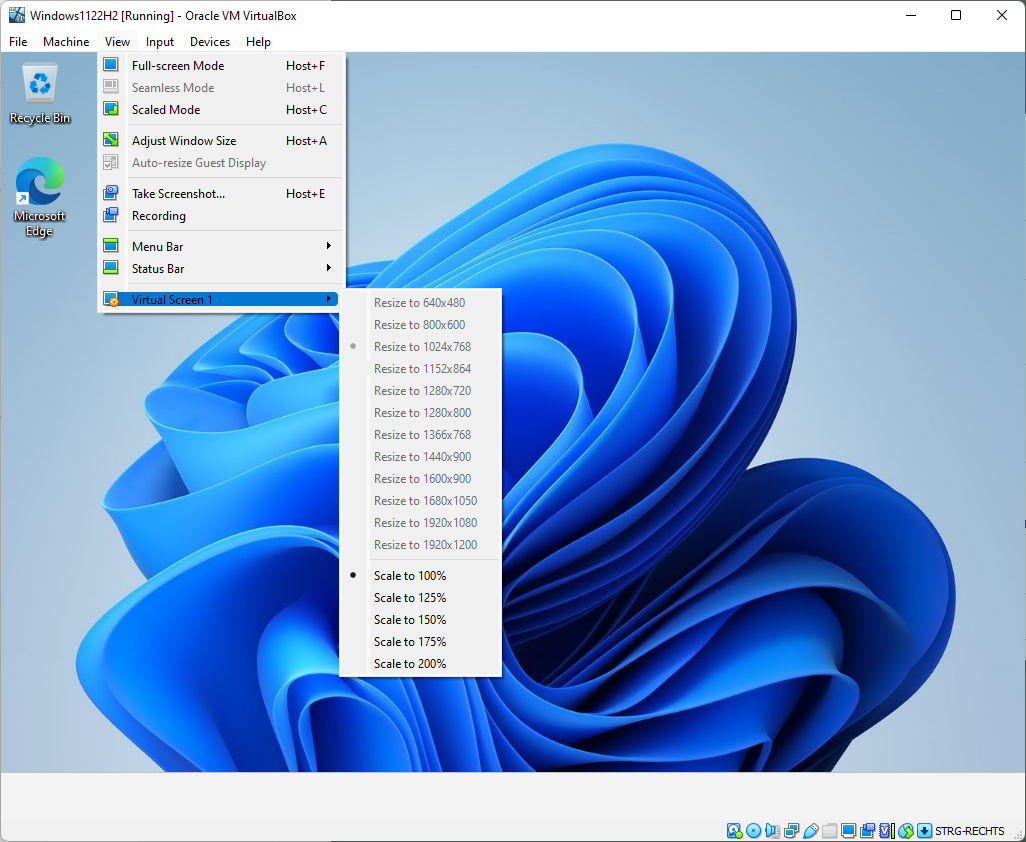
The low resolution may be sufficient for some tasks, but many may benefit from larger resolutions. The View > Virtual Screen menu of the VirtualBox application lists all available resolutions and scaling options.
The "resize to" options are all inactive, as they are grayed out and not selectable. The scaling options are unlocked and available, though.
Thankfully, it is rather easy to unlock all supported screen resolutions in VirtualBox. The following instructions explain in detail how that is done.
Fixing the Screen Size of Windows in VirtualBox
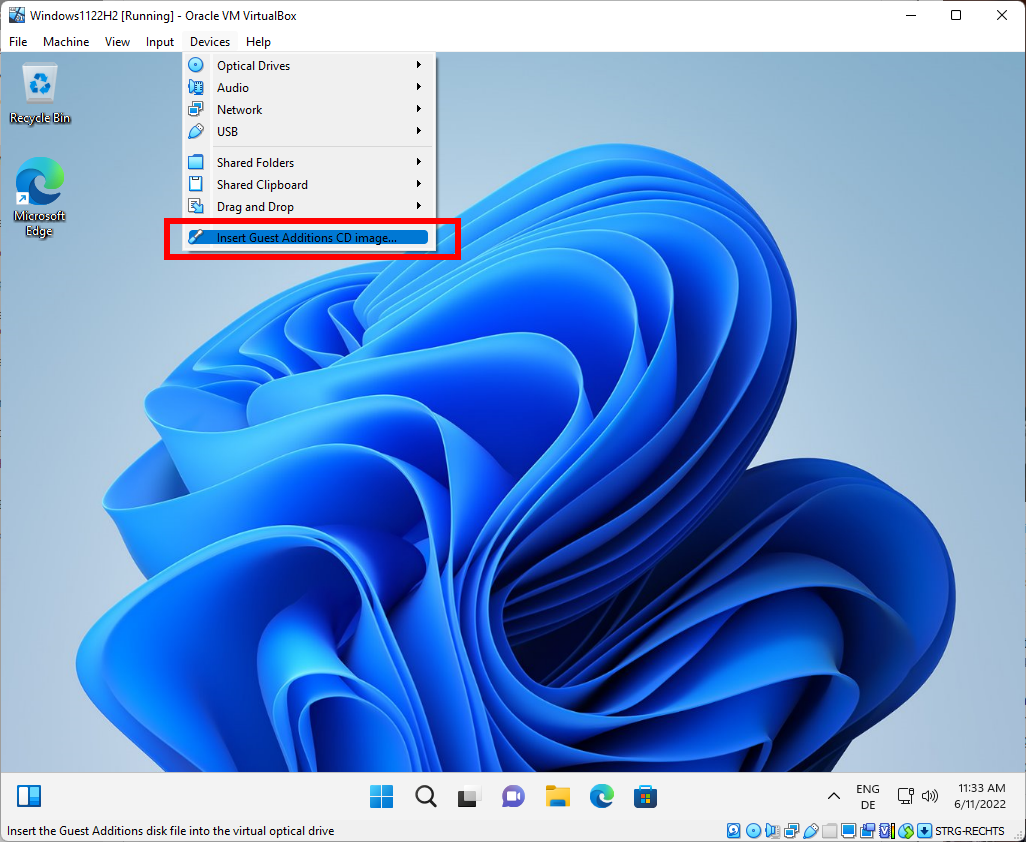
The fix requires the installation of Guest Additions; this may sound intimidating at first, but it is a straightforward process that completes in a matter of minutes on most systems. The description may sound as if you'd need to insert a CD image, but this is not the case. VirtualBox mounts a virtual CD image when the option is selected.
To get started, select Devices > Insert Guest Additions CD image. All that it does is mount the Guest Additions CD in VirtualBox, so that you may access its contents. You will hear a sound that indicates that the CD has been mounted.
Next, open File Explorer on the system and open the the CD drive "Virtual Guest Additions".
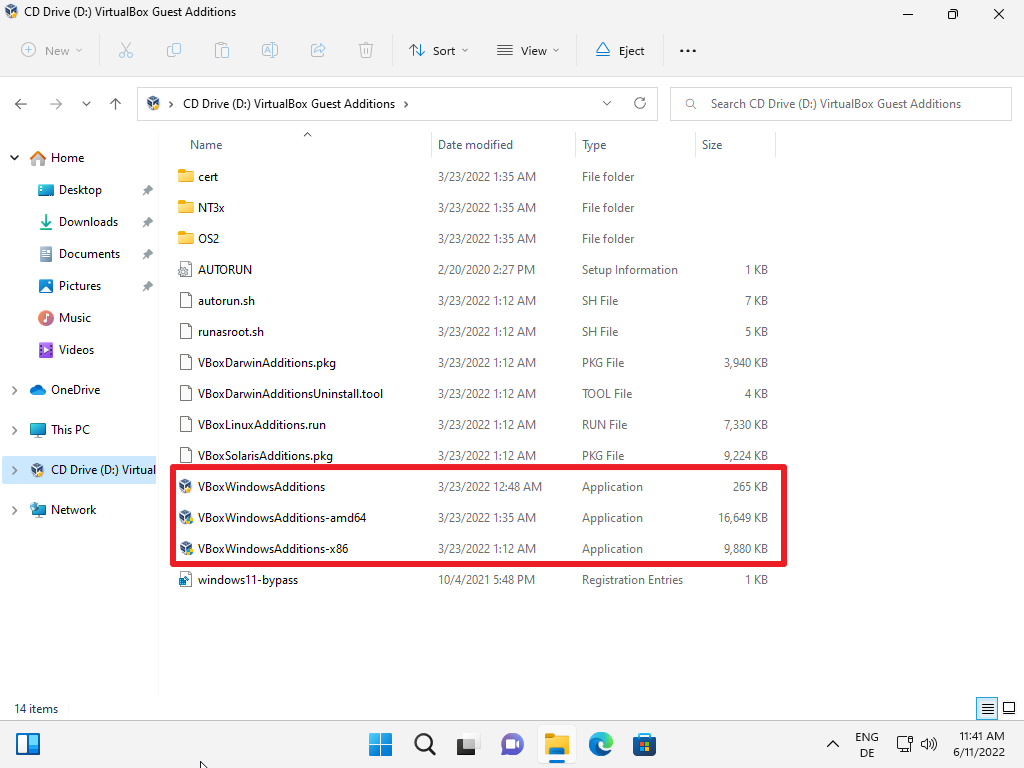
The root menu lists three guest additions for Windows. There are also additions for other operating systems, including Linux and Solaris.
The three Windows guest additions are for different architectures.
- VBoxWindowsAdditions is an automatic selector. Pick this one.
- VboxWindowsAdditions-amd64 is 64-bit systems.
- VboxWindowsAdditions-x86 is for 32-bit systems.
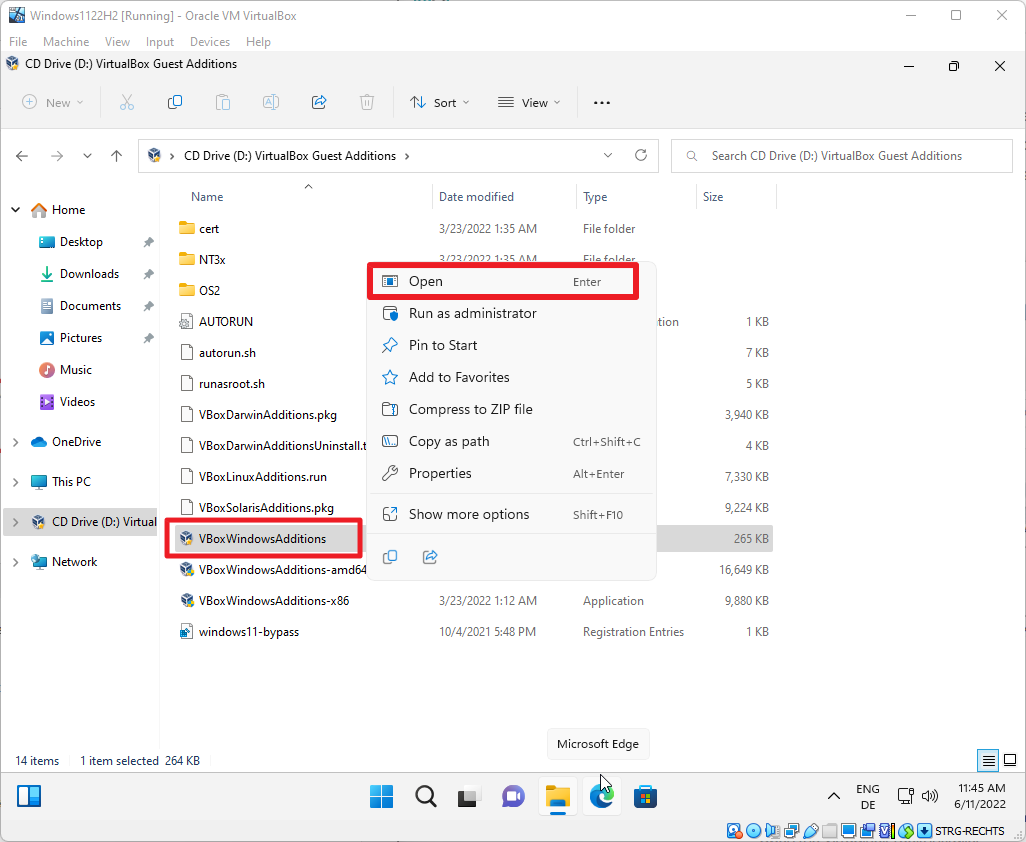
Right-click on one of the files and select open from the context menu to start the installation in the virtual machine. You may double-click on the file to start the installation.
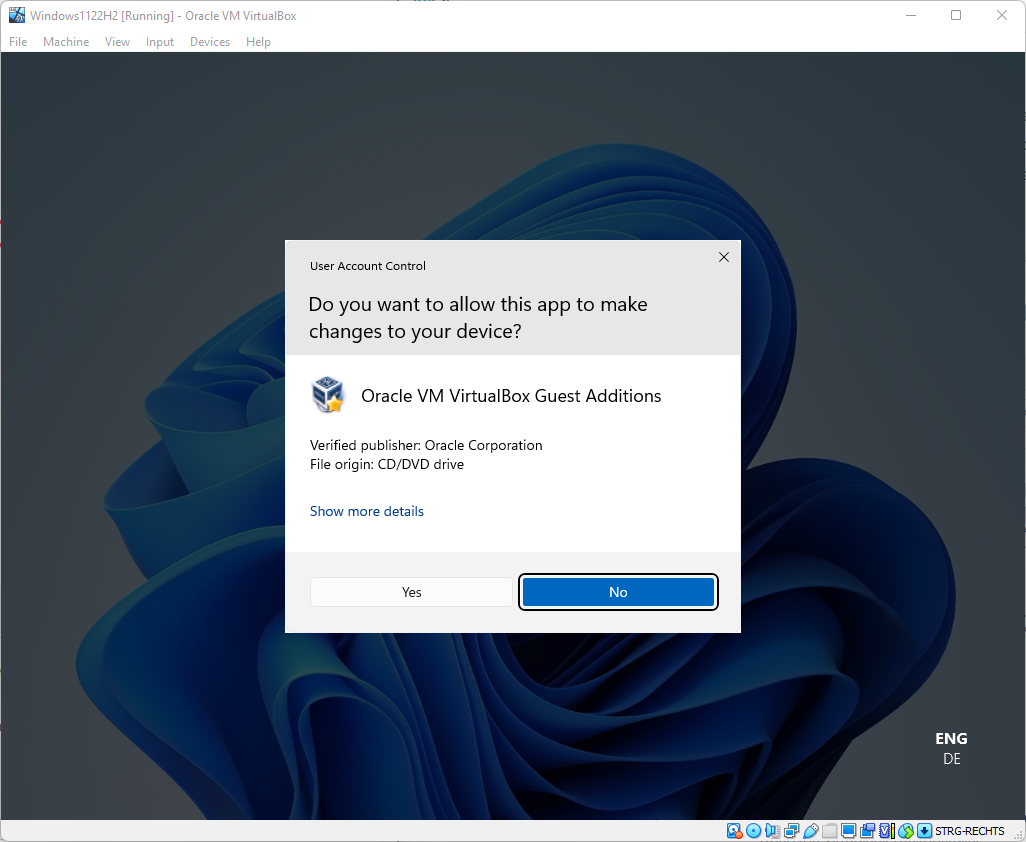
Windows displays a User Account Control prompt, which you need to allow by selecting Yes.
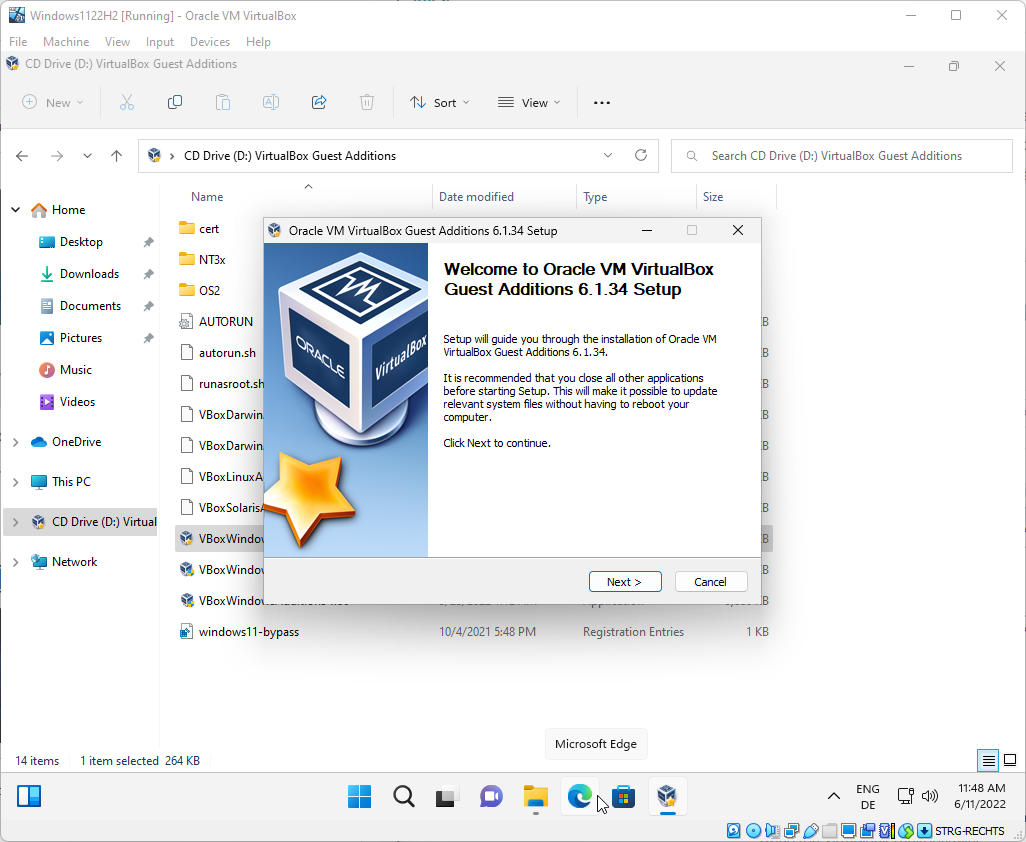
The installer launches after you have selected Yes. Select next on the first page that is displayed.
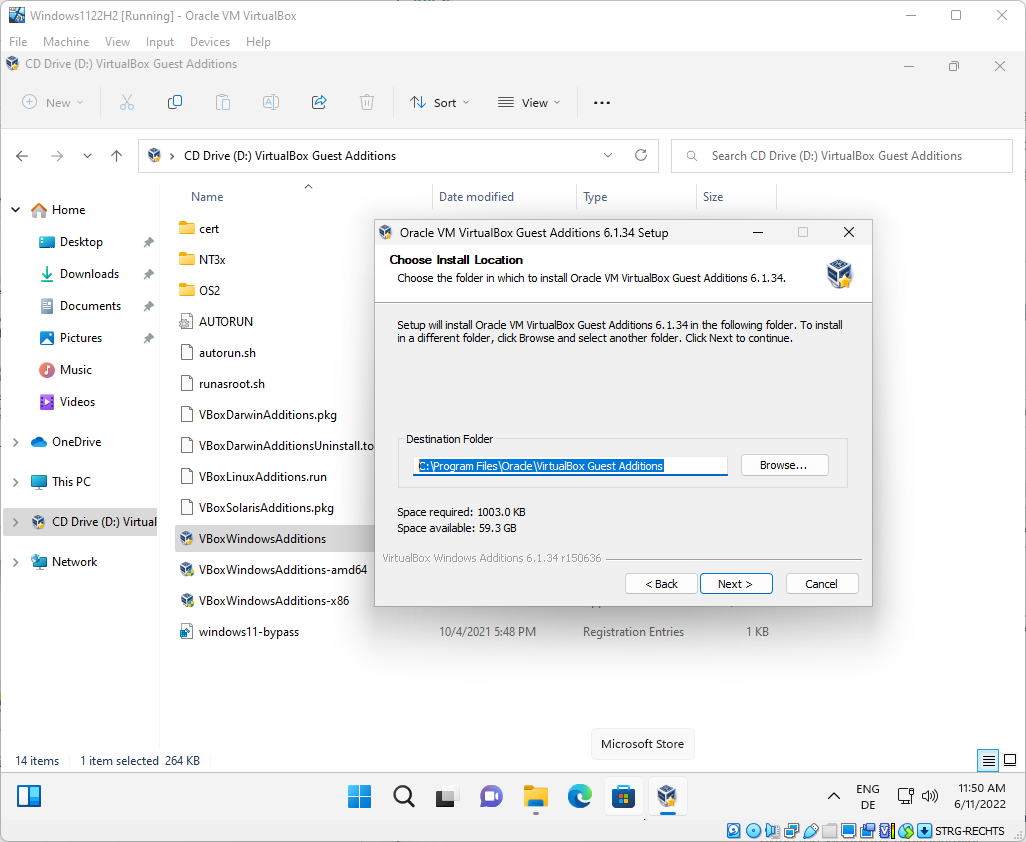
The page that follows displays the destination folder for the files that will be installed. You may change it, but most users may want to keep the default path. Select Next to proceed.
The final screen displays the components that will be installed. You may disable the creation of a start menu entry, but the two remaining components will be installed. Select the install button to proceed.
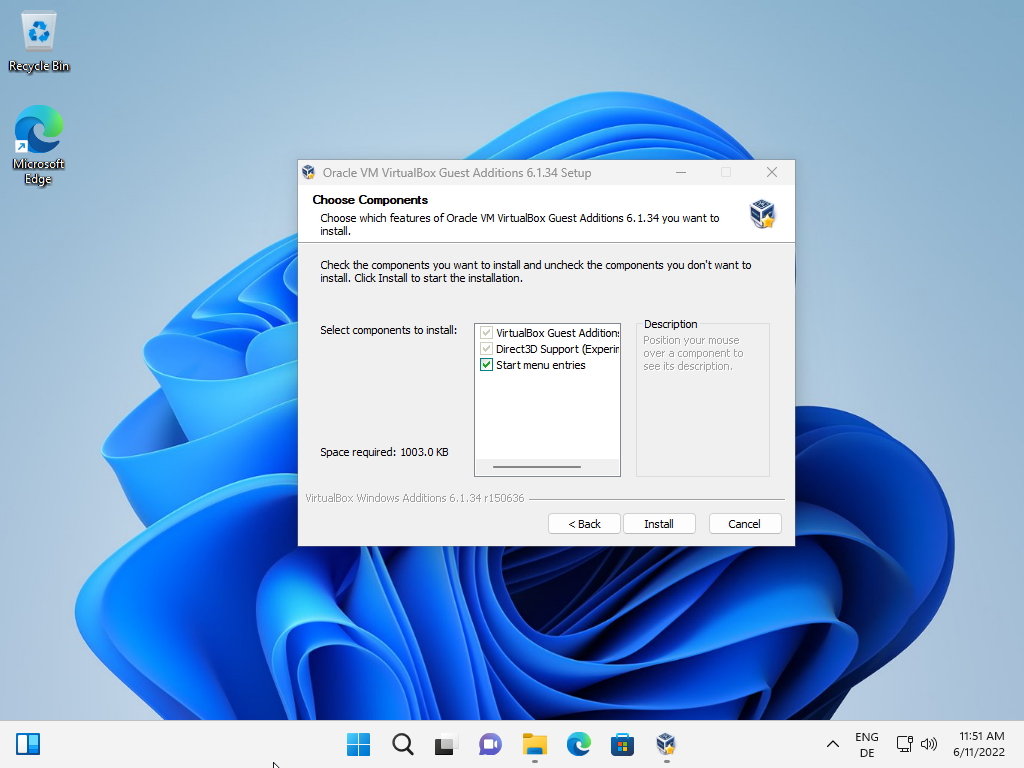
The installer displays its actions once you hit the install button.
It is necessary to reboot the virtual machine to finalize the installation. You may do so right away by selecting "reboot now", or at a later point in time. Select finish to exit the installer.

All screen resolutions are unlocked after the restart. Select View > Virtual Screen X to select a different resolution. Please note that it may take a few seconds before the resolutions become available.

The physical display limits the available resolution; you can't go beyond the maximum resolution that is supported by the display.




Awesome, Thank you!
What is NOT pointed out in this article is that the licensing for Guest Additions is different than that for VirtualBox itself. The Guest Additions is more restrictively licensed (PUEL license) and for many uses you require a purchased license for the Guest Additions. The license may only cost $50 (11/2022) but Oracle only sell in bulk – minimum order is 100 units – so one seat in a commercial environment costs $5000
Thanks so much for this instructional! I would’ve had no idea that installing a program in the VM OS would have solved this resolution problem for VirtualBox itself! Clearly, I have a ways to go before I understand virutal machines.
Definitely a fan of ghacks now!
You only need to install Guest Additions once.
Subsequently, when you upgrade VirtualBox, it upgrades the Guest Additions.
I seem to remember that I fixed the problem by setting the display resolution in the OS, rather than thru a VirtualBox setting.
And because I like accuracy more than fake news,
https://en.wikipedia.org/wiki/64-bit_computing
It also explains where the amd64 comes from, and not because of compilers (since they use the current binary name) because that was actually the name x86_x64 changed to since it was like mentioned AMD the corp who developed it. Wikipedia doesnt lie.
But its not for AMD machines, like @Jeff wrongly claimed.
See my reply above. Again, I didn’t claim amd64 is for AMD systems. Martin did, in the first version of this article. Martin messed up with the concept of amd64, NOT ME. I was here to correct him, and thankfully he did correct it in this 2nd version. So stop accusing me (like five times!) of the mistaken statements that Martin made.
What’s so annoying about you is that you didn’t even read what I had written. If you did, you would know what I was talking about. You only read one sentence from my reply, which is the quotes from Martin, thought I said those, and suddenly picked up the gun and wrote 6 or 7 posts how “Jerry has no idea”. Gosh, you are such a clown.
As stated above, AMD64 does not refer to anything AMD-specific – it’s the term used for all 64-bit Windows. The term is used simply because AMD invented the 64-bit architecture used today by AMD and Intel. Yes, I know Intel invented one first, but it didn’t take off because it was incompatible with all previous Win32 software.
Correct, and the filename is only because Virtualbox windows binaries are cross compiled in Linux and the compiler doesn’t use x64 by default for x64 bitness and uses the default amd64.
But its OK, people dont have to know everything, its only when they realize that they are talking rubbish and refuse to learn the actual facts, that then and only then these people can be kindly referred to as ignorant.
did we really need a dedicated tutorial just to tell people “install vmware tools/vbox guest additions lol”?
This is a very clever article, to show everyone windows 11 running on Virtualbox, anyone who is not dumb or afraid to RTFM can go read https://www.virtualbox.org/manual/ch04.html which explains what this article explains, but with no pretty screenshots of Windows 11.
I wonder ho much Microsoft pays for these articles.
Agree, i thought that was common knowledge when tinkering with virtual machines. It was literally the first thing i installed when when playing around with VMWare Workstation almost 20 years ago.
Is this article really written by Martin? Because it is full of mistakes (or misleanding information, at least).
1. “The description may sound as if you’d need to insert a CD image, but this is not the case.”
IT IS THE CASE. VirtualBox literally has an ISO image in its program folder, and by clicking “Insert Guest Additions CD image” it inserts that ISO image for you. Users can do it manually, especially if anyone want to download and test different versions of Guest Additions.
2. “VBoxWindowsAdditions is for 64-bit systems.” “VboxWindowsAdditions-amd64 is for AMD systems.”
Both statements are wrong/misleading. “VboxWindowsAdditions-amd64” is for 64-bit systems. It has nothing to do with AMD systems or AMD processors. “amd64” is just a term interchangeable with x64 (well, with very subtle diffrence that normal users can ignore). And “VBoxWindowsAdditions” (without suffix) is for both 32-bit and 64-bit systems. In fact, it is just an automatic selector (look at its tiny file size!). It automatically selects from -amd64 and -x86 based on the right architecture it detects. So:
– If the guest OS is 64-bit, use either “VBoxWindowsAdditions” or “VboxWindowsAdditions-amd64”.
– If the guest OS is 32-bit, use either “VBoxWindowsAdditions” or “VboxWindowsAdditions-x86”.
Come on Martin, you are much better than this…
@jerry @martin
and to clarify vbox manual says…https://www.virtualbox.org/manual/ch04.html
4.2.1.4. Manual File Extraction
To explicitly extract the Windows Guest Additions for another platform than the current running one, such as 64-bit files on a 32-bit system, you must use the appropriate platform installer. Use VBoxWindowsAdditions-x86.exe or VBoxWindowsAdditions-amd64.exe with the /extract parameter.
So by reading that you can indeed confirm Jerry has no idea about compilers and cross compilers, since Windows vbox binaries are cross compiled on Linux and that how Linux compilers name the 64bit binaries FOR ANY platform.
@unicorns-will-save-you
I’m sorry my friend, but you are so hilarious. The two stupid sentences you quote (“VBoxWindowsAdditions is for 64-bit systems.” “VboxWindowsAdditions-amd64 is for AMD systems.”) were not said by me. Those were written by Martin originally. He made those stupid mistakes. He messed up with the definition of “amd64”, and I (just like you) tried to correct those mistakes. Why do you think I used the quotation marks in the first place?? Did you see that I said “both statements are wrong”? And did you see the article was “updated June 12”? It was updated/corrected because I pointed out the mistakes in those two sentences.
Again, those stupid statements that you laughed at were written by Martin, not by me. If anyone “has no idea about compilers and cross compilers”, that was Martin, not me. You are too late to the party and have no idea what the first version of this article looked like, and you wrote a bunch of stuff that’s essentially the same as what I had written earlier.
And please re-read @Farmers’ comment. When he said “as stated above”, he meant “as stated by Jerry”. That means you, I, and @Farmers all share the same opinion. Clear?
@Jerry
>2. “VBoxWindowsAdditions is for 64-bit systems.” “VboxWindowsAdditions-amd64 is for AMD systems.”
Incorrect…
VBoxWindowsAdditions detects your OS bitness and either calls VboxWindowsAdditions-x86 or VboxWindowsAdditions-amd64 which the later is just a 64bit for all 64bit Windows systems.
The amd in filename has NOTHING todo with AMD the brand… Clearly you arent familiar with what you are talking about and whats worse anyone reading
If you dont believe me go ask irc://irc.oftc.net/vbox or https://www.virtualbox.org/manual/ch04.html and read this part
> Unless you have the Autostart feature disabled in your Windows guest, Windows will now autostart the Oracle VM VirtualBox Guest Additions installation program from the Additions ISO. If the Autostart feature has been turned off, choose VBoxWindowsAdditions.exe from the CD/DVD drive inside the guest to start the installer.
>The installer will add several device drivers to the Windows driver database and then invoke the hardware detection wizard.
The hardware detection wizard is the part that detects which guest OS bitness and calls respective executable.
In fact you can just bypass the detection wizard and run the respective binaries directly if you know which Guest OS bitness you have
Sigh for calling out martin and providing false information.
This has been corrected, thanks for pointing it out.
I have 2 virtual machines with the Guest Additions: one win 7 and one win 10.
In the first there is no “View” in the menu !
In the Win 10 machine, the resolutions are not grayed out but nothing happens when you click on them. On the other hand, the scale works.
Sorry, resolutions smaller than 1024×768 work, but larger resolutions don’t!
@Belga
It all works, its been buggy at times but if you run a recent VB version it works and has worked for the last 10 versions.