VideoCleaner is an open source video enhancement tool for forensic purposes
VideoCleaner is a forensic video enhancement application that is used by law enformencement agencies and forensic experts.
Technically it is not an application on its own, but a script executed in a different software, but for the sake of understanding what it does, let's call it a program.
Tip: if you are interested in forensic software, check out previously reviewed solutions such as AChoir, OSForensics, or FotoForensics.

Basically it can be used for getting more details from videos that are of poor quality especially in terms of lighting. The program is open source and the download is delivered as an archive which contains the program's installer MSI package, an installation guide and a user guide. There are a couple of steps mentioned in the installation guide that you need to follow for setting up VideoCleaner to work.
The program installs to the top-level of the C Drive, i.e, in the C:\VideoCleaner\ folder and requires Admin rights to be installed. It also installs AVIsynth and FFDshow which it requires to process videos.
Once installed, an application called AvsP opens, which is the interface of VideoCleaner. You will see shortcuts to install Camstudio, Lagarith Codec and XVID Codec. All of these are optional of course, and all open-source projects.
Warning: I should warn you that Camstudio is infamous for bundling adware in its installer.
On a side note, If you want to record on-screen and audio content, I'd say skip it entirely and use something safer and modern like OBS.
The codecs however can be useful as they add support for extra features like lossless video and support for the Divx format. I used them while testing the program but it was quite the hassle to install all of these on the system; remember that you may want to update these frequently as well.
Let's get to the main application; you can open it from the Run VideoCleaner icon in the Start Menu or Desktop. One of the first things to do, and this may sound really weird, is to NOT use the menu at the top of the screen. That's because the menu is AvsP, which is the host program running the VideoCleaner script. So forget that menu completely.
Note: I did use the menu to see how it would turn out, and it failed to load the media properly because it was missing the VideoCleaner.avs script.
When you click on the VideoCleaner shortcut, a pop-up Windows Explorer window should appear. It can be used to navigate to the folder where the image or video that you want to verify or enhance is located. It supports video formats like AVI, MP4, MKV, WMV and image formats such as BMP, PNG, JPG. There are a few sample images and videos included in VideoCleaner's Samples folder which you can use to learn how to work with the program.
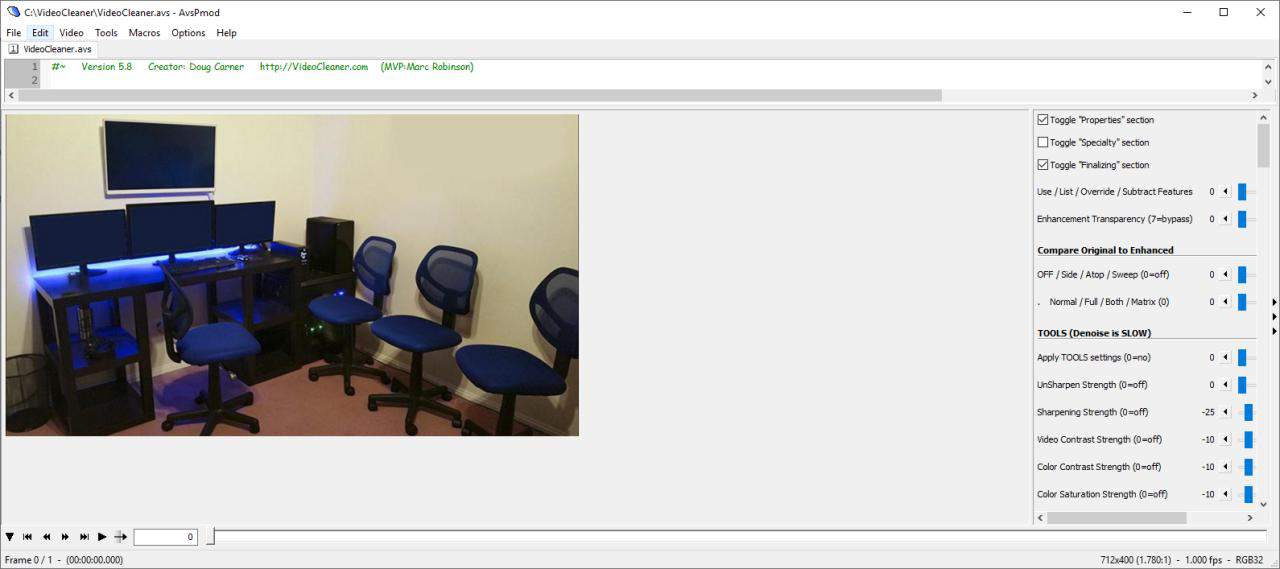
Once you load some media, you will see a preview of the video or picture with playback controls just below the preview pane. There is a panel on the right-side of the screen; this the VideoCleaner interface. You can toggle the Properties, Specialty and Finalizing sections using the checkboxes. The rest of this interface consists of sliders. Move the slider to the left or right to adjust the corresponding value. The current value is displayed towards the right edge of each line.
The 4 sliders on the top are useful for checking if there are differences between the frames, and also for comparing the original video with the one you have edited. These can be useful to check if a video has been tampered with.
And now we come to the editing sections. Each of these has a master switch slider (at the top) that you will need to enable to apply the effects. Tools has various filter options that you can use to adjust the Sharpness, Color Contrast, Saturation, Hue, Histogram, Denoise, and other settings. Can you see the jagged lines on each object on the screen? That's because I increased the sharpness.
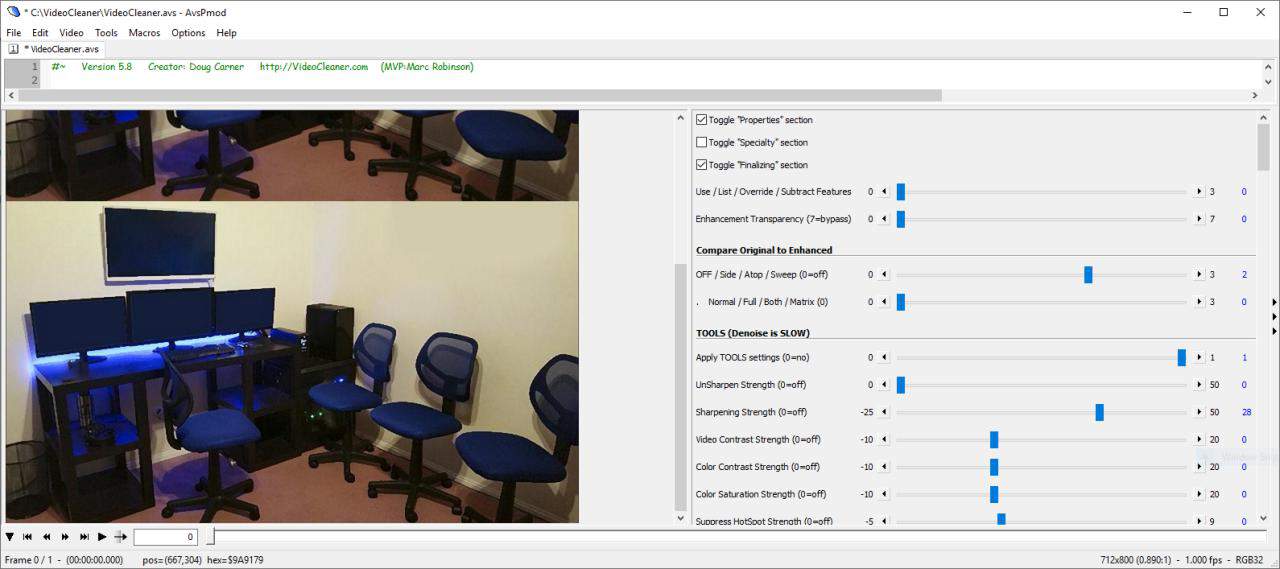
The Curve section is for altering the lighting balance. Look at the image now, that can show some hidden details like what's underneath the computer table.
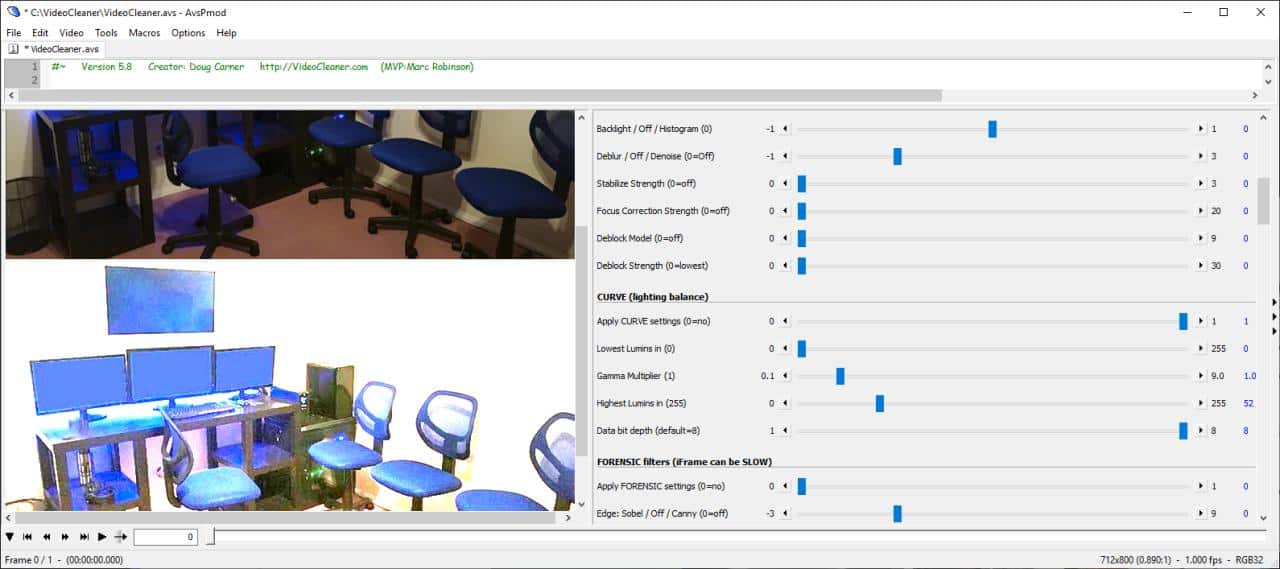
The Forensic filters are a bit more advanced and let you adjust Edge detection, isolation, RGB amplification. The analysis and information tools have sliders for enabling Pseudocolors, noise, etc.VideoCleaner can be used to adjust the color channels, add accents to an area, adjust the angle, etc. You can also use it to add timestamps or numbers to frames, annotate text, margins to the media.
Right-click on the media to adjust the zoom levels, access the crop-editor, view the properties, and other options.
When you're done enhancing the video hit F7 to save it. You can also export it to Virtualdub by using F6.
There are far too many options in VideoCleaner to list here, and quite frankly it works best with videos. Choose a dimly lit video and load up some filters to see the magic. Hit F1 to see the keyboard shortcuts supported by the application.
Closing Words
I think VideoCleaner is an incredible tool and could be useful especially when dealing with footage shot by CCTV cameras, or other low quality videos.








@ashwin: Not working. Get no menu on the right
I love finding new programs for working with problematic photos/videos! Especially for videos as this is harder to find. I don’t use any of these things for forensic purposes obviously, but they help for stuff like severe color casts or grabbing more detail from extremely bright/dark content.
Only problem, is why they would include Camstudio? Someone, who I’m assuming is a dev, posted above clarifying that they use the last version that was clean but still, it’d be better to just get rid of Camstudio to begin with…
Nice review. Hadn’t heard of this and will definitely check it out.
Thank you for the review. One correction is that the included Camstudio has no Adware (as it was the last version before they started that terrible policy). VideoCleaner can also detect manipulated images or videos. It is note worthy that nothing is monetized, not even the hosting website or its Youtube training videos, support and updates are free forever, and that we will gladly add user requested features.
Thanks you very much for this very interesting review !
With a good video editor most of what VideoCleaner can do is possible to a degree by toggling various filters with two editor instances open but that’s a very arduous process. VideoCleaner’s free, so why bother?
VideoCleaner works well for its intended purposes; I’ve used it to clean up some clips that were muddy or had excessive bloom. It’s a good specialty tool vs. an overall video editor.