How To Schedule Cloud Hosting Data Backups
With every major Internet company offering their own cloud hosting and synchronization service, it is time to look at ways to make use of that extra storage. One option that you have is to use it for data backup. Depending on the storage space that you have at your disposal, it is more or less feasible for that. While you probably won't be able to use the cloud hosting service to store full system backups, you can use it to backup important files.
The first thing that we need to address is the question why you would want to use a backup software for that, as it is possible to move the files that you want to backup manually into a folder where they are then synced with the service.
Most services, with the exception of Cubby and a few others, make use of a root folder where all files that you want synced with your online storage need to be placed in. Depending on the number of files and documents that you want to backup, and their location on your system, it is more comfortable to automate the process and let a software handle it for you. Plus, you get extras like compression and encryption that would require additional manual steps to complete.
Preparations
You need to make two decisions: First about the cloud hosting service that you want to use, and then about the backup software that is suitable for the job.
- Picking a service: If you are already using a service, then it may make sense to use it for the purpose of backups as well, provided that it is offering enough storage space for the operation. Most services let you buy extra storage, which you can do if you do not want to use a different service for the purpose. When it comes to free space, SkyDrive is currently leading the pack with 7 Gigabytes of free storage. (Check out our Cloud drive price comparison table for further information)
- When it comes to the backup software, you need one that suits your needs. I'd suggest to use one that is offering compression, to save up disk space, and encryption, to protect the data in the cloud. And since you want to automate the process, it should support scheduling as well. In this tutorial, I'll be using Ace Backup, a free backup software that is offering those capabilities. (Check out 10 best Windows backup programs for additional options)
Schedule Cloud Hosting Data Backups
Now that we have completed the preparations, it is time to configure the backup job in Ace Backup. Start the program after installation, and click on File > New to create a new job.
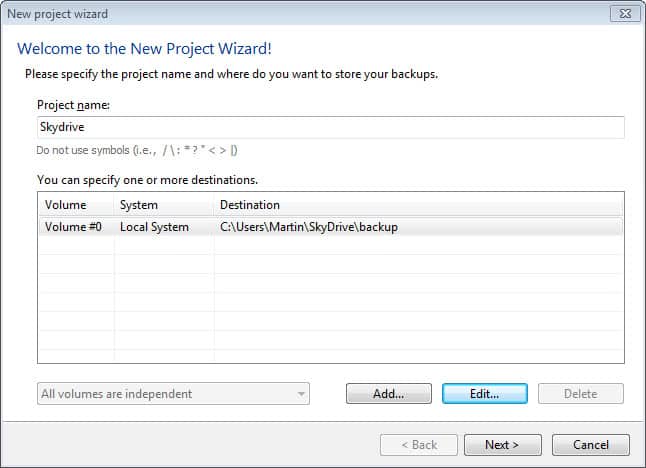
1. Project name, Backup location
Here you assign a name to the backup, and select at least one location where you want to store the files in. I suggest you create a new folder in your SkyDrive folder for that. The standard SkyDrive folder is located in C:\users\username\SkyDrive\
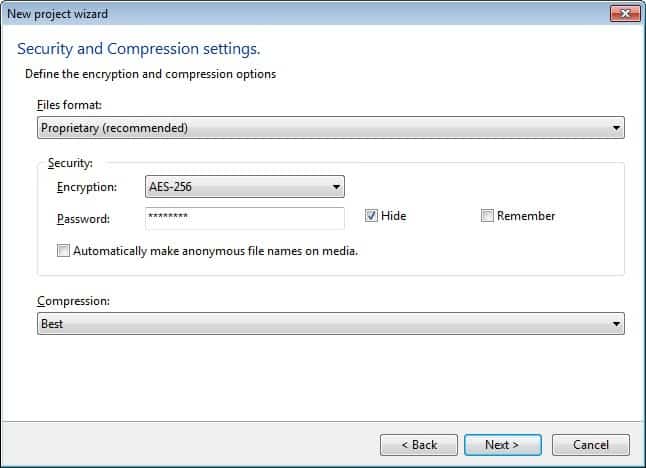
2. Security and compression
Now that you have made the selection, you can select the security and compression options. I suggest you use encryption and compression to protect the backup and make it use as little space as possible.
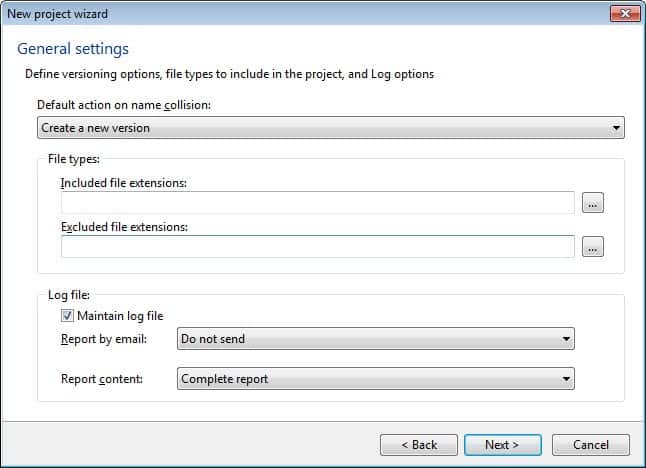
3. General Settings
Here you can configure how name collisions should be handled by the backup software. You can select to overwrite the old file, or create a new version whenever it changes. File types can be included or excluded in this step as well.
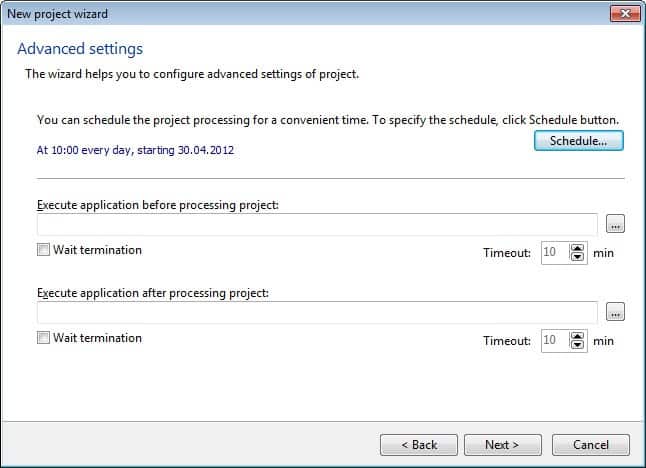
4. Advanced Settings
Click on the schedule button and configure it. The application uses the Windows Task Scheduler for that. You can for instance configure the program to create or update the backup once a day in the morning, or at night. If you want, you can also select to run applications before and after the project has been processed on the system.
5. Selecting the local files
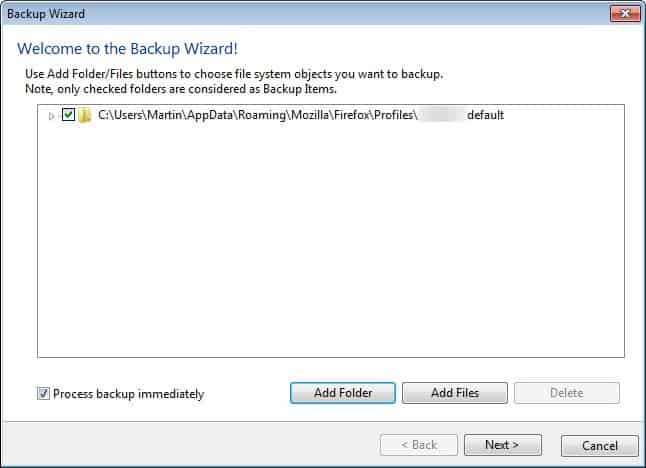
Now that the backup job has been configured, it is time to add local files and folders to it. Click on Project > Backup Wizard for that, and select the files and folders that you want to backup on your system. Note that the backup will be processed immediately, unless you disable the option in the wizard.
6. Processing
Ace Backup compresses and encrypts the data before it transfers it to your SkyDrive folder. SkyDrive will then synchronize the data with your online storage. While you will end up with the backup on your local computer and on SkyDrive, it should not be that big of a issue as the method is best suited for small and medium sized data backups.
Closing Words
You can replace SkyDrive with the name of another cloud hosting service. Dropbox, Google Drive and others are all capable of storing your backups online. The solution is best suited to store important documents, databases or files online. Automation, compression and encryption makes it more secure and error proof than a manual solution.
Advertisement


CX gives 10GB of free storage and it also syncs from a folder on your hard drive so I’m sure it could be set up for scheduled backup as well:
http://www.cx.com
Thanks for the write up Martin.
I am a bit of a noob when it comes to cloud storage. I have been using SkyDrive for a little while now and have avoided putting sensitive data (things that included personal details etc) on it even though it would be handy for me in some cases.
When it comes to the encryption and compression, I assume that is making it less ‘other’ device friendly?
I use my phone a lot for SkyDrive access and I am wondering if it would be possible to compress and encrypt files but still be able to open, edit and save from devices other than the one they’re ‘created’ on.
As long as you have the passphrase at hand, you should be set, provided that the backup software supports accessing backups from different systems. Ace Backup comes with an import wizard that you can use for that task. All you need to do is point it to the backup path which imports the project. Once that is done, you need to supply the password.