How To Scan Documents on Your iPhone or iPad?
Many people use iPhones, but most of them aren’t fully aware of all the features these phones offer. For instance, did you know that your iPhone has a hidden document scanner? Considering the number of times you’ve headed out to get documents scanned without knowing you had a scanning device with you all along. This article will help you understand how to use your iPhone or iPad to scan documents.
In-Built Scanners
Not everyone owns those all-in-one printers which come with a scanner and when you need to send out scanned documents, it might get daunting since you need to go look for a place to get it done. While most people don’t know this, their iPhones and iPads come with a scanner to help scan and send these documents right away.
If you’re about to get bummed and think we’ll go on about how good it is and then simply mention you can click a picture of the document you intend on scanning, we’ll stop you right there. We’re not talking about clicking a picture but we’re talking about an actual scan function Apple introduced in 2017 with its iOS 11 update. The scan feature is in the iPhones Notes app, so if you’ve never used the app, it’s likely you have no clue it’s there.
How To Use the Feature?
In case you’re wondering how to find this hidden feature, we’ll walk you through it. For you to scan a document, you’ll need to first place the document on a flat surface with ample lighting. You then need to open the Notes app on your device. You can create a new note or open an existing one. You can also create a folder on your phone and name it scanned documents so you can store all the scanned documents in one location.
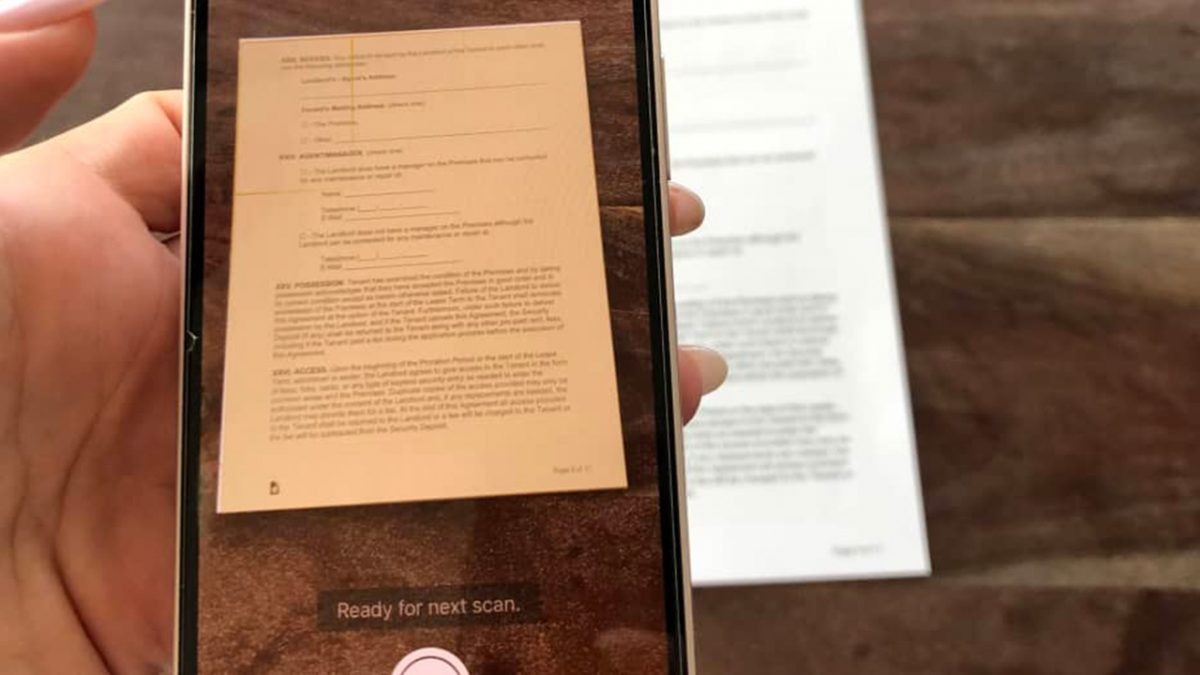
Once you’ve opened the note, click on the camera icon and then click on scan documents. This will activate the camera on your iPhone or iPad. To start the scan, you need to click the shutter button at the bottom of the screen. You’ll get a couple of prompts on your screen, so make sure you follow through. To get the scans clear, hold the device with a sturdy hand over the document for it to be scanned.
As soon as you begin the scanning process, there’ll be a small yellow box icon which will appear on the screen. You’ll also get prompts on whether you need to move the camera closer or further away. Once the scanner identifies the entire document, it will capture the scan. If your device is unable to locate the document, you can click on the shutter button again. The thumbnail will stay open till your scan is complete. You can use the function to scan a single page or multiple documents in one go. Once complete, you can click save.
You can adjust the document to get the perfect image. This includes color scheme adjustments, rotation of the image, or even adding more pages. You can also crop the image if you want to eliminate the excess area the scan covered. If you tap on the document and open it, you’ll get an option to edit the file and you’ll get access to multiple editing tools to help enhance the scanned piece.
There’s a small circle near the crop tool. It’s highly effective to cut out corners from the document. You can also use the magnifying glass to further get into detail and edit the file. Once your file is scanned and edited the way you want, you can choose to sign it and share it directly. To share the file, you need to click on the share button, which is at the top right corner of the screen. If you want to add your signature to the document, you need to scroll down below the shortcuts and click on Markup. The tool will allow you to draw freestyle or enter text. There’s a + sign which enables you to see all these options. Once done signing, you can choose to email the file or save it for later. Now that you’ve learned how to scan documents, we hope you use the feature more often.


These scans seem to be simply photos, with some corrections applied. And for the record, I stopped using the iOS Notes app after I found out one day that it had uploaded all my notes to Google without asking (a surprising side effect of configuring a Google Mail account on the device.)