How to disable Bing Search in Windows 10 version 2004 and newer
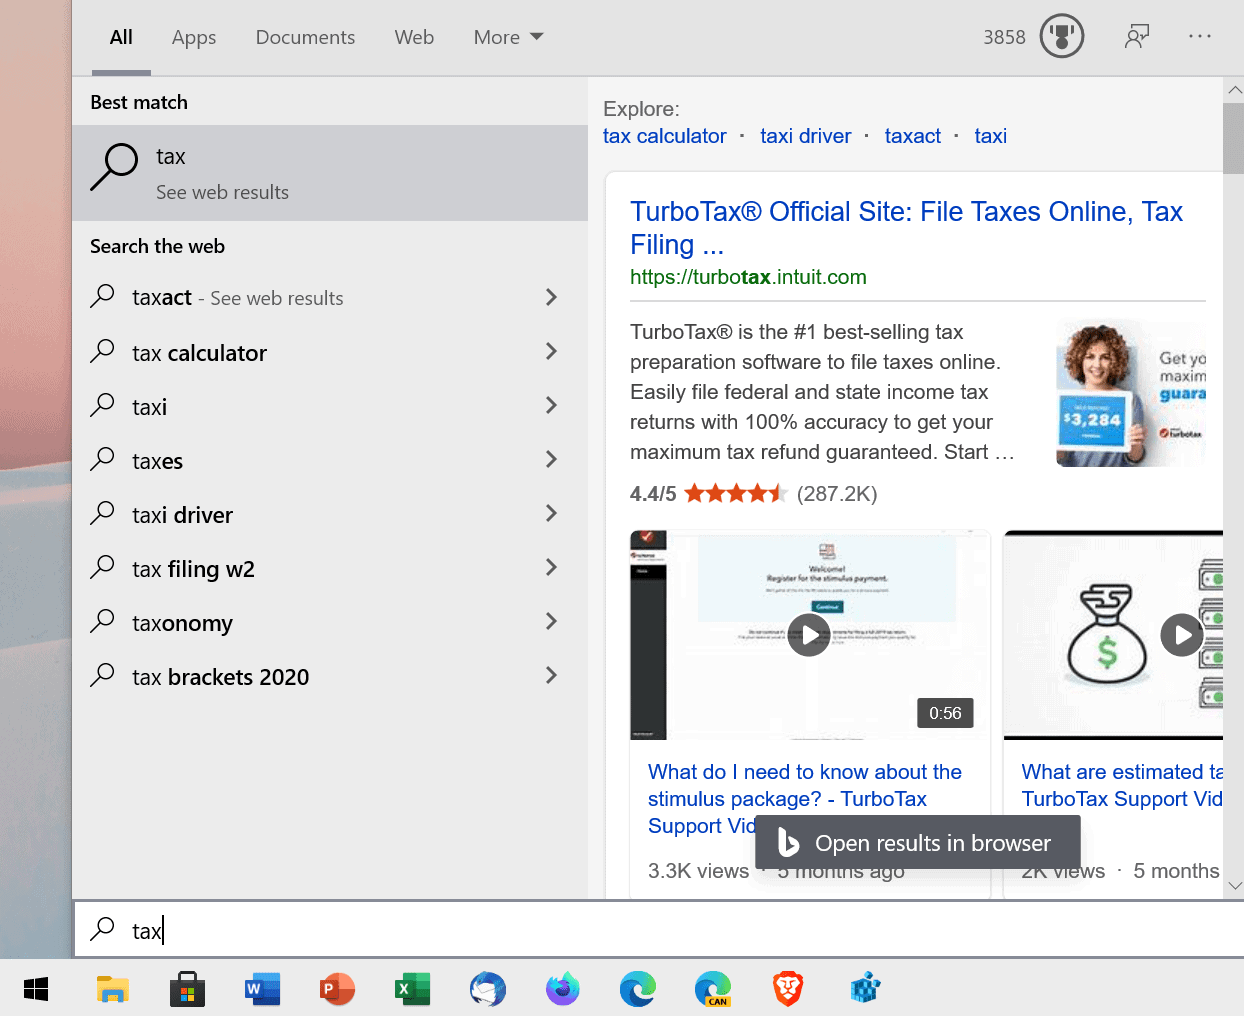
When Microsoft launched its Windows 10 operating system in 2015, it merged the local search functionality with the digital assistant Cortana and also Bing Search.
Cortana has since been revamped completely and cut from many parts of the operating system, but Bing Search is still integrated. Run a search for something, and you may get local and remote results. There has never been an option to switch the search engine.
Some users may like the feature, as it may speed up certain look-ups or operations; others dislike it, as the local input is submitted to Microsoft servers. Bing is also not the best of search engines outside of the United States, and especially for non-English speaking countries.

Tip: if you rely on local results, check out this guide to manage search index locations in Windows 10. If you run into troubles, use Microsoft's Windows 10 Search Indexer Diagnostics app.
The remote functionality of Windows 10 Search's was the cause for several issues in the past. Users ran into CPU spikes in 2019, and saw a blank box only for some time in 2020.
Up to Windows 10 version 1909, administrators could set a Registry key, BingSearchEnabled, to turn off Bing Search functionality in Search. Microsoft removed the Registry key in Windows 10 version 2004. According to Windows Latest, a new option is now available to disable the Web Search functionality of the Windows Start Menu.
Disable Bing Search in Windows 10
- Note that you need to have elevated rights to edit the Registry. If you use a standard user account, check the addendum below this list.
- Create a backup of the Registry just in case.
- Open the Start Menu, type regedit.exe, and load the Registry Editor result that is displayed to you.
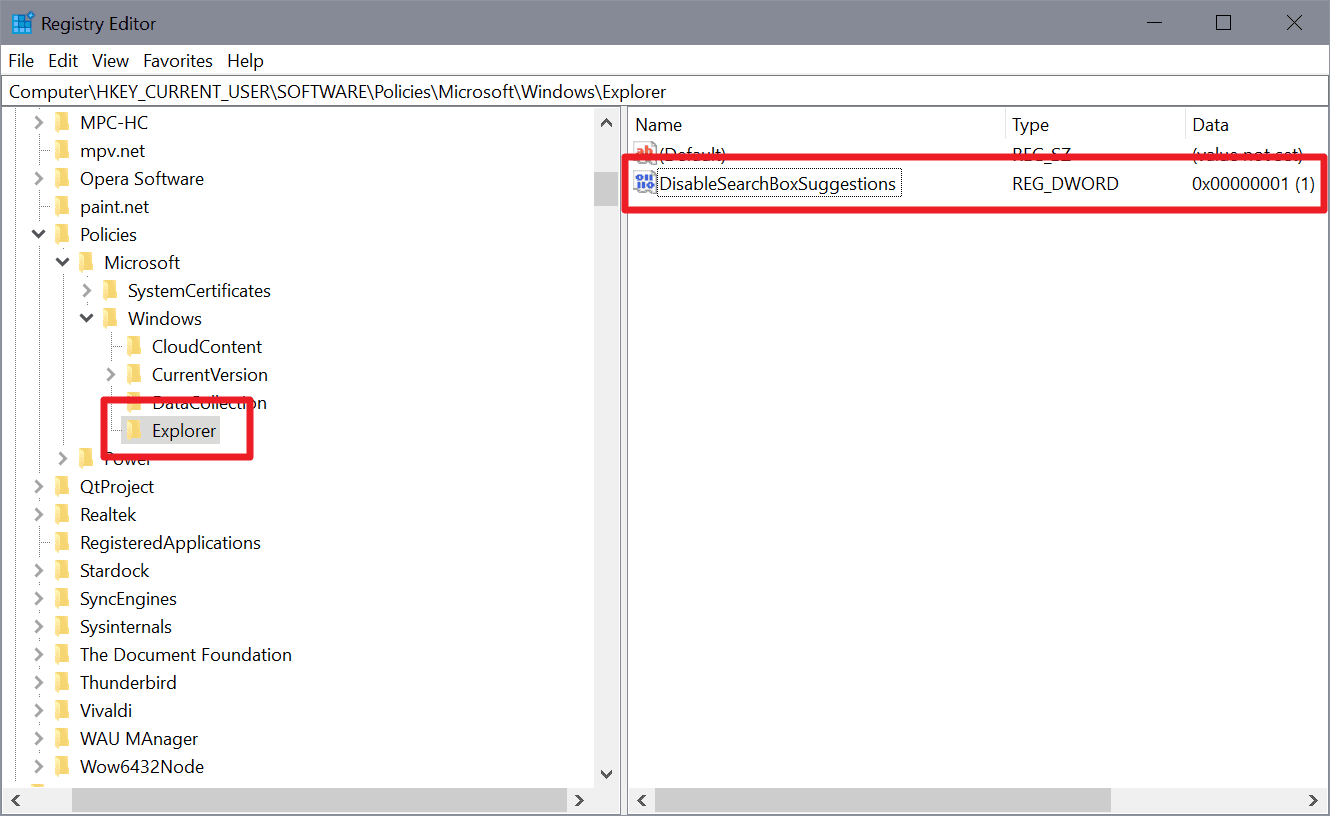
- Go to the Registry key Computer\HKEY_CURRENT_USER\SOFTWARE\Policies\Microsoft\Windows\
- Check if a subkey Explorer exists.
- If the key exists, go to 6) below.
- If it does not exist, right-click on Windows, select New > Key, and name it Explorer.
- Right-click on Explorer and select New > Dword (32-bit) Value.
- Name it DisableSearchBoxSuggestions.
- Double-click on it and set its value to 1
- Restart Windows, sign-out and on again, or kill the Search process in the Task Manager to complete the process.
You can restore Web search functionality by deleting the Dword DisableSearchBoxSuggestions using the Registry Editor.
Addendum:
Günter Born notes that the guide mentioned above works only for users signed-in as administrators. Additionally, users may set the Dword value DisableSearchBoxSuggestions to 1 to disable it.
The steps are slightly different for standard users because of this:
- Open the Registry Editor with elevated rights.
- You find the relevant path under HKEY_USERS, and need to identify the correct account. Born suggests that you start the Registry Editor as the actual user first and create a simple key under HKEY_CURRENT_USER, e.g. Martin, for identification purposes.
- Follow the path to SOFTWARE\Policies\Microsoft\Windows\, e.g. HKEY_USERS\S-1-5-1-<SID-Angabe>\SOFTWARE\Policies\Microsoft\Windows\
- Create the Explorer key under Windows.
- Add the Dword (32-bit) Value DisableSearchBoxSuggestions under Explorer.
- Set its value to 1.
When you run a search now on Windows 10, you should get local results only. The quick search suggestions, e.g. to run a search for weather, are also no longer listed when you open the Start Menu on the system.
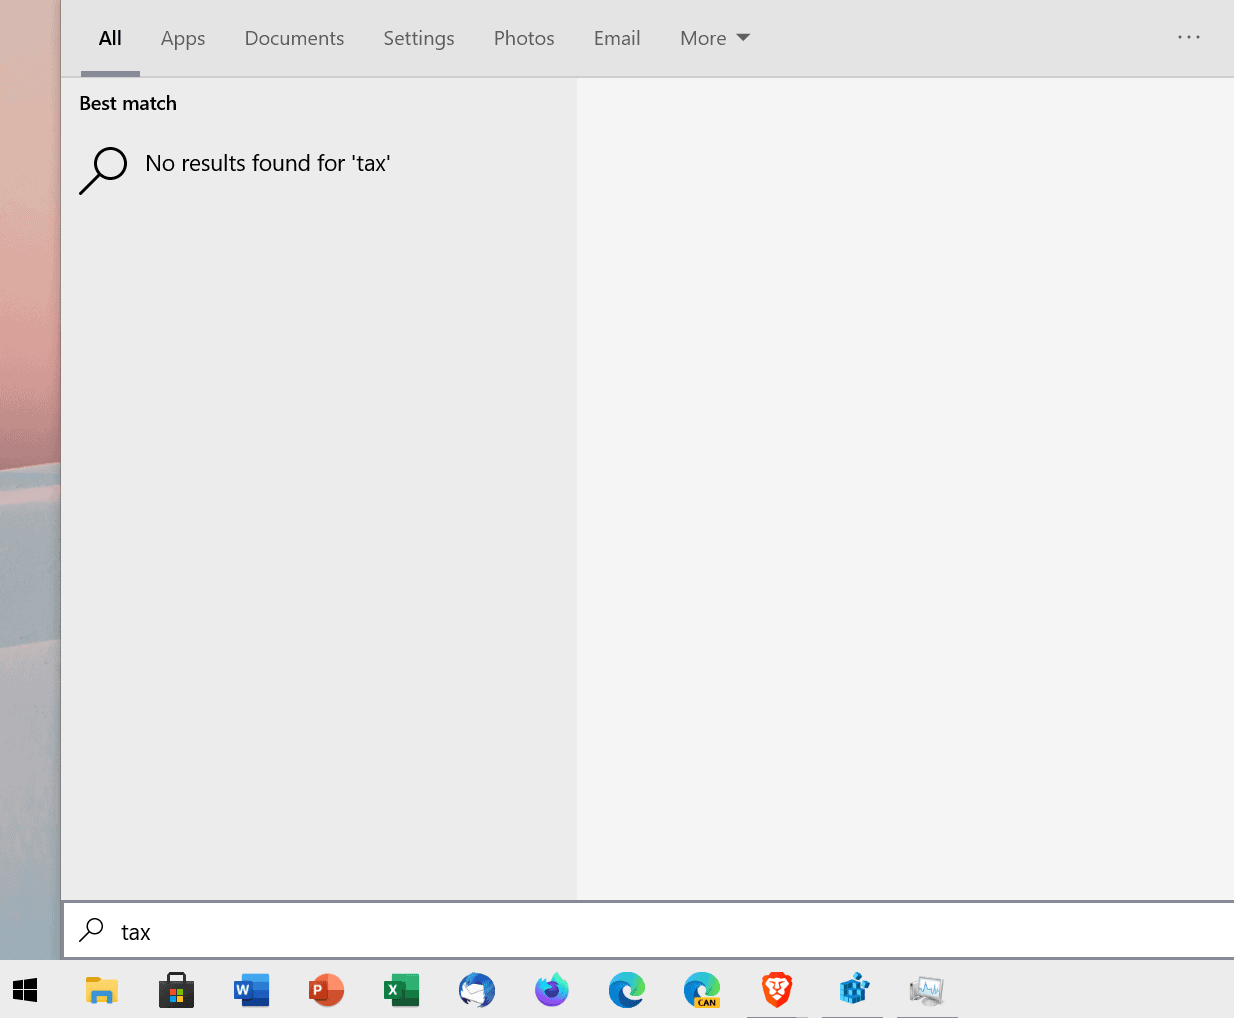
Disabling Bing Search in Windows 10 has several benefits: it is better for privacy, and it eliminates a cause for search issues on the system.
Using the Group Policy Editor
You can make the modifications on Windows 10 Pro and Enterprise versions using the Group Policy Editor.
- Open Start, type gpedit.msc, right-click on the result and select Run as Administrator.
- Go to User Configuration\Administrative Templates\Windows Components\File explorer\
- Locate and open Turn off display of recent search entries in the File explorer search box.
- Enable the policy.
- Restart Windows.
Now You: What is your take on the integration of web searches in Windows Search?





@Martin
Re:
> “Add the Dword (32-bit) Value DisableSearchBoxSuggestion under Explorer.”
… under the addendum.
Can we get a pluralization of that key value name please. This explains why my friends computer was still showing web results in that account. i.e. typo
Thanks so much and keep up the awesome work! :)
Done, thank you!
Ill keep Windows 7. Windows 10 is intrusive. Microsoft will change registry keys every major update to get people to use their awful search.
This is a function that shouldn’t exist or at least be optional and disabled by default. But i understand why Microsoft did the opposite; no one would use it unless it’s turned on by default. This is not for user convenience as much as funneling traffic through Bing to boost it’s numbers in order to increase the ad-revue profitability. That’s where the real money is and that’s the reason why MS introduced Cortana in the first place: You are a product, not the end user.
This is what I’ve been using:
Computer Configuration\Administrative Templates\Windows Components\Search
“Do not allow web search”
“Don’t search the web or display web results in Search”
I’ve read similar articles on this topic, where more than a few particularly point out this ability is due to a recent Windows update. I’m curious as to whether I can utilize this tweak while currently running version 1909.
IIRC you don’t need it (it won’t do anything) pre-2004 as the old method Rick mentions bellow works, in 2004 they removed the group policies he mentions for anything but enterprise versions.
You can’t search your local files without Microsoft knowing what you’re searching for. Just the usual dystopian privacy problems that have become customary from the Big Tech fascists and their sold out fake alternatives.
Can you cite proof that Microsoft knows what you’re searching for in terms of local files?
softscheck.com/en/privacy-analysis-windows-10-enterprise-telemetry-level-0/
https://support.microsoft.com/en-us/help/4468233/cortana-and-privacy-microsoft-privacy
“your web search queries will be treated as described in the Bing section of the Microsoft Privacy Statement.”
https://privacy.microsoft.com/en-us/privacystatement#maincortanamodule
M$ know every keystroke you type in W10 spysearch.
this was awesome! thank you!
Shouldn’t take a registry edit just to choose a search engine. Personally have stayed away from anything Microsoft has baked into Windows 10.
Useful article, thanks @Martin. :]