Record screencast or web cam video with VokoscreenNG an open source program for Windows and Linux
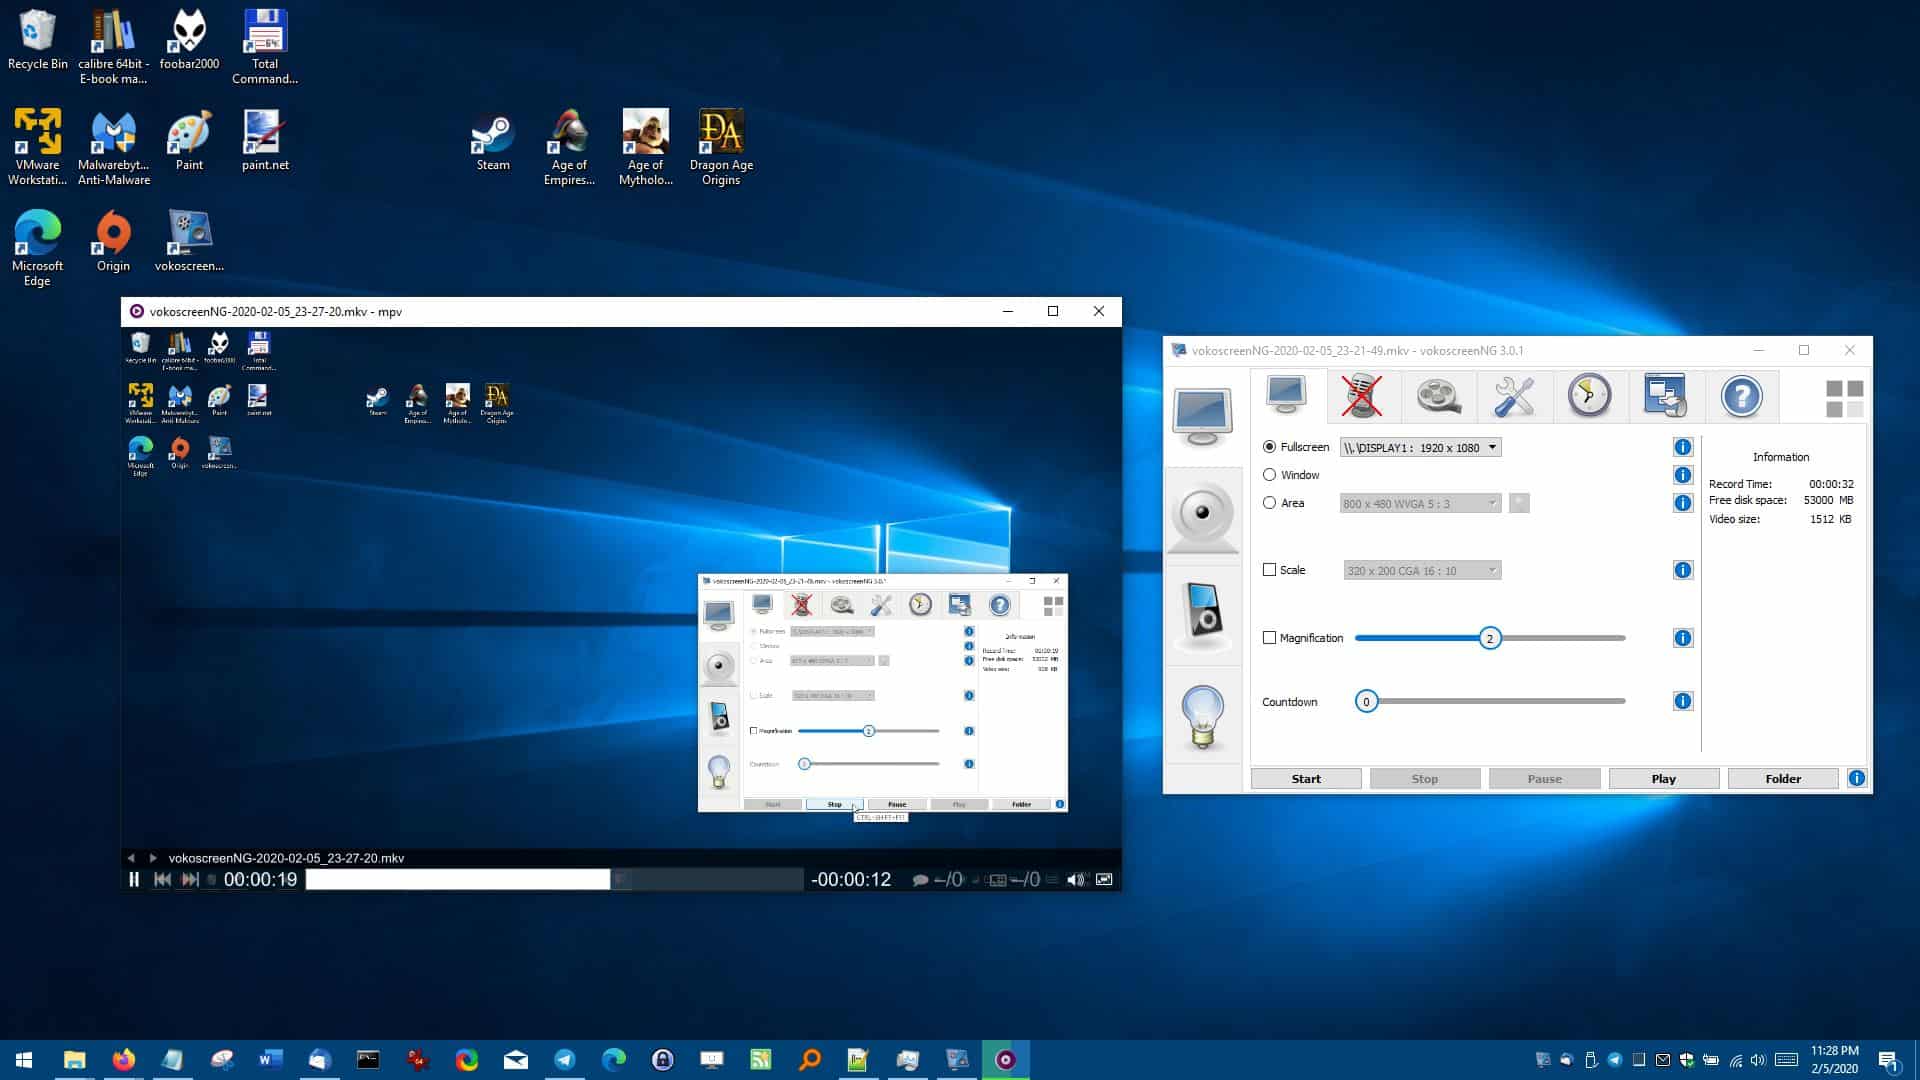
VokoscreenNG is an open source screen casting program for Windows and Linux. It can be used to record videos from your webcam or the screen content, along with the audio source that you choose.
The application is based on vokoscreen, also open source and from the same developer, but the new version has been completely re-written in Qt and GStreamer.
Every option in the program has an i (information button) next to it which you may activate to explain the function which is helpful for new users; an option to turn these off would be useful however to declutter the interface.
The interface has two sidebars, one at the top and the other to the left of the screen. The sidebar has four options: Screencast, Camera, Player and Log.
Note: There is a strange issue with the Windows version. Do not run the vokoscreenNG.EXE directly, if you do you will notice that none of the video formats are available and the program doesn't work as intended. It just keeps crashing. Instead, run the vokoscreenNG.vbs, which then runs the executable in a working state. I spent an hour trying to figure out why the shortcut I placed on the taskbar was buggy until I noticed the Start Menu shortcut had the vbs in the Target field.
Screencast
You can use this to record the content on the screen. You have two options to choose from: fullscreen and area. Fullscreen mode captures everything on the screen and supports monitor selection if you have multiple monitors. Area mode has preset resolutions that you can pick to resize the view-finder to the corresponding size (say 320 x 200 pixels). You can of course drag the arrows on the screen to resize it and use it as free-region selector.
Note: Window mode is only available in the Linux version, it's unclear why. I was able to get it working by switching from Area mode, a crosshair to select the window appeared, but the program said it needed a codec. It appears to be a placeholder setting for now.
Select a mode and hit the Start button at the bottom to begin recording the content, or to pause or stop it. There is a system tray that you can use for starting/pausing/stopping a video.
The screencast tab also has options to scale the video to a different aspect ratio, enable the magnifier tool, and a countdown timer that indicates when the recording will start. The information pane on the right edge of the window displays the total duration of the current recording, the amount of free space available on your hard drive and the size of the video.
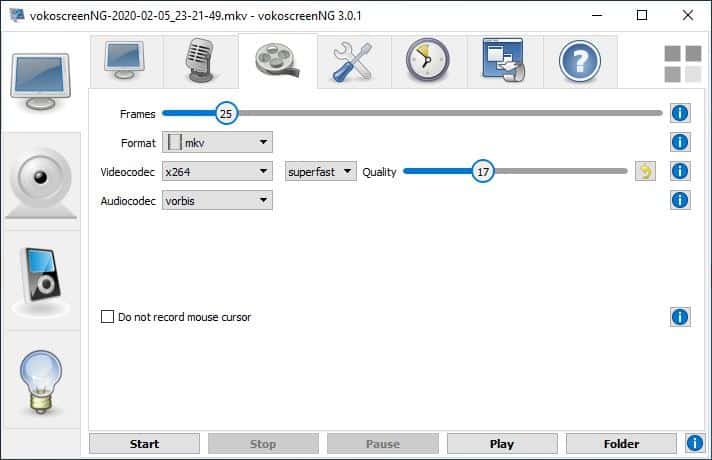
The top of the Screencast tab has another toolbar; the options discussed above are the recording settings. The next one is the audio selector which you can use to pick your audio source, i.e. the speaker or a microphone if you have one plugged in. The third tab is the video format selector, which you can use to set the frames per second, video format, video codec, audio codec, quality, and other video parameters.
vokoscreenNG's settings are housed in the fourth tab; use them to define the number of seconds before a recording should begin, how the program should start (minimized, system tray) and set the desired folder for the recordings on the local system.
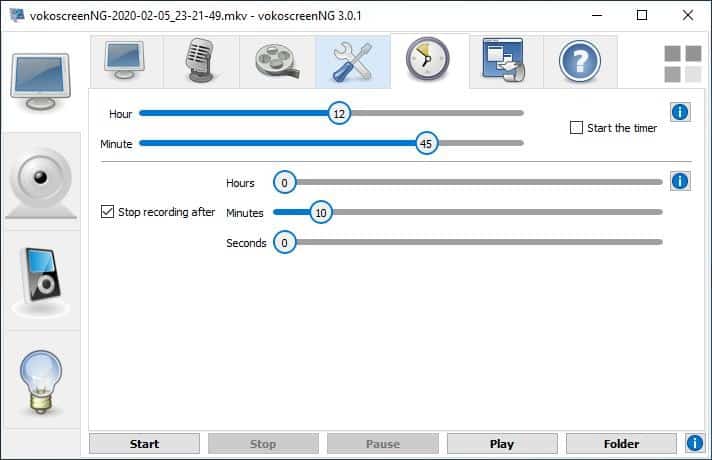
The timer tab can be used for scheduling a recording. The application uses the 24-hour format and has sliders for hour and minute to easily set the starting time. It also lets you stop the recording after a specific number of hours, minutes or seconds. Hit the Start timer button to activate it.
The penultimate tab lists all supported video and audio formats that the program supports. vokoscreenNG supports MKV, WEBM, AVI, MP4 and MOV video formats with x264 and VP8 codecs. Audio formats supported by the program include MP3, FLAC, OPUS and Vorbis.
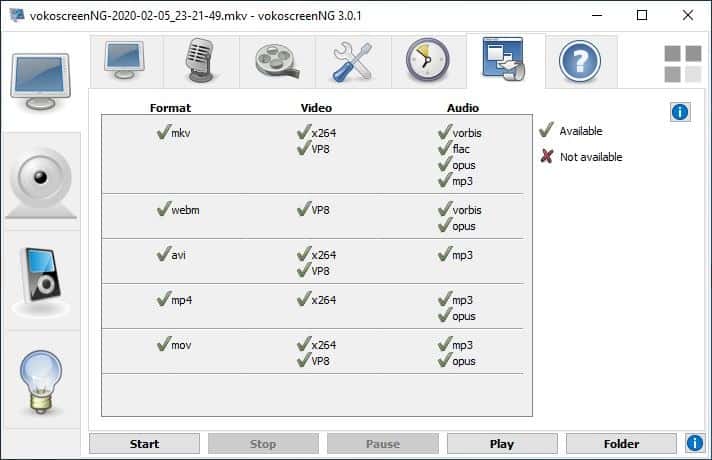
That does cover formats supported by modern media players, YouTube and other platforms, should you want to upload it to your channel.
Camera
This mode allows you to record a video using your computer's camera or an external one that's connected to the system. Select it and you will see a new window pop-up. The Camera tab can be used to adjust the video resolution, flip the image vertically/horizontally, invert, enable Gray or Black and White color filters. The remove Window frame disables the camera window's title bar.
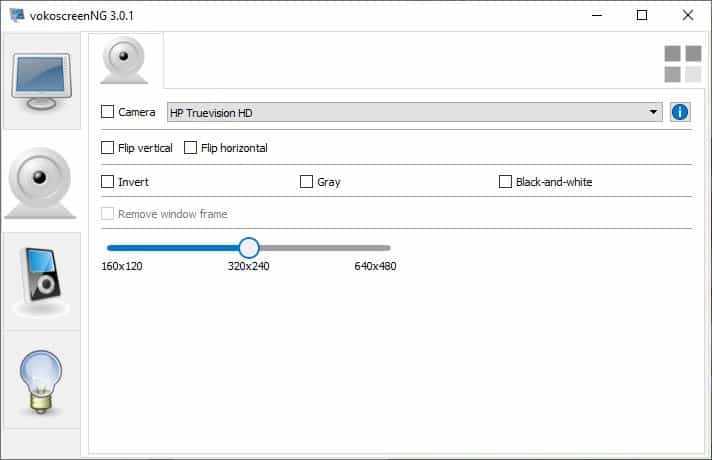
Note: You can right-click on the camera window to view the same options.
To begin recording use the Ctrl + Shift + F8 keys. The same combo allows you to stop the process. Jump between Full Screen mode and Window mode by using F11 or double-click with the mouse. Picture-in-Picture recording works too, in case you want to place the camera window in a corner and record the rest of the screen.
Player
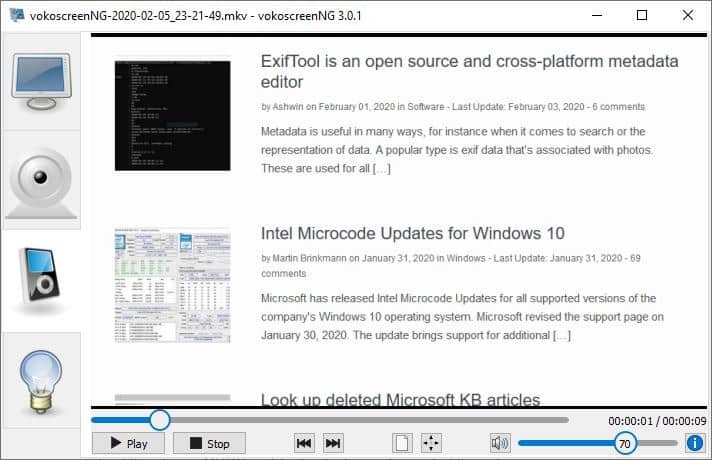
This is the built-in media player of vokoscreenNG, that you can use to watch the current recording. It's a pretty basic one and it is usually better to use a different media player that offers better functionality. But, it is good enough for quick previews.
The Windows version can be downloaded from the official website, and the source code is available on GitHub.
Closing Words
vokoscreenNG works well for the most part, but crashes when a custom resized region was set as the source. The program is still in beta, so we can expect it to get better like the old Linux version which is still usable. SimpleScreenRecorder is another user-friendly screen capturing tool, OBS Studio is a more robust choice if you're looking for a video recorder with advanced options.











As an old programmer I am a bit confused as to why the screen casting has a dedicated button and I know when I am recording, but when I need to record from the webcam suddenly no button and no way of knowing that I am recording. I think the UI leaves a lot to be desired. I was just a visual basic and VC++ Programmer back in the day but if you can design the screencast UI to be user-friendly… I am not sure what the thought pattern was behind making the webcam recording function so… unfriendly. I never know if I am seeing a preview and whether I am recording when opening the camera. If I am recording… did the designer not think that the person using the software may want to set up and ensure everything is right before recording and then also be aware that they are in fact recording? I am sorry if this comes across as rude it isn’t meant that way. I have been trying to use this software to record from my webcam because someone told me it is amazing. Maybe for screencasting but I have been trying to record a video for my wife for valentines day … after several attempts, I am giving up. I wanted to do something special but I guess it just wasn’t meant to be.
Here on gHacks I quite rarely come upon programs that I have never known about before and this is one of these occasions. I added VokoscreenNG to my test list, great find.
Thanks for the report.
The version is still beta and most of the mentioned bugs will be fixed soon.
Thanks, Ashwin,
Do I understand correctly that the maximum video format 640p x 480p?
Do you (Or anybody else who knows this) know or this or any other program which has the possibility of handling 1920 pixels x 1080 lines pixels or at least 1280 pixels x 720 pixels?
Paul, I use OBS (Open Broadcast Software from The OBS Project), it’s probably the most used screen, webcam, and remote cam recorder/broadcaster on the market. It’s used a lot by municipal/military/commercial webcams, as well as those naughty folks live-broadcasting naughty things online.
I use it for screen recording (it does both photos & video) at 1280×720. I believe it goes up to 1920×1080.
Mainly I use it to record live cam feed from Skype conversations with my elderly parents. They’ll be gone soon so I want to capture as many conversations as I can. Also I use it as a PVR for a back-yard swimming area, which helps me not pay those enormous remote camera fees that security companies charge. My wife uses it to record videos for her legal blog. I still haven’t discovered all it can do. It’s free and I believe it’s open source.
There is a learning curve because it can do so much, but if you’ve fiddled with professional recorders or PVRs before you’ll catch it fairly quick. It does have it’s own tutorials, which I needed and used.
https://obsproject.com/
I love OBS, but I wish it had a timer to set to record something at a later time. I couldn’t find anything to support that, but maybe I am missing something.
I can’t say for Windows, but I just checked using Linux Mint and it did record at 1080P.