Easy flow chart creation with Dia

Lately I have had to use a number of flow charts for articles and presentations. Flow charts are very handy tools to help explain processes, algorithms, and more. A flow chart could be created with a standard graphics or drawing tool (GIMP, Inkscape, or OpenOffice come to mind).
But by using such a tool you are adding a level of complexity you do not need. Instead, use a tool specific to the task. One such tool is Dia. Dia has been around the Linux-verse for a while and has become the de facto standard for diagrams and flow charts. Dia is amazingly easy to use (so long as you understand the functionality of flow charts) and can have you up and running in no time.
In this tutorial I am going to show you how to install Dia and create a fun flow chart. Are you ready for a rousing fun time with diagrams?
Installation
The installation of Dia is simple as it will be found in your standard distribution repository. So fire up your favorite application installation tool (Synaptic or Ubuntu Software Center come to mind), search for "dia" (no quotes), select the results, and apply to install.
Once Dia is installed you will find it located in the Graphics sub-menu of your Applications menu.
Using Dia

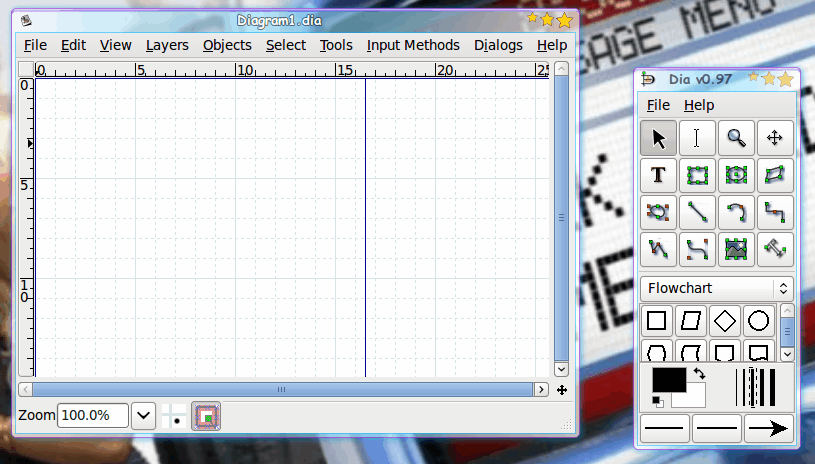
When you first fire up Dia you might be reminded a bit of the multi-window'd interface in The GIMP (see Figure 1). You do not have to start a new file, as Dia will start up in a new file window. You can simply begin creating your flowchart.
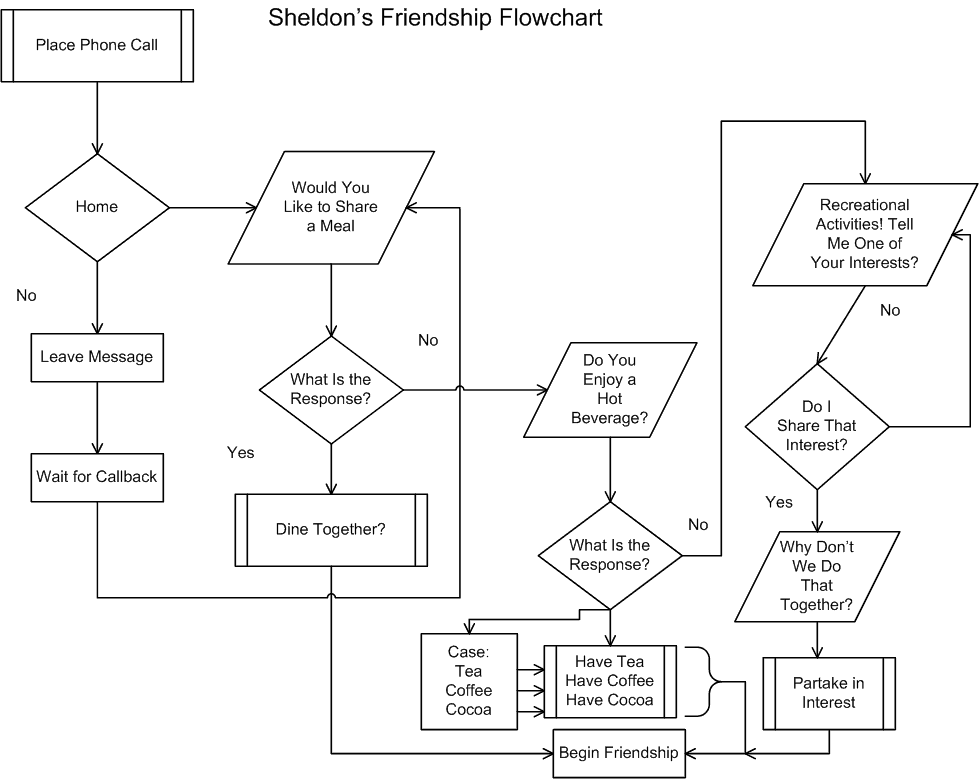
Just for kicks I want to illustrate how to create one of my favorite flow charts. The flow chart in question is from TV's Sheldon Cooper (The Big Bang Theory). In one episode he created a Friendship Flowchart established and illustrated the algorithm for making new friends beginning with the pre-defined process of placing a phone call (see Figure 2).

I won't go into the details of flow charts and diagrams here. Instead let's just dive right into creation.
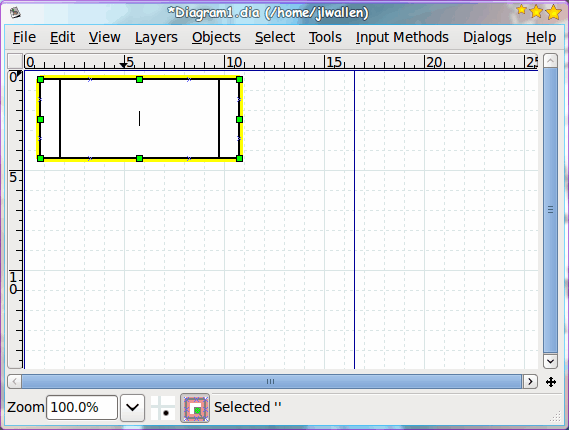
In the tools window (smaller window on the right-hand side of Figure 1) you will notice all of the tools you need to begin. As you can see the flow chart begins with the pre-defined process of placing a phone call. If you look in the tools window select the pre-defined process element (you will have to scroll down in the listing of elements) and then move to the diagram window. In the diagram window click and drag your mouse (or trackpad) until you have the size of the pre-defined process you want (see Figure 3).

After you have the size correct you will see the blinking cursor ready for you to enter text. Type your text (in this case "Place Phone Call") and then click outside of the newly created element.
Now it's time to continue on. According to our next event we have a decision (which is a diamond shape). Select that tool from the tools window and then draw it underneath the pre-defined process. Once sized correctly, enter the proper text and click outside of the shape.
Now you have to connect the to elements. There are numerous ways to connect elements:
- Lines
- Arcs
- Zigzag lines
- Polylines
- Bezier lines
In our case we only need a simple line. In Dia, when connecting elements, the direction arrow will be pointing in the same direction you draw the line. So, since we need our direction arrow point from the pre-defined process to the decision we follow these steps:
Select the line tool from the tools window.
Click the bottom of the pre-defined proces.
Draw and draw the line to connect to the decision.

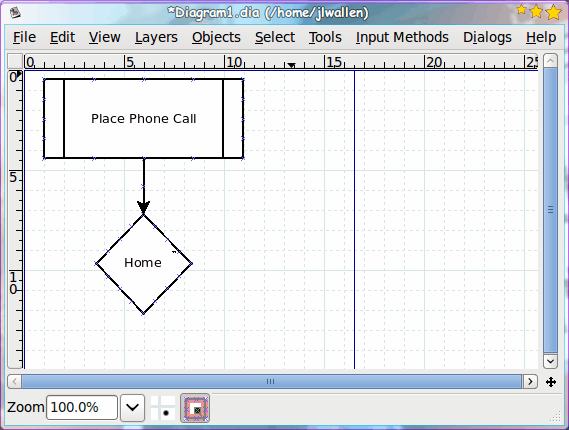
You don't have to worry about being exact in your connection points. When you have the line tool selected, and you click on an element, you will see that Dia automatically connects the beginning point of the line on the outline of the element. And when you drag the connecting line to the end-point element, it will automatically make the connection for you. The end results are shown in Figure 4.
I won't go through the rest of the creation of the flow chart. Instead let's skip to the saving point.
Once you have completed the process, all you have to do to save your diagram is go to the File menu and select Save. Give your diagram a name and click Save. You can also export your diagram to numerous formats (such as most common image formats, eps, pdf, and many more).
Final thoughts
Dia is an amazingly simple to use flow chart creator that rivals much of the competition. If you're looking for a handy tool to help you create solid flow charts and diagrams, Dia is your open source solution.


Hello,
A question about DIA: how do you write YES and NO on the arrows that outputs from decission objects?
in decision tool when i draw connector from left or right
the connector starts vertically & then bend & it always has 2 beds whether required or not.
i want that the connector to start horizontally then bend as the figure in the above diagram shows
how this can be achieved
& also is there any way to fill block with gradient
& can we save our customization & settings in profile
Dia looks great. I love how simple it is. The only thing I can not seem to do is have a transparent background.
Also have a look at OpenOffice Draw. Has some nifty flowchart symbols built in.
Thanks, I took a stab at making one of these:
http://xkcd.com/627/