Creating a database with MySQL Administrator

My last article illustrated how to manage your MySQL databases with a simple (albeit outdated) GUI MySQL Navigator (see my article "Manage your MySQL databases with an easy to use GUI"). Although that tool is outdated, it does still work for basic functionality.
But there are better tools for managing your MySQL databases. One of those tools, MySQL Administrator, is actually released by the MySQL developers. This tool will work with any MySQL installation >= 4.0 and makes the daunting task of administrating MySQL databases far easier than any other desktop GUI tool.
And, to make matters even easier, MySQL Administrator is found in the standard distribution repositories, so installation is a breeze. And MySQL Administrator is available for both Linux and Windows, so even the non-Linux crowd can enjoy this fantastic tool. In this article you will see how to install MySQL Administrator as well as create a schema (aka database) and a table for your database.
Installation
As you would expect, all you need to do is fire up your software installation tool (such as Synaptic or the Ubuntu Software Center), do a search for "mysql administrator", select the results, and install. You should already have a running MySQL installation, but if you do not the software installer should pick up all of the dependencies.
Once installed you will find this tool located in the Programming sub-menu of the Applications menu.
Using MySQL Administrator

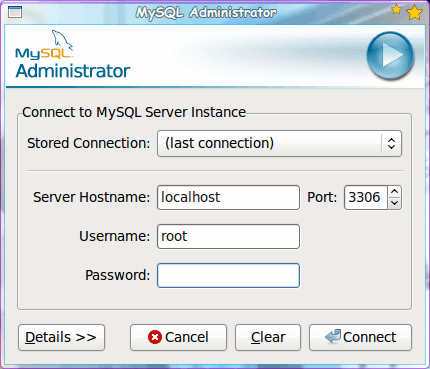
When you first start up the MySQL Administrator tool the login window will appear (see Figure 1). From this window you can create a local or a remote login. If you go for a remote login you have to make sure your remote MySQL server will allow for remote connections.
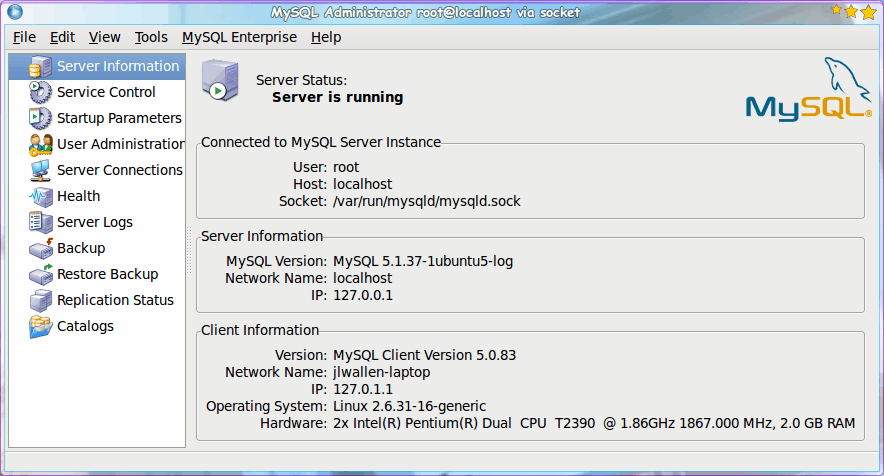
For this article we will focus on a local connection. So the information you need to enter will be similar to what you see in Figure 1. Once you enter the information click the Connect button to establish your connection. When the connection is made you will find yourself in the MySQL Administrator main window (see Figure 2). This window will immediately give you plenty of information about your MySQL connection as well as all the tools you need to work with MySQL.

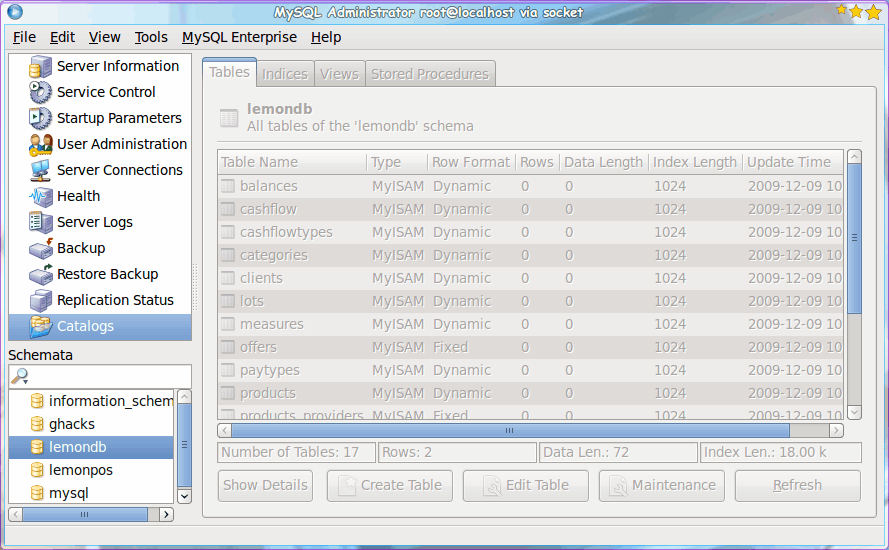
In order to create a new schemata you need to first open up the Catalogs window. The catalogs window is a listing of your current schemata (database collection). To open up the catalogs window double click on the Catalogs listing in the left pane.

When the catalogs listing opens (see Figure 3) take a look at the lower left pane. In this pane you will see a listing of your current schemata. In order to create a new schema right-click inside of that pane and select Create Schema. When you select this a small window will appear asking you to enter a name for your new schema. Do this and click OK and you will have an empty schema ready for you to add tables.

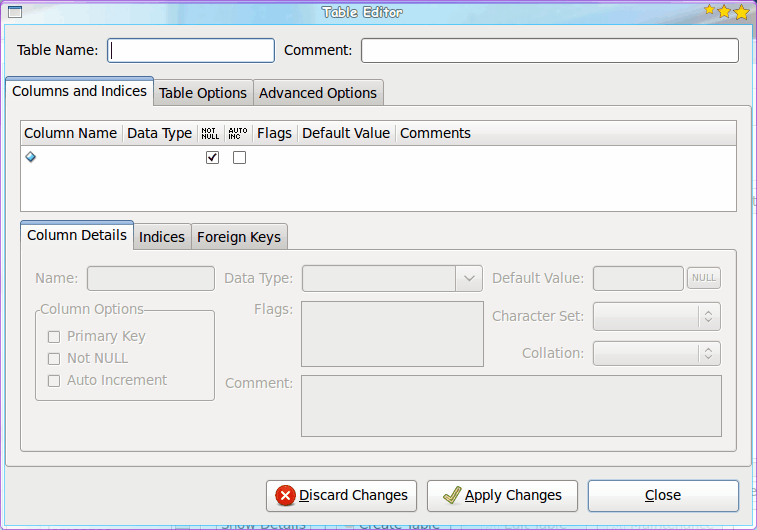
In order to create a table in your schema you need to click the Create Table button after you have selected the schema you want to work with (see Figure 4). Â The first thing you need to do is give your table a name. Â Once that is done click in the Colun and Indices area and you will then be able to start building the fields for your table.
A couple of notes about fields:
- You will want to have one field with a primary key.
- A primary key's Data Type should be Integer.
When you finish filling out the data for the first table click the Apply Changes button which will then bring up a window showing you the MySQL command to be executed. Click the Execute button and the command should go off smoothly. Once the command is finished you will see your new field in the Columns and Indices window. In order to create a new field click below the newly created field and start all over.
When you are finished working with your table click Close to dismiss this window. You have now added fields to your table in your schema. When you are finished with that scheme click Close and you are done.
Final thoughts
Don't think this is all you can do with the MySQL Administrator tool. This tool can handle nearly every aspect of MySQL administration. After you become familiar with creating schema, tables, and fields, start poking around the rest of the tool and see if it will take care of all of your MySQL needs.


You can more professional and frunctional MySQL Manager from Devart – dbForge Studio for MySQL. Read more here: http://www.devart.com/dbforge/mysql/studio/
Not so far I have found new cool tool to work with mySQL – Valentina Studio. Its free edition can do things more than many commercial tools!!
I very recommend check it. http://www.valentina-db.com/en/valentina-studio-overview
Do you have info on MySQL Workbench? A lot of things have changed in the new tool. I miss the old one. :(
I know how to google lads, simply pointing out to the author that it’s customary to provide a link to the tool you’re reviewing.. Martin always does afaik, or at least he did when this was exclusively a Windows site. (I’m sick of all this Linux-focused stuff appearing in my feed anyway, if I wanted a Linux feed I’d subscribe to a Linux site. Anyone know if there’s a tag to get rid of it, like on Giz?)
@dahamsta – Assuming you’re using Linux check your repo (as mentioned in the article). Mine has this:
Administration tool for MySQL 5.0
MySQL Administrator is a powerful graphical administration console that enables
you to easily administer your MySQL environment and gain significantly better
visibility into how your databases are operating. MySQL Administrator now
integrates database management and maintenance into a single, seamless
environment, with a clear and intuitive graphical user interface.
This is MySQL Administrator 1.2.12.
And for Windows check Softpedia – “MySQL Administrator for Windows 5.0 r17”
But you should know all this already.
When I started Server side scripting using JSP, it took me some time to figure out how to work with MySQL. I am glad that this tutorial makes the learning curve less daunting for new comers.
Afterall connecting with a database is a very important aspect of every good application
Unless I’m missing something, this is the second artcle on MySQL tools without a link to the actual tool in question…
SQLTools are available at the Sun’s MySQL website http://dev.mysql.com/downloads/gui-tools/5.0.html