How to screenshot on Mac: A complete guide
Once you learn how to screenshot on Mac you will never forget it. If you want to capture what's on your Mac screen, you might need to take a screenshot. A screenshot is an image of your entire screen or a portion of it that you can save, edit, or share with others. Screenshots can be useful for many purposes, such as documenting an error, showing your work progress, or creating tutorials.
In this blog post, we will show you how to screenshot on Mac using keyboard shortcuts, built-in tools, and third-party apps.
How to screenshot on Mac?
There are different ways to take screenshots on Mac, depending on what you want to capture and how you want to use the image, such as:
- Keyboard shortcuts
- Built-in tools
- Third-party apps
Let's explore the ways!
Keyboard shortcuts for taking screenshots on Mac
One of the easiest and fastest ways to take screenshots on Mac is by using keyboard shortcuts. Keyboard shortcuts are combinations of keys that you press to perform certain actions. Here are some of the most common keyboard shortcuts for taking screenshots on Mac:
- Command + Shift + 3: This shortcut will capture your entire screen and save it as a PNG file on your desktop. You will hear a camera shutter sound when the screenshot is taken.
- Command + Shift + 4: This shortcut will let you select a portion of your screen to capture. You will see a crosshair cursor that you can drag to draw a rectangle around the area you want to screenshot. When you release the mouse button, the screenshot will be saved as a PNG file on your desktop. You can also press the Spacebar after pressing Command + Shift + 4 to switch to a window mode, where you can click on any window to capture it.

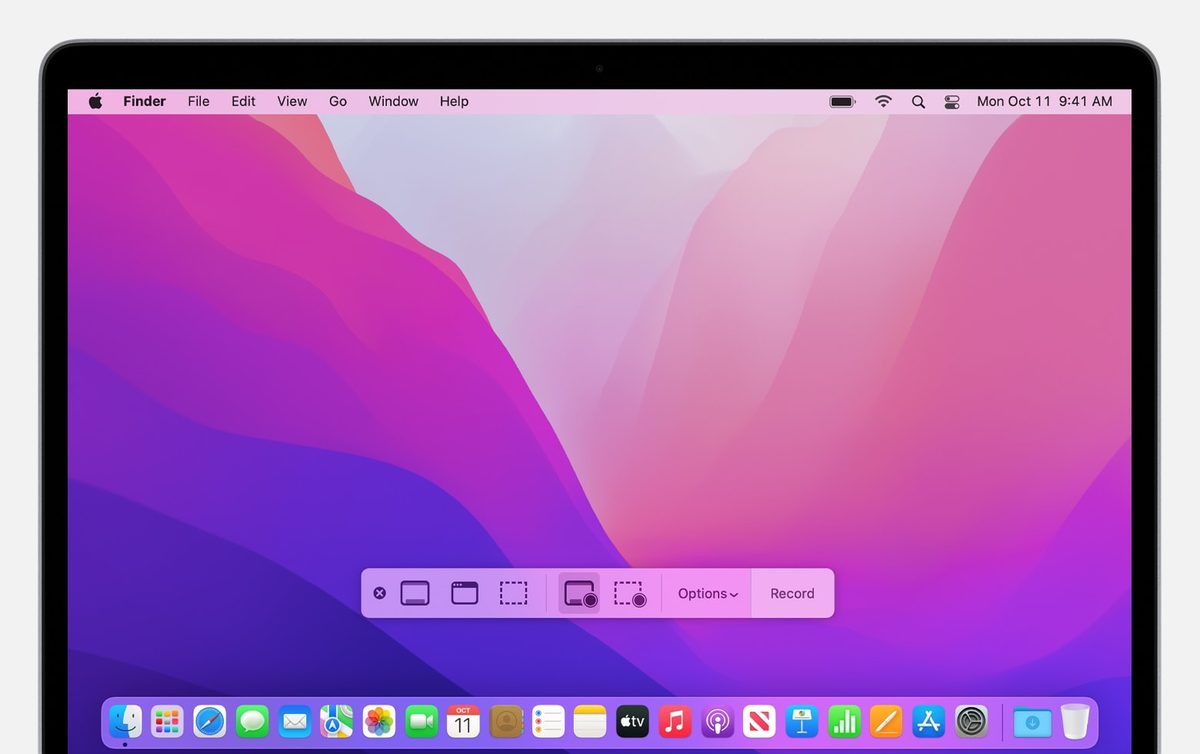
- Command + Shift + 5: This shortcut will open the Screenshot app, which gives you more options for taking screenshots on Mac. You can choose whether to capture the entire screen, a window, or a portion of the screen. You can also set a timer, show mouse pointer, and choose where to save the screenshot. You can also use this app to record your screen as a video.
Built-in Tools for taking screenshots on Mac
Besides keyboard shortcuts, there are also some built-in tools that you can use to take screenshots on Mac. These tools are:
- Preview: Preview is an app that lets you view and edit images and PDFs on your Mac. You can also use it to take screenshots by going to File > Take Screenshot and choosing one of the options: From Selection, From Window, or From Entire Screen.
- Grab: Grab is another app that lets you take screenshots on your Mac. You can find it in the Utilities folder in your Applications folder. You can use it to capture the entire screen, a window, a selection, or a timed screen. You can also choose whether to show the cursor or not in your screenshot.
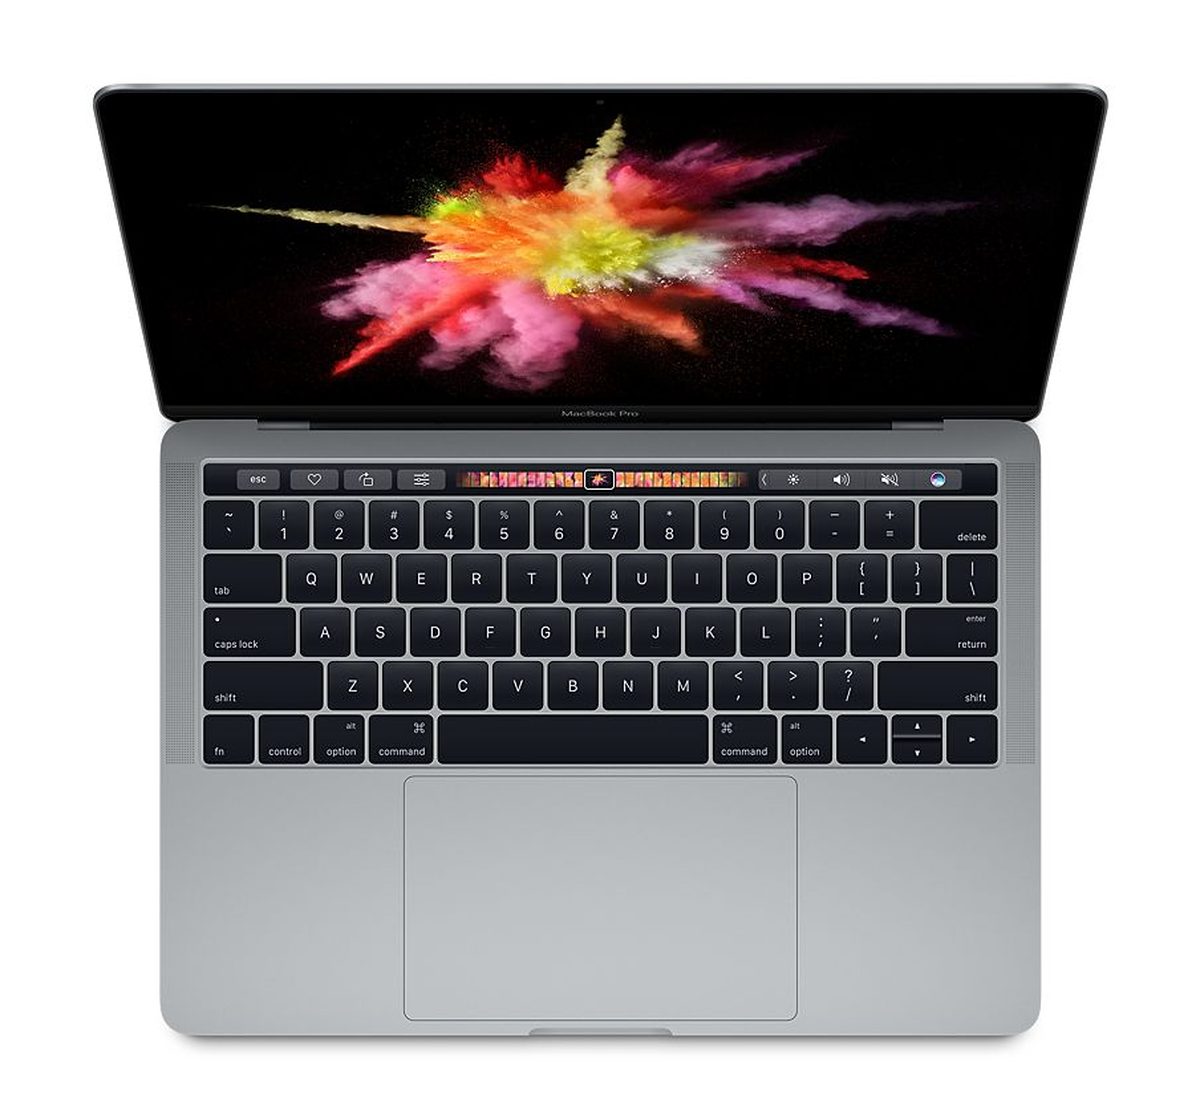
- Touch Bar: If you have a Mac with a Touch Bar, you can use it to take screenshots as well. You can customize your Touch Bar by going to System Preferences > Keyboard > Customize Control Strip and adding the Screenshot button to it. Then you can tap the Screenshot button and choose one of the options: Entire Screen, Selected Portion, Window, or Menu.
Third-party Apps for taking screenshots on Mac
If you want more features and flexibility for taking screenshots on Mac, you might want to try some third-party apps that are designed for this purpose. Some of the popular ones are:
- Skitch: Skitch is a simple and fun tool that lets you take screenshots and add annotations, shapes, arrows, text, and more. You can also share your screenshots with others via email or social media. Skitch is integrated with Evernote, so you can sync your screenshots across your devices and access them anytime.
- Lightshot: Lightshot is a lightweight and easy-to-use tool that lets you take screenshots and edit them online. You can also upload your screenshots to the cloud and get a short link to share them with others. Lightshot also has features such as search by image, similar image search, color picker, and more.
Taking screenshots on Mac is not difficult once you know how to do it.
Advertisement