Change your computer's power plans quickly with Switch Power Scheme
Windows 10 comes with some useful power plans, which help preserve the battery life. When you are playing games, you will need the computer running on maximum performance. However, it doesn't have to be at full power for day-to-day usage. This applies more for laptops, especially if you don't have them plugged in all the time.

But Windows 10 doesn't let you change plans directly from the tray. You would expect clicking the battery icon would let you switch between various plans, right? No, instead we have to right-click on the icon, select Power Options and then choose the plan from the Control Panel applet.
Tip: find out how to enable the Ultimate Power Plan in Windows 10. You may also create a power efficiency report on Windows.
Switch Power Scheme reduces this menial task to two-clicks. It may not sound like much, but it is convenient once you get used to it. The program is portable, and the archive contains the 32-bit and 64-bit executables. The application can be accessed from the system tray. Right-click on the icon to access your power plans, a second click activates the chosen scheme. Switch Power Scheme does not come with its own plans, but you may use it to create new ones easily.
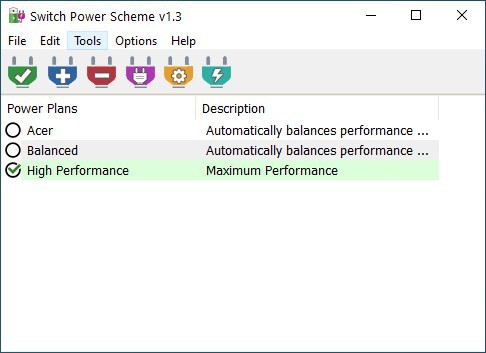
Left-click the tray icon to access the program's interface. The toolbar has some nice and colorful icons. The existing power plans are listed with their description, the active scheme has a checkbox next to it.
To add a new power plan, click the + button on the toolbar. This is basically a shortcut for the Power Options applet. Use it to create a power scheme and modify its settings. Back to Switch Power Scheme, hit the - button to delete the selected scheme. Double-click on a scheme to activate it.
Warning: The program deleted the High Performance plan when I used it for the first time. I strongly advise using the Export option to backup your settings before you start using Switch Power Scheme.
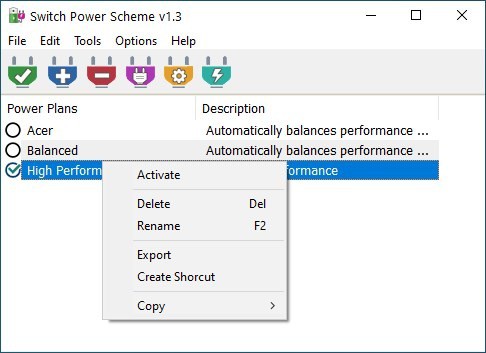
Here's how you can backup a plan's settings. Right-click on a power scheme and select the export option, you will be prompted to run the program with administrator rights. Accept the prompt, and use the menu to select the export option again. Switch Power Scheme will save the plan as a .POW file at a location of your choice. To restores a saved plan, click the file menu and select the Import Power Plan option. The menu has a shortcut to reset all your power plans, so you should be careful while using it.
The program's context-menu has a couple of useful items. You can use it to rename a plan, create a desktop shortcut for it for accessing it quickly. View a list of your power plans' GUIDs from the tools menu. This opens a command prompt window that lists the information, it's a bit too technical for the average user.
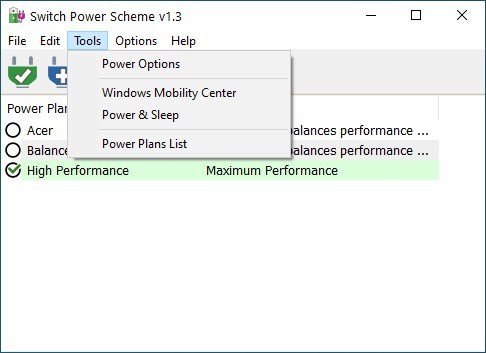
The 4th icon, with the plug symbol on it, opens the Windows Mobility Center. You can access the advanced power settings of the current plan, by using the button with the gear cog. The last button takes you to the operating system's Power Options screen.
Switch Power Scheme is a freeware application. It's a simple tool, that can prove to be useful. I couldn't get "Add to desktop menu" and "Use the Shift key to display" toggles in the program's Options menu to work, even when running it with elevated privileges. The other settings were fine. A similar program is Easy Power Plan Switcher, but it has not been updated for a while. If you prefer shortcuts, try Battery Mode instead.





To be honest, I didn’t feel the need for this app, but…
It’s made by Sordum.org (USA), which develops useful apps, and it was also introduced in GHacks Tech News (Germany), so I gave it a try.
The Power plan (Control Panel, Hardware and Sound, Power Options) can be practically managed by “Don’t Sleep”,
https://www.softwareok.com/?seite=Microsoft/DontSleep
But the advantage of using this app together is that you can visually recognize (identify) the “current power plan” and in addition, it is beneficial to be able to easily change the power plan settings (sleep and hibernate) or create a new one.
I found this app to no problem without it, but useful with it.
In the options of this app,
Add to Desktop Context Menu
Hide When Minimized
Auto Start With Windows Startup
I decided to continue using the application with the following enabled.
The amount of system resources in my use case is approximately “RAM: 5.0 MB”.
I’ve been using Power Buddy for years. https://github.com/PerfectlyCromulentLtd/PowerBuddy It hasn’t been updated for 4 years though. The last time I reinstalled windows I had to fiddle with it to get it to work but it does work.
Any Control Panel item can be shortcutted (is that a word?) by right clicking on it. Great for all the Gear Thing settings that send you to the Control Panel, ones you use often.
Thanks for sharing, I was able to add the right click features, use Options – Add to desktop context menu then comes a warning “This feature requires administrator rights…” use yes button then repeat the firs action (Options – Add to desktop context menu) or you can run the software directl as admin, I think , this feature should apply automatically after user use “yes” button.
We can create a shortcut to change the power plan
https://devblogs.microsoft.com/windows-music-dev/quickly-switching-your-power-plan-on-windows-10/
This software has already create shortcut feature ;
1. Highlight any plan with cursor
2. Right click on it and choose “Create shortcut”