Launching Windows Tools with Windows Utility Launcher
You have several basic yet important utilities on your Windows operating system and it is not always easy to find them. You have to navigate the Control Panel or perhaps delve into the myriad lists of the Start Menu, entering just the right search terms. You could create desktop icons for all of these utilities but then your desktop becomes covered with icons. Those icons can be placed in a file folder on the desktop to clean things up but it is better to have rapid access to the utilities you use most often. For users who spend a great deal of time working with Windows and use utilities regularly, there is a free application called Windows Utility Launcher to organize frequented utilities for easy access. This will require the application, of course, and also .NET Framework 3.5+. Both links are provided in this article. The setup for Windows Utility Launcher is provided in a .zip file as an .exe application. Put it in the Program Files folder and create a desktop shortcut to ensure the easy access that you seek.
Please note that the Windows Utility Launcher software requires the Microsoft .NET Framework 3.5 (SP1) on the system.
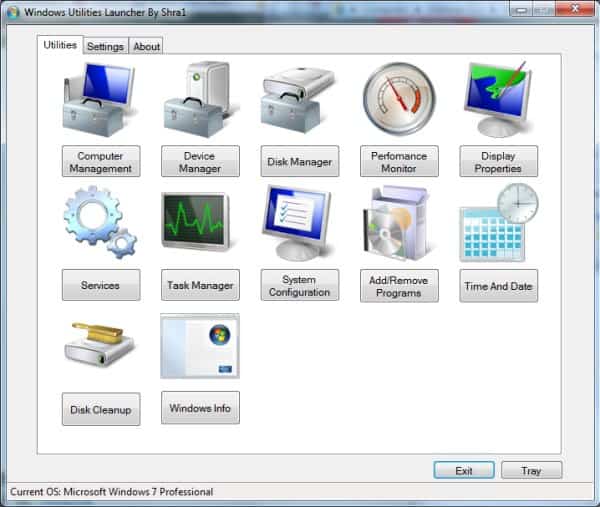
Download Windows Utility Launcher from this link. Double click the .exe file for Windows Utility Launcher and you will see the following window open.

In the Utilities Tab, all utilities shown are quickly accessed by a single click. You click the button below each of the listings to access them. The two buttons in the lower right corner allow you to exit the utilities or minimize them to the System Tray at will. Notice that the Status Bar at the bottom indicates the version of Windows being used. Be aware that this will only work for Windows 7 and Vista operating systems and is not functional in Windows XP or XP virtual mode.
The Settings Tab allows you to set this application for launch on startup and also to start minimized in the System Tray. As you move on to the third tab, the About Tab, you will find basic application information. There is also a way to contact the developer, should the need arise.
Access the right-click menu from the System Tray. You will find the main menu by holding the pointer over or clicking on “Windows Utilitiesâ€. You can also access the Notepad and Calculator utilities. The menu simply contains the same options as the primary window does. If the Windows Utility Launcher is minimized, as it probably will be, this is how to access the different utilities easily from the System Tray.
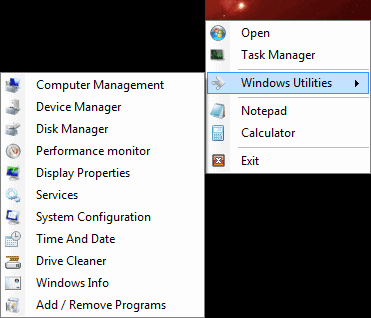
By clicking on Services, for example, from the main menu of Windows Utilities Launcher, The Services menu opened immediately. This gives quick access to stopping or starting services with a quick launch. This application is essentially a time saver for system administration by making utility access a breeze.
Advertisement






Or you can use Windows “God Mode” :-)
p.s forgot to say “Thank You”.