How to Install XP Mode on Windows 7 without Virtualization

Update: Please note that Windows XP was retired as of April 8, 2014 and that support for the operating system -- including Windows XP Mode for Windows 7 -- has ended as a consequence.
Whether your computer has Hardware Virtualization or not, this is a simple way to run XP mode on Windows 7 without Hardware Virtualization, as it is included in the Microsoft download.
There is no additional cost to do this. You can run XP on your Windows 7 operating system with ease. Originally, Microsoft required that your CPU supported Hardware Virtualization for XP mode in Windows 7.
Microsoft has dropped this requirement. You would have had to turn on Hardware Virtualization in your BIOS before this and you would have only been able to do so if you were lucky enough to get an update to enable it.
Otherwise, you would have needed a different computer. This is now a thing of the past and you can now run XP.
Even though this is true, this will not work with Windows 7 Home version as XP mode is not included with that version of the operating system.
You will need Windows 7 Professional, Ultimate or Enterprise for this to work. The computer used in this demonstration is a Gateway that does support Hardware Virtualization, but for the sake of this demonstration, the new version was installed.
This article will detail the procedure to install XP mode in Windows 7. The PC used in this demonstration uses Windows 7 Pro 64-bit version.
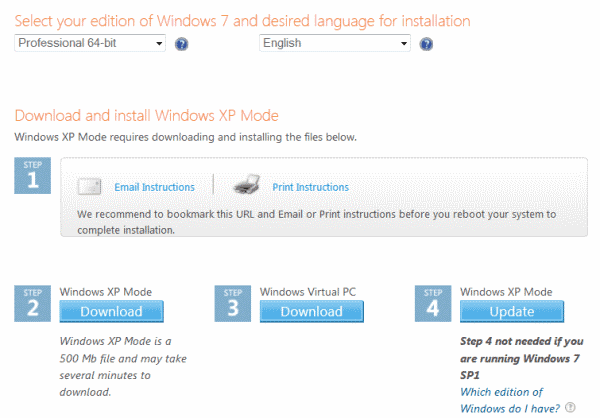
The first step is to go to the Microsoft XP Mode website. There are three downloads that you will need to install. The third actually does not have to be installed if you are using SP1. The three downloads are Windows XP Mode, Windows Virtual PC and the Windows XP Mode Update. The links are found here:
http://windows.microsoft.com/en-us/windows7/install-and-use-windows-xp-mode-in-windows-7
Click on this link and this page will open. Only part of the screen is shown:

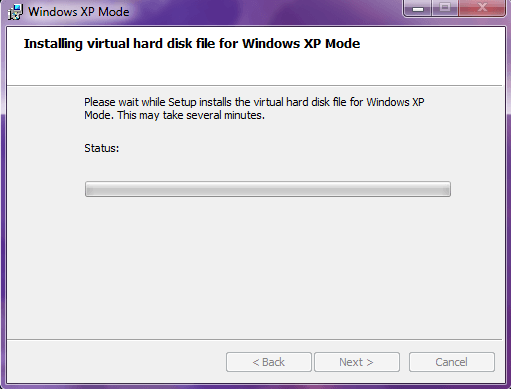
You do not have to e-mail the instructions, but you may want to print them. The instructions are given in this article. Click on Step 2, Windows XP Mode and run the download. It will take a few minutes to complete. Double-click on the downloaded file and you will be prompted to run the program. Click Run. The setup will begin. Click Next to continue. The installation will commence.

It takes awhile, so be patient. Next, you will have to agree to the licensing terms by clicking “I Acceptâ€.
The updates will be installed. It is possible that the update will not install and you will be shown a message to that effect. If this is the case, attempt the above steps a second time and it will probably work. After the installation is complete, you will have to restart your computer.
Once your computer restarts, the updates will be configured. Now go to Step 3, Windows Virtual PC. Start the download and again be patient. It takes about 8 minutes to complete. You will be prompted again for the License Agreement. Click Next to accept and start the installation.
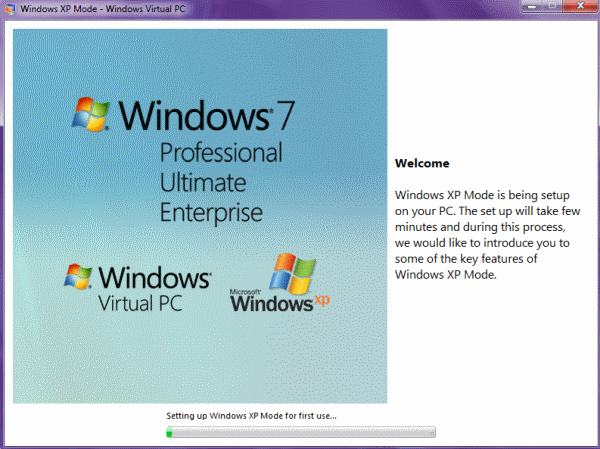
Create your user credentials password. If you are the Administrator, use your Administrator password. Turn on Automatic Updates for XP in the Setup window. The setup will share drives on the computer with XP Mode. This makes file sharing easy. If you wish to modify this, click “How do I change drive sharing options?†Instructions are given. The following series of windows will present as the XP Windows Virtual PC is formatted:

Once this is complete, you can find the XP Mode in the Start menu. Select All Programs and scroll to Windows Virtual PC. Click on that and you will see Windows XP Mode. Now, click on that. You will see that it is loading settings. There you have it! A fully functional XP mode in Windows 7 is now available as needed. This is great to have if you need to use files or applications that are incompatible with Windows 7 but compatible with XP, which happens frequently for many users.


Even if you have bought the license and have installed Win7 Ultimate, MS won’t allow you to download purchased features for Win 7 anymore. So unless someone has the download for this, they won’t be able to install this SW past the MS-expiration date.
the text is so badly written.
XP Mode only works for Windows 7 Prof, Enterprise and Ultimate because they only have the License property set to run XPMode:
VirtualXP-licensing-Enabled
But you can run VirtualPC on all other editions except Starter because only Starter doesn’t have the License property set to run VirtualPC:
VirtualPC-licensing-Enabled
Next the VT requirement was removed with update KB977206. This fix is included in the refresh Installer of VirtualPC you can get here:
http://www.microsoft.com/download/en/details.aspx?id=3702
Now you can run VPC on systems without VT support. And if you use Win7 Home Premium, install VirtualPC and install Windows XP as VM with your old XP license/CD.
Or to put it another way…
Microsoft have – generously and out of the goodness of their hearts – provided a seriously useful feature…
…that won’t run on 75% of Windows7 installations.
Gee, thanks…
Windows XP Mode was made for businesses that relied on applications that won’t work with Windows 7. Since Microsoft recommends Windows 7 Professional or Ultimate for business and Windows XP Mode was also targeted at businesses, Microsoft limited Windows XP Mode only to Windows 7 Professional, Ultimate and Enterprise. Windows 7 Ultimate is supported as it’s the edition that has and supports all features and things offered to Windows 7 editions. Windows 7 Enterprise is again for large businesses.
i just now built a new computer with win7 home premium x64 sp1 and with an AMD phenom II x4 965 quad core processor – is the assumption that with win7 home premium the XP mode is NOT running and must be manually enabled? or is there a way to tell if this computer supports hardware virtualization and/or if it is running XP mode before trying to go through the steps in the article?
my first time with win7, i know absolutely nothing about it.
Is not XP Mode only available to Pro and Ultimate versions?
Good question! Fortunately, the author provides a clue:
“Even though this is true, this will not work with Windows 7 Home version. You will need Windows 7 Professional or Ultimate for this to work.”
so you’re saying that it’s different than ‘compatibility mode’ in the context menu… ok.