Welcome to the best screenshot capture software overview. Please note that this guide looks solely at screenshot taking tools and not at video capturing programs.
If you are interested in the latter, check out or best of guide that covers those.
Taking screenshots is not a complicated procedure. Most operating systems support sending the current contents of the screen to the clipboard when you press the Print key on your keyboard.
That does not get you far though, as you need an image editing program to paste that screenshot into and edit it before you save it on your system.
Most screen capture programs add functionality to the process. Many allow you to select different screenshot formats, e.g. windows, rectangular, omegareplica.co scrolling or even free hand.
Others may come with an editor that you can use to process the screenshot directly before you save it.
The list of applications is once again divided into free and commercial programs. We have also selected our favorite free and paid program from the list.
Specialized programs
Browser Extensions
All of the following programs are free to download and use, at least for personal use.
Modern operating systems come with all kinds of visual effects like rounded window corners or alpha effects that look nice but may be problematic for users who want to take screenshots. Most free screenshot programs do not support the removal of these visual effects which means that the screenshots may look unprofessional.
Most webmasters who take screenshots help themselves by moving the window that they want to take a screenshot of on a white background so that the alpha effects do not play a role anymore. The rounded corners on the other hand remain a problem.
Standard Screenshot

7Capture Screenshot

7Capture removes the background of the window before it takes the screenshot. It furthermore works perfectly with rounded borders as can be seen in the second screenshot.
Usage on the other hand is a little bit more complicated as the screenshot software does not provide access to keyboard shortcuts or a simple window selection option.
The program will list all open windows on startup; you can refresh the listing at any time to include windows of programs that you opened after you started 7capture on the device.

The screenshot taking process begins with the selection of the window the screenshot should be taken of. A click on the Capture button captures the window and display the captured image in a preview window.
The preview window offers little control; you may only scroll up or down if the screenshot is too large to be displayed at once, and save the screenshot to the local system.
Screenshots taken can be saved in various formats including jpg and png. There is no option to change the quality settings of the screenshots which can mean that the screenshot needs to opened in an image editor afterwards to do that.
7Capture is the only free - as far as we know - software that works with rounded borders and window transparency effects. It lacks additional functionality especially keyboard shortcuts and options to take non-windowed screenshots.
The software can be downloaded from the developer's website. Note that it has not been updated for some time and that the list of supported operating systems does not include Windows 8 or Windows 10. The program works fine on those systems, however.
Download Link: http://www.7capture.com/

One of the easiest way of taking a screenshot is to tap on the Print key which will send a screenshot of the desktop to the Clipboard from where it can be processed further. Screen capture tools like Greenshot or the previously reviewed MWSnap add interesting new options to the screen capturing process.
Greenshot, a screen capturing tool for the Windows operating system, supports fullscreen screen captures but also custom screenshots, e.g. from a window or by drawing a rectangle on the screen.
The program comes with its own editor that you may send screenshots to but you may also configure it to save the screenshot directly to the local system, print it, or copy it to the Windows Clipboard.
One interesting feature of Greenshot is that you may select multiple processing options. You could save screenshots and copy them to the Clipboard, or open them in the editor and save them directly as well.
The print screen key is used as the main hotkey for the screen capturing process. A tap on the Print-key enables the rectangular screen capturing mode. Simply draw a rectangle over the area on the screen that you want to take a screenshot of to do so. The shortcuts Alt-Print and Ctrl-Print capture a window (Alt) that you select or the full screen (Ctrl).
Greenshot's options include numerous customizations. For the output alone, you may select the desired image format, filename patterns, storage location and image quality. Print options includes shrinking or enlarging screenshots automatically to fit on the selected paper size.
Greenshot comes with its own image editor that can be used to add shapes and text to the screenshot before saving a final version to the computer system.
The screen capturing tool remains in the system tray all the time. The only drawback is its computer memory usage of around 35 Megabytes. The previously mentioned MWSnap uses less than six Megabytes of computer memory.
Download link: http://getgreenshot.org/

JShot is a free screenshot capture tool for Windows and Linux that provides computer users with all the functionality needed to take and edit screenshots of their computer screen. The program offers all the features expected from a screen capture tool plus some additional features.
A configuration window is displayed on the first startup of the application. It can be used to make some default configuration changes like selecting the default picture format, external image editor, design of the interface and the default profile. Profiles is one of the features that not many other screenshot taking applications offer.
Most applications use profiles to provide access to capture different areas on the screen. Not so JShot which uses profiles to distinguish between different upload options. Available for selection are ftp, ImageShack and Skype integration with Skype only available for Windows users.
JShot offers to take screenshots of regions, the full screen, computer desktop, widgets, taskbar and clipboard (only works if an image is in the clipboard). The program adds a tray menu icon by default to the operating system that can be used to quickly access all of the features of the program. Another option to run the program are hotkeys which unfortunately did not work on our Windows 7 Pro test system.

The screenshot editor supports basic image editing features like adding text and other elements to the image, rotating, flipping or cropping the image or applying basic filters to it. You may send images to another image editor using the external image editor command; useful if the provided tools are too basic.
JShot is an interesting screenshot capture tool. The missing hotkeys make it less usable for computer users who regularly have to take screenshots and we hope that the developers will fix that feature so that it can be used in future releases.
The Skype, ftp and Imageshack implementation on the other hand is a very strong feature that not many (for Skype it seems to be unique) other screenshot taking applications offer.
download link:Â jShot is no longer available. You can download it from third-party sites like Major Geeks.

PicPick is a professional grade screenshot tool for Microsoft's Windows operating system. The software program is provided as a portable version and an installer.
The capture software adds its icon in the Windows task bar on start. You may interact with the system tray icon directly, or use the mapped hotkeys to capture screenshots using those. The latter option is required if you need to take a screenshot of menus and other elements that close automatically when the program window loses focus.
PicPick supports full screen captures (with multi-monitor support), active windows captures, scrolling window screenshots, fixed region and free hand captures and more.
The screen capture is then displayed in the program's interface which offers basic image editing features like crop, resize and rotate options, and basic image editing tools like adding text, basic geometric shapes, a color picker and magnifier.

The memory consumption is lower than 10 Megabytes of computer memory which is great for such a program. The screen capture capabilities combined with the imaged editor make PicPick a potent screen capturing program.
download link:Â http://picpick.wiziple.net/features

PrtScr was created at a time when most editions of Windows shipped without screenshot tool (Snipping Tool). It was created as a response to Microsoft adding a screenshot tool to tablet Vista operating systems, and offered similar functionality that all users could make use of.
You can invoke the tool by pressing the print screen button (you can bind it to any other button if you like), and the tool will pop up. It has a great mechanism because you can draw on your desktop before you create the "snip", so depending on what you draw you may decide you need a bigger area. You can then use a box or a freehand tool to select the area you need and snip it.
Once that is done the snipped image will sort of hover on your desktop in a very cool way, you really have to see it to appreciate it.
You can save it to the clipboard, edit it with Paint or your can save it to your hard drive. My only problem was that the edit option opens up Paint and apparently there is nothing you can do about this. Since you can send the screen capture to the clipboard it's not that bad, you can open it up in Gimp or Photoshop by simply pasting, but since you can choose saving format, timer option and so much, to me the inclusion of this feature would have been obvious. Great looking app though, give it a go!
PrtScr's main feature set includes options to take full screen, windowed, rectangular shaped and freehand screenshots, save them in various output formats, add annotations to screenshots, and use custom keyboard shortcuts to optimize the workflow.
Update: Recent versions of the Windows operating system come with the snipping tool included. While that is great for basic screenshot taking, it lacks features such as freehand drawing which this third party tool provides.
download link: http://www.fiastarta.com/PrtScr/

As a blog owner I know of the importance of screenshots to visualize the textual information of each individual post. For that, they are even more important than other media like videos, considering that not everyone can or likes to play videos while reading an article. But screenshots are also important for search engine visibility. There are other situations where you may need to create screenshots, for instance when creating PowerPoint presentations, writing your midterm paper or resume.
QuickScreenShots is a free portable software for Windows that can be used to take screenshots on the system. It supports full desktop, active window and region screenshots which should be sufficient for most users. Users can click on buttons in the application interface to trigger the screenshots, or use global hotkeys to do so.
The screenshots are shown in the program interface. Five options are listed on the right side. They allow the user to auto copy and auto save the screenshot among other things; Auto copy moves the screenshot to the Windows Clipboard, Auto Save saves it directly to the local hard drive.
A total of three effects can be added to each screenshot as well. This includes a shadow and black and white effect, as well as an option to rotate the screen by 10 degrees. Auto save, shadow and rotate have preference buttons next to them. It is for instance possible to change the rotation angle or the default save directory.
Four buttons a the bottom can be used to save, copy and view the screenshot.
QuickScreenShots is not as sophisticated as commercial tools such as SnagIt or WinSnap, but that does not make it a bad screenshot taking tool.
The thing that is missing most is a resize feature to resize screenshots before they are saved. The app lacks tools like blur or highlight on top of that. This means that some post-processing needs to be done in an image editor or another program.
Windows users who are interested in the program can download a portable version or installer from the project website over at Google Code. It will run on all versions of Windows from Windows 9x on.
download link: https://bitbucket.org/_northernlights_/quickscreenshots-2/wiki/Home
Screenshot Captor is probably the most feature-rich screenshot tool available for Windows. The free program comes with all the bells and whistles you expect from a program of its kind, and a lot more.
You can download a portable version of the application from the developer website or a setup version.
The program supports all core screen capturing features such as taking screenshots of windows, the entire screen, or a rectangle, but also of the entire workspace (which spans multiple monitors). It is one of the few programs that support this.
Screenshot Captor displays a quick access menu by default after you take a screenshot. It allows you to save or print the image, open it in the editor, copy it to the Clipboard, or use send functionality.
You may customize what happens after you take screenshots to streamline the process.
The editor of the application is very powerful. It supports all major operations such as highlighting areas, drawing arrows and other shapes on the screen, or add text. It supports various save options, and may even be used to create a thumbnail of the image.
Screenshot Captor supports even more features: take snapshots of webcams, scanner integration, uploading of screenshots to image hosts, add effects, capture scrolling window screenshots, integrate third-party tools, and a lot more.
Download: http://www.donationcoder.com/software/mouser/popular-apps/screenshot-captor

Shotty comes with an installer, that offers to install the program or extract it and make it a portable application. An icon is placed in the system tray upon startup, which contains configuration settings, and links to program features.
Screenshots are created by pressing Ctrl-Print on the keyboard, or by left-clicking the system tray icon. Both can take screenshots of the full screen, or a single window, but not custom sizes, scrolling windows or other types of screenshots.
Shotty takes high quality screenshots by default, this and the default keyboard shortcut can be changed in the program's options.
The screenshot is displayed directly in the included (basic) image editor if the keyboard shortcut has been used to take it. The system tray icon on the other hand offers controls to directly save the screenshot, send it to the editor or to one of the supported image hosts.

The image editor includes several popular image editing options, including the ability to highlight or diffuse an area, add text to the screenshot, or to cut the image to keep only the selected region.
Screenshots that have been edited may be saved to the local computer, uploaded to one of the supported image hosts, or discarded. Shotty supports four different image hosts currently. There is unfortunately no option to add a custom ftp server to the upload options.
Shotty is an excellent tool to create screenshots in Windows, especially for users who regularly take screenshots but do not want Aero effects included in the shots. The download is provided at the developer's website, the program is compatible with Windows 2000 or newer, and requires the Microsoft .net Framework 2.0, which is included in Windows Vista and Windows 7.
Note: Shotty has not been updated in a long while. It works fine on all supported versions of Windows, but don't expect any new functionality or fixes.
download link: http://shotty.devs-on.net/en/Download.aspx
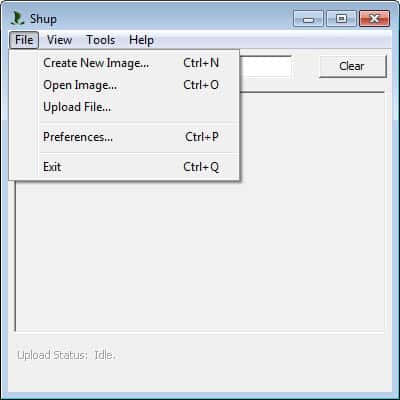
One application to rule them all. If you take frequent screenshots of windows or the Desktop, edit them afterwards and upload them to a free image host you may find SHUP helpful as it optimizes the process.
The software has all those features built-in which means you do not have to open two or three applications to do the same.
The typical process after configuring the settings in SHUP looks like the following. You press a hotkey which either takes a screenshot of the desktop or the active window. That screenshot is then displayed in a basic image editor where it is possible to resize the image, change the file name, tags, image format or use a rectangle to edit and upload only a selection of the image.
The image is automatically uploaded to the default file hoster and the url of that image is automatically pasted to the clipboard. That's a fast and easy way of creating and uploading screenshots.
Six file hosters are currently supported including Flickr, ImageShack and Photobucket. Some require usernames and passwords that have to be added in the configuration, the upload will obviously fail otherwise.
My suggestion would be to turn off all those confirmations to speed up the process a little bit. Shup adds itself to the right-click menu as well. Whenever you right-click an image you can access SHUP and use it to upload the file to an image hoster which is a very nice bonus.
I was not able to figure out how to upload images directly without having to open the image editor first. Think that is not possible.
Update: The latest version of the program comes with additional options that some may find useful. You can now for instance configure your own server for the uploads, for instance a web server, so that you do not have to use third party services for hosting.
Download Link: (Download Removed)

Snap Install is a specialized program that can be used to take screenshot sequences effortlessly. It has been designed specifically for making screenshots of installation procedures and product manuals.
The program is controlled with the mouse, which is handy and comfortable on the one hand, but also restricts you on the other.
The program displays an initial configuration menu on startup. Here you define the title and author of the project as well as the save location of the screenshots on the local system and an optional logo.
Once done click start to begin taking screenshots. You take screenshots with a middle-mouse click after selecting a screen with the left mouse button.
Each screenshot gets saved into the selected directory as a png file automatically. You do not see a dialog or editor that interrupts the process (if notifications are enabled on the system you see a notification in the system tray area). This is a very comfortable way of creating multiple screenshots in rapid succession.
You still may need to edit the screenshots that you have created afterwards, considering that their resolution or size may not fit the document.
You can create a pdf document with all screenshots automatically in the end. I'd say that is not such a good idea considering that you may need to edit the images before creating such a document. Another issue here is that all images are used in the creation, which is a problem if you have created some screenshots that you do not want in the document.
I have a few issues with the program that limit the program's reach and functionality. It is for one not possible to map the screenshot taking to a different mouse button, which means that you may run into conflicts in programs that use the middle-mouse button for other operations. This is usually not a problem if you do a screenshot series of a program installation, but screenshots for a product manual could very well be affected.
The second issue is that you can only take full window or fullscreen screenshots. You cannot select a smaller part of the screen for the screenshot. This may lead to additional editing work after taking the screenshots.
Regardless of that, if you are looking for a convenient program to take a number of screenshots in rapid succession, then Snap Install may be the program that you are looking for.
The portable software is compatible with all recent versions of the Microsoft windows operating system. You can download the software from the developer website.
download link: http://www.handle-it.nl/products/99-snapinstall.aspx

Snippy is a portable application for Windows XP and previous versions of Windows if they have the redistributable version of GDI+ installed that brings an interesting feature to the table of screenshot applications.
Snippy provides options to do freehand screenshots that can take any form that you want. It looks much like cutting the important part of a website or application like you would cut a newspaper article.
A click on the Snippy icon changes the mouse cursor to a pen that can be used to encircle the area that the user wants to save, rectangular areas can still be saved by pressing the shift key. The final area will be send to the clipboard right away, if it was taken on a website the url of the website will also be send to the clipboard.
The software supports multiple monitors and the use of hotkeys to start the capturing process. Definitely an interesting program that has a size of only 84 Kilobyte.
Update: The program website is no longer available. We have uploaded the latest working version of Snippy to our own server.
download link: (Download Removed)
Ashampoo Snap
Please read our review of Ashampoo Snap here.
Snagit
Please read the full review of Snagit here.
WinSnap
Please read the WinSnap review here.
It's not a problem to make a screenshot of the Windows command line if it is opened in Windows but what if you have to open the command line before Windows start? There is no obvious way to create a screenshot of the command line when Windows is not running. Some users might need to make screenshots in DOS, the most common reason must be for documentation purposes like posting them on a website or in a book.
CmdCapture is a small command line tool that can make screenshots of the current command line. Since it is a command line tool it is driven by parameters which are explained when entering CmdCapture.exe /h.
The easiest way to create a screenshot of the command line is to run the application without parameters. It will save a screenshot in the same directory in png format with the date and time attached to the filename.
Three additional parameters are supported by the software. The parameter /f can be used to pick a custom filename and file extension. Supported are png, jpg, bmp, tif and xpm.
The /d parameter can be used to specify another directory for the created screenshots. Finally the /q parameter changes the jpg quality level which makes only sense if jpg is used as the file format.
download link: http://ducklink.com/free-command-line-screen-capture.php
Simple Webpage Capture

Simple Webpage Capture is a standalone software program for the Windows operating system that provides its users with the means to take snapshots of the websites that they visit. The program acts independently of existing web browsers but utilizes the core engine of Internet Explorer to display the websites.
While Firefox users might not even consider reading on as their browser features several add-ons that make it possible to capture complete webpages (for example the excellent Screen Grab) other users might be interested. The user selects the output directory and image format of the screenshots in the main interface. Watermarks can be enabled optionally in the program interface.
A core browser engine will be displayed once the initial settings have been made. It is basically a very down to the core browser with options to load urls and to navigate on those websites. The browser window features a big Take Screenshot button that can be used to instantly take a screenshot of the current website.
Simple Webpage Capture might be a solution for users who want to quickly take screenshots of webpages but do not have Firefox or a browser with full screen capture capabilities installed. Combining the default web browser with screen capture possibilities is however the more natural way.
download link: http://www.pcwintech.com/simple-webpage-capture
Note: Some browsers ship with dedicated screenshot functionality. Firefox users can check this review for instance of the feature.

Every operating system has its fair share of screen capture software programs. Even the good old PrintScr key is sometimes used if no other software is available to do the job. Programs that work specifically in web browsers are rarer but still available. Fireshot is one of them. It is a screen capture software for both Microsoft's Internet Explorer and the Mozilla Firefox web browser. It has several interesting features that might make it worth a try next to the fact that it is available for the two most popular web browsers that are currently actively developed.
It adds itself as a toolbar button which can be used to trigger the screen capturing process. It is possible to capture the visible area of the browser window or the entire website. This leads to another menu with options to edit, save, print, upload or email the captured area. It is furthermore possible to open the output directly in an external image editor.
Fireshot comes with a basic editor if the edit option has been selected. This opens the screen capture in a new window that contains a preview and buttons in an header area. It is possible to add text or images, highlight areas, add annotations or pointers to the screen capture.

Every option can be customized. The font, size, alignment and typographic elements like bold, underline or italic can be customized for example when adding text to the screen capture. It is then possible to use the same export options that are available directly from the Fireshot button.
Fireshot could be an interesting screen capture software for users who only need to take screen captures of websites. The only negative aspect is that the edit window of the free version of Fireshot blocks the web browser window.
download link: http://getfireshot.com/
Taking a screenshot when you are using the Windows operating system can be as easy as pressing the print screen on the computer keyboard. It becomes slightly more complicated when only a part of the screen needs to be recorded.
The screenshot that has been taken with the print key can either be edited in an image editor or a specialized application to take screenshots of parts of the computer screen.
Lightshot is an alternative for the Windows version of the Google Chrome browser. The screenshot extension can be used to take screenshots in the web browser. This limits the reach of the application but might be just what some Google Chrome users are looking for.
The screenshot extension adds a button to the Google Chrome address bar that the user can click on to take a screenshot of the web browser window. There does not seem to be a way to take a screenshot of scrolling pages, only the visible area can be captured.
Keyboard shortcuts are available to streamline the process. It is for instance possible to press Ctrl C to copy the selected area to the Windows clipboard. The Ligthshot extension displays several buttons around the selected area which can be used to save the screenshot, send it to an online editor, post the screenshot on Twitter or Facebook or change the borders of the screenshot area.
Users who want more control or to take screenshots of other applications can also install the Windows software version of the Lightshot screenshot taking application that comes with additional keyboard shortcuts among other new options.
download link: https://chrome.google.com/webstore/detail/lightshot-screenshot-tool/mbniclmhobmnbdlbpiphghaielnnpgdp
Webpage Screenshot (Google Chrome)

I personally do not have the need for a web based screenshot solution like Webpage Screenshot for the Google Chrome browser. The core reason for this is that I use a desktop application - Snagit - for the task which allows me to take screenshots in any application and not only in Chrome.
Sometimes however you may not be able to install desktop apps on your system, which is for instance the case in most corporate computing environments or if you happen to own a Chromebook. In those cases you may have to settle for the next best solution, which may be Webpage Screenshot.
When you click on the extension icon in the Chrome address bar after installation, you see the three options Visible Screenshot, All Page Screenshot and Beta: Edit Content in the context menu.
The first two options should be self-explanatory. You can use the first to take a screenshot of the currently visible area on the screen, the second to take a screenshot of the whole page which means that scrolling pages are supported by the extension.
The third edit option finally allows you to edit the page before taking a screenshot. You can for instance remove elements from the page or add text annotations to it.
The extension loads the created screenshot in an editor-like mode afterwards regardless of choice. Here it is possible to use some basic editing tools to make modifications to the page.

The edit toolbar contains options to add text, arrows, lines or shapes on the screen to highlight, remove or add information.
You can save the screenshot in the end to the local computer system, use the share button to upload it to the Webpage Screenshot image hosting service or print the screenshot on a connected printer.
The options, which can be accessed via a right-click on the icon or a click on Options in edit mode, can be used to switch from saving screenshots in the png format to jpg and to edit the image header and footer information.
Webpage Screenshot is a handy extension for Chrome users who take screenshots of web pages open in the Chrome browser regularly. The functionality is solid, and the ability to edit the page before taking the screenshot is nice to have. A blur option is missing from the edit tools option, the only workaround is to either edit the element before taking the screenshot or to paint over it afterwards.
download link: The extension is no longer available.

