The term screen capture may refer to taking a screenshot of the desktop or part of it, or a screencast which is a digital recording that records activity over time.
This guide reviews screencast solutions exclusively and will concentrate on solutions that are available for the Windows operating system. That does not mean that some programs are not available for other operating systems as well, paneraireplica or available as online services, but the main focus is Windows here.
Screencasts are used in a variety of situations. They can be used to create product demonstrations, tutorials, or even game videos that are quite popular these days on video hosting sites such as YouTube.
Not every software application is suited for all situations though. While all can be used to record the desktop and activity on it, only a few come with capabilities to record computer games or full screen activities.
The list is divided into free video screen capture programs and commercial programs.
Commercial Programs
The Express version of BB FlashBack is free, while the standard and professional version are not. The Express version is limited in what you can do with it.
You can for instance only export screencasts to avi or Flash video, but not to mpeg4, quicktime or other formats that the commercial versions support.
There is also no support for annotations or video editing, and as far as effects are concerned, only cursor highlighting is available.
That does not necessarily have to be a bad thing though, for instance if you just want to record the screen and use video editing software to edit the recording afterwards.
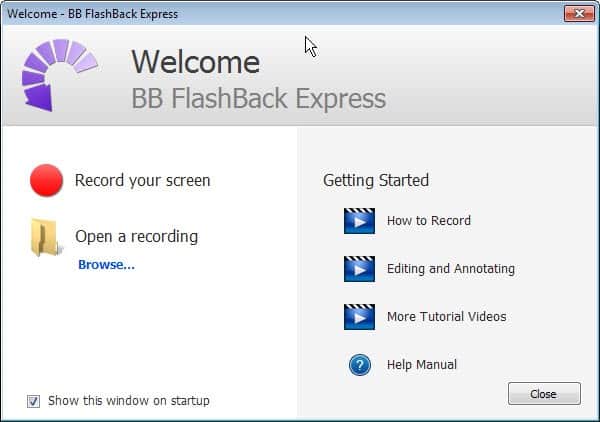
A program wizard is displayed on first launch that links to the core program features. Here you also find tutorial videos that you can watch to learn the program this way, and a link to the help manual to look things up there.
The recorder interface displays three options to you. Here you can select what to record, full screen, region or window, if you want to record sound, and if you want to record the stream of a web cam.
Before you hit record, I'd suggest you open the options first as you can look up hotkeys here among other things.
The only hotkey that is set by default stops the recording when you press Ctrl-Shift-S. You can change the mapping of the function and add other hotkeys that allow you to pause the recording or start a recording as well.
Other options available here allow you to adjust performance settings, limit the file size of the recording, schedule recordings, or configure sound and web cam recordings in detail.
The program supports several interesting features, like the aforementioned recording scheduler which are available in the free version of the video recording program as well.
Another interesting feature is the option to set a maximum file size but not a maximum recording time. The program will adjust the quality of the recording automatically based on the target file size.
BB FlashBack Express is a powerful video screen recorder for the Windows operating system. It ships with everything you need to record the desktop in a matter of minutes. The free version lacks video editing and annotations, but that may not be an issue.
You do need to supply an email address to get a download link though on the developer website.
download link: https://www.flashbackrecorder.com/express/

The CamStudio desktop screen recorder is a free program that enables you to record all screen and audio activities on the computer. It is one of the most popular screen casters for the Windows operating system, and supports many features comparable to commercial applications like Camtasia Studio.
When you first start the program after installation, you see a basic interface that displays all relevant screen recording options right in front of you. Here it is possible to start a recording right away with a click on the red recording button.
It is however suggested to first configure the program properly. It begins with the selection of an appropriate codec under Options > Video Compression. The Microsoft Video 1 codec is used by default, and options are provided to switch to a more efficient codec instead.Note that only codecs installed on the system will be listed here, and that you may need to download and install appropriate codecs for your recording task first to make sure you have the right balance between compression (to get as low of a video file as possible) and quality (to create a video with the desired quality level).
Other options include changing the quality of the recording (the higher the more disk space for the video file), and frame rate related settings.
Camstudio Recorder can record audio from all connected audio sources, including microphones and speakers connected to the PC. The audio source can be selected in the Options menu as well.
The program records the full desktop by default. Sometimes you may want to record a program window or region on the desktop instead, which you can do with a click on the Region menu to make the selection there. This can be useful if you want to create a video tutorial about a particular program for instance.
Recordings can be paused or stopped at anytime, either with a click on the buttons in the program window, or with the help of keyboard shortcuts that are available for that purpose. The keyboard shortcuts make sure that the program window is not appearing on the screen at the end of the recording. It is therefor suggested to configure the recording shortcuts to start and stop the recordings this way.
Camstudio is an excellent open source alternative for Camtasia and other commercial programs. While it does not offer the same feature set, video editing for instance, it is still an excellent alternative that you can use for the majority of tasks that commercial programs offer to do.
download link:Â http://sourceforge.net/projects/camstudio/
Creating a YouTube channel and videos that you publish on it may sound like a complicated task on first glance especially if you are not the tech-savviest of users. While it is easy to record videos using a webcam or software like MSI Afterburner, you need video editing software to edit the recorded video before you publish it on a site like YouTube.
There are free programs out there for that task, like Free Video Dub and while they produce great results, it means that you have to work with at least two different programs on your system.
Ezvid is a free program for the Windows operating system that combines screen recording with video editing. While it may not provide you with the same feature set as Camtasia Studio, it is an elegant easy to use solution that should be sufficient for a lot of users.
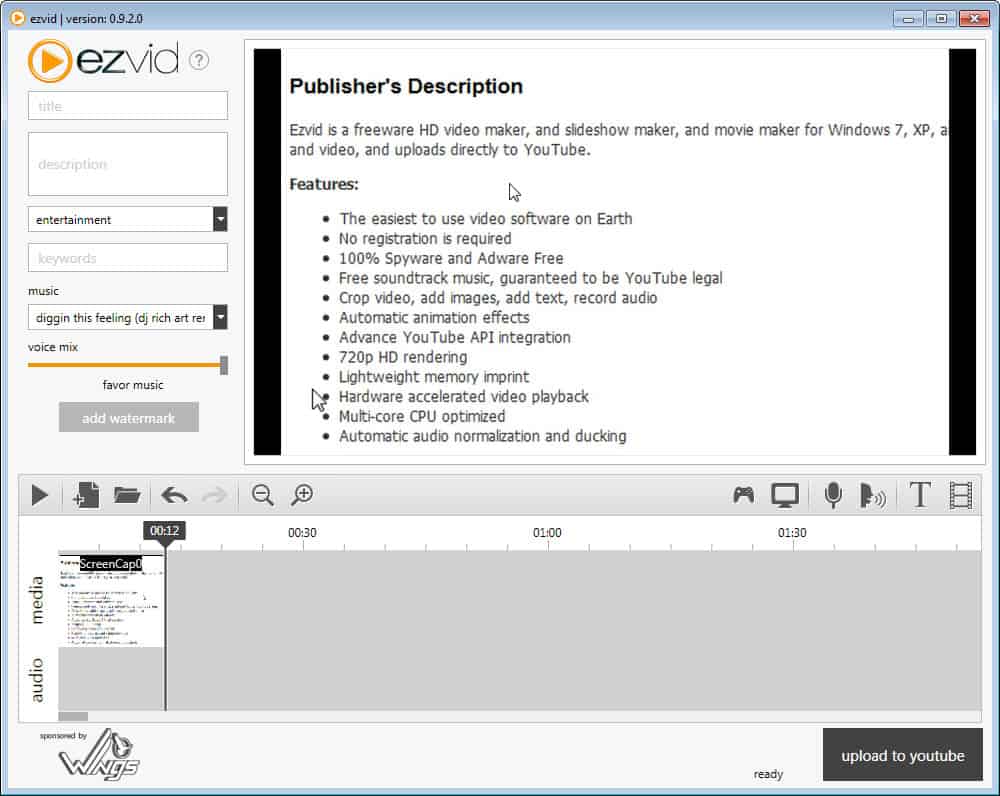
You see a screen similar to the one above on the screenshot when you start the program. Here you can edit video title, description, category, keywords and music on the left, see a preview of the video on the right, and video editing and recording options at the bottom.
You can drag and drop videos or images from the local PC in to the interface or use the recording capabilities that the program provides you with. The screen capturing options let you capture video footage from a connected webcam, an area on the screen or the full screen. You can in additional enable microphone capturing to add audio in real time to the recording.
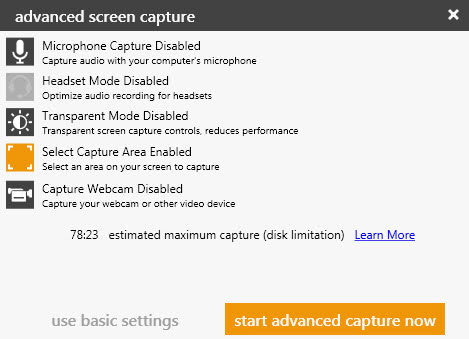
The program displays the maximum recording time available based on the size of the hard drive it is installed on. There does not seem to be an option to change that setting, I could not find one at least.
One interesting option it provides you with is to add text to the video and even synthesize the text to voice. As far as editing goes, you can split, duplicate and delete parts of the video easily using the timeline of the video at the bottom of the screen.
The editor offers a couple of additional options like adding a watermark to the video or dragging and dropping audio files to the time line to use your own pre-recorded audio files instead of the 30 or so tunes the program ships with.
Ezvid is a simple program that offers a variety of interesting features to create and edit videos that users of the software can upload to YouTube. That's unfortunately the only option the program provides users with as it is not possible to save videos to the local PC instead. The program could use a couple of features to improve its overall usability. Editing videos in the timeline is sometimes a bit fiddly for instance and better controls here could really make things easier for the editing user.
The program downloads more than 170 Megabyte when you run the installer which is another thing worth mentioning. If you want an easy to use program to create, edit and upload videos to YouTube, then this program may provide you with everything you need to do so.
Download link: http://www.ezvid.com/

Hypercam 2 can be added to the list as the developers of the program have turned it into a freeware that you can download free of charge from the developer website where it is available for 32-bit and 64-bit versions of Windows. Hypercam 2 should not be confused with version 3 of the screen recorder, as it is still available as a commercial version. Still, version 2 provides all the options needed to create recordings of a window or region.
Tip: Pay attention to the installation of the program as it will install the Babylon Toolbar on the system unless unchecked during setup.
Once you have installed the program on your system you can use it to create screen recordings. Before you do that, I'd suggest to make sure the preferences are all set correctly. A click on hotkeys for instance displays the keys on the keyboard that you can control the recording with.
Avi File lists the directory the recording is saved in and capture related settings. This includes the number of frames per second that are recorded and video compressor settings if available. When you are ready to record, you can either use the hot keys to start a recording, or switch first to the screen area tab to change the default width and height of the recording area. This is not necessary if you want to record a window, but if you want to record an area on the screen, for instance two windows or maybe even the full desktop, then it is necessary to adjust the dimensions manually first.
Audio is automatically recorded if you have access to a microphone that is connected to the PC. You may however prefer to record the audio after the video recording, or record system sounds instead. You can configure the audio related recording settings in the sound tab of the program. Here you can disable sound recording or select a specific audio source for it instead.
HyperCam 2 is an easy to use screen recorder for Windows. It lacks the ability to capture fullscreen applications, but ships with everything else that is necessary to record a video off of your screen.
Download link: http://www.hyperionics.com/hc2/index.asp

Techsmith, the creators of Jing, are making the news every day with an exciting announcement. They are giving away old versions of Camtasia and SnagIt for free and now announced a new screen capturing utility with two interesting features.
Jing lets the user capture part of the screen by dragging a rectangle around the part of the screen that he wants to capture. This rectangle can be moved around and some parts of the screen are recognized as units which can be captured without drawing the rectangle around them. The rest of the screen is shown in black and white which makes it easier to hit the mark. Once the image has been captured it can be spiced up by adding arrows, a highlighted area, text, and a frame to it to annotate or catch the attention of the viewer.
The so created image or video can be easily uploaded to Screencast, ftp, Flickr or saved as a file locally. This is a great feature for webmasters who create a lot of screenshots that they embed in their website to spice up articles there.
Users have to signup to Screencast during setup of Jing which is an uncomplicated process. They receive 200 Megabytes of free space and 1 Gigabyte transfer limit per month. Don't worry, you do not have to use this service to use Jing.
What I like about Jing is that it is relatively uncomplicated to use and has some great features like the upload ability that saves me some steps when creating screenshots. The user interface however is experimental and users surely will need some time before they get used to it.
My projection is that Jing will become commercial sooner or later so grab it while it is hot and free. Runs on Windows and Mac computers.
download link: http://www.techsmith.com/jing.html

Microsoft Expression Encoder is an application that allows you to record your screen, and also audio. This can come in handy for those who wish to record instructional videos, or if you want to record yourself playing a video game, or pretty much anything else. You won’t need to enter a product key. If you’re asked for one, you can skip that page and simply continue.
To get started, you need to first download a copy of Microsoft Expression Encoder. You can do this by going to this link. This will take you to the Microsoft download center, and all you need do is click on the download button. You may be taken to another page where it will prompt you to download the file. Just go ahead and save it to you computer. Once the file has downloaded, you simply have to click on it to begin the installation process and follow the instructions. During the installation process it will not only install the Microsoft Expression application, but also a screen capture codec, that will allow you to capture the screen and audio from your computer. It will also enable you to save the video you’re recording into a file format you can use later to edit the video.
One you’re done installing the program, you should be able to find it listed as a new program in your start menu. It will be called Expression Encoder Screen Capture or something similar. When the program runs, you may see an informational screen saying the program is limited to only ten minutes of screen capture. This is because this is the standard version of the software, so if you want to record for more than ten minutes, you’ll have to split your video into sections and join them again later. Most instructional videos are less than ten minutes anyway, so this shouldn’t be too big of a deal.
To get the best out of the software, you should probably alter some settings before recording. So click on the “gear†icon, which will open up a settings screen. The best frame rate is about 30fps, so just change that on the drop down menu. Also change the quality to 100. Also if you’re going to be using a microphone during the recording, click on the audio tab, and select the microphone you’re going to be using, and choose a bit-rate of 256.
To start a recording, just click on the red record button. You will get a window on your screen that can be resized to how you want. You can record either the entire screen or just a portion of it. Once you’re ready and happy with your screen size, go ahead and click on record once more to start your recording. Click on stop when you’re done.
Once you have finished a recording you will be presented with another screen where you can choose to open your recording in Expression Encoder 4 for encoding. Choose an output directory on the right hand side of the screen – your desktop might be a good place. Click on file, and then encode, and your video will be created. The standard video type is a WMV file, so you can view your video in Windows Media Player. That’s all there is to it really.
Download link: http://www.microsoft.com/en-us/download/details.aspx?displaylang=en&id=24601
Screen Recorder from Rylstim is a free portable video capture program for Windows. It is a basic program when you compare it to other applications listed here on this page, but that does not mean that it is not sufficient for your tasks.
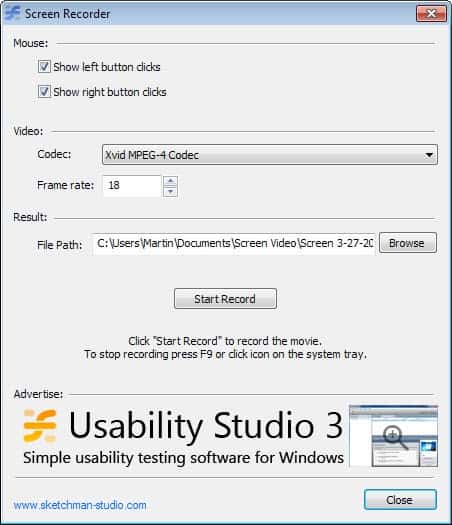
When you start the program you only get a handful of options. You can select a video codec that is installed on your system and the desired frame rate, the download path where the recording will be saved to, and whether you want left and right mouse clicks to be recorded.
That's all there is and once you have made changes to the initial configuration or kept its default values, you can hit the start record button to start the recording.
The only hotkey available lets you stop the recording when you hit F9 on the keyboard.
download link: http://www.sketchman-studio.com/rylstim-screen-recorder/

Screen2Avi is another lightweight free program to record avi videos. The program is available as a portable version and installer. The application uses tabs to configure the screen recording session. Available for selection are fullscreen, predefined and custom dimensions for the video.
It is not only possible to select the recording dimensions, but also the position of the recording frame. You can select one of the nine fixed positions like center left or bottom right, or define a custom position on screen. There is unfortunately no option to directly select a program window for recording. The only option to record a window is to use the custom positioning to set its position on the screen. The position and dimension are shown with a green frame directly on the screen.
All installed video compression codecs are available for selection under video. This is also the location where the frame rate of the recording is defined.
Screen2Avi can record audio, but that feature needs to be enabled separately. The program supports only audio recording from external sources like microphones, it cannot record the system sound directly. You can select audio devices available on the computer.
The output path for the screencast is defined under General. Other available options are enabling or disabling the mouse cursor or configuring hotkeys to start pause and stop the recordings.
A click on the red recording button starts the recording. It is usually easier to use hotkeys (F1 start, F5 stop) than the buttons in the program window, especially when recording in fullscreen.
Screen2Avi has a few usability issues, like the previously mentioned audio recording limitations or selection of windows. It is nevertheless a handy tool for users who need to create a screen recording, especially if they can live with those limitations.
Windows users can download the screen recording software Screen2Avi from the developer website. It is compatible with 32-bit and 64-bit editions of the Windows operating system. The developers have uploaded a tutorial to their website that walks new users through the configuration and creation process.
download link: http://www.trustfm.net/divx/SoftwareScreen2Avi.php?b2=1
Screencasts are an efficient way of visualizing tutorials and to highlight how something is done on a computer. They are mainly used for educational purposes such as recording step by step instructions on how to use a certain program and for teaching purposes highlighting what is being taught visually as well.
This is usually done by capturing part of or all of the screen to visualize what is going on and using a connected microphone to add audio commentary.
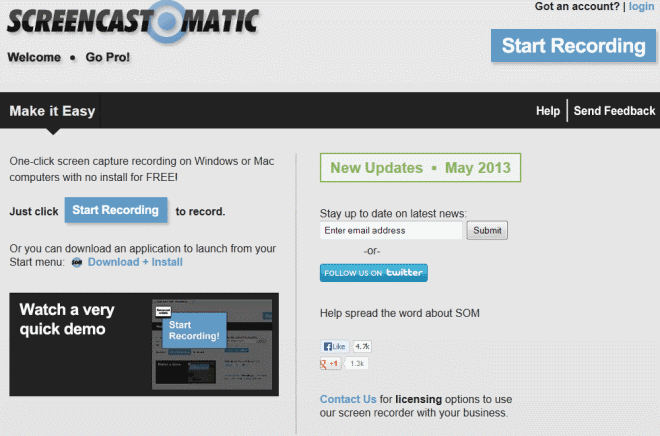
The service Screencast-O-Matic offers a free and reliable way of creating screencasts using just your browser and Java. It is not necessary to register an account to create a screencast but you can do so if you want to publish it on the website. A pro account is available that improves the service further. Watermarks are removed for instance, there is no recording limit and you get options to publish the recording on third party sites such as Google Drive, Dropbox or Vimeo directly.
It is furthermore possible to export the screencast into Apple Quicktime format without registration as well. You probably would like to know more about the process itself and how it works.
Just click on the Create button on the Screencast-O-Matic and select a resolution for the screencast. You currently can choose between 640x480, 800x600 and 1024x768 plus the option to screencast full size if you have a maximum resolution of 1024x768.
You may then select to record audio as well right away by selecting one of the available audio sources. It is alternatively possible to not record audio during the recording which can be useful if you want to edit the video afterwards and add commentary then to it. Last but not least you may select to use a red square that displays mouse movement in the screencast because the mouse pointer itself is not shown.Only the frame of the window that you have selected is shown unless you select to screencast in full size.
The frame can be moved around and all applications, not only the contents of your browser, can be moved into it so that they are recorded by the application.The screencast can be started and stopped at anytime but the maximum recording time is 15 minutes at this time unless you upgrade to a pro account. After finishing the screencast you get the option to export the screencast to .mov or upload it as a public or private screencast to the Screencast-O-Matic website which requires a registration.I recorded a 15 minute screencast and exported it.
The file that was created was 120 Megabytes in size and it took only a few minutes to create.
Update: You can now download a Screen Recorder application instead if you prefer to run it locally, or if the Screencast O Matic web app is not working properly for you. Free users can publish the video to YouTube directly, or save it locally as mp4, avi and flv files.
download link:Â http://www.screencast-o-matic.com/

Screen capture programs can be divided into two categories: Those that concentrate on the screen capturing part and those that add functionality like image editing to the process. Screenpresso belongs to the second category as it offers basic image editing and annotation features for screenshots that have been taken with it.
The portable software program hijacks the Windows Print screen and adds functionality to it at the same time. Pressing print on the keyboard will give you the option to draw a rectangle on the screen to capture the area that it surrounds. Adding the Ctrl key to the procedure will take a screenshot of the whole screen while Ctrl-Shift-Print will capture a scrolling window.
The default action after pressing the keys can be configured in the program's settings. It is for instance possible to open the internal image editor afterwards to edit the image or to open the screenshot history instead. The history lists a number of recently taken screenshots, by default 20.
Other automatic options include copying the captured image or the path of the captured image to the clipboard.

The image editor offers access to six drawing tools that can be used to add arrows, numbers, text and rectangles to the image as well as blur part of it. The crop, resize and border tools complete the image editing options that the program provides.
Screenpresso is a portable software program for the Windows operating system that should provide computer users with all the tools needed to capture screens and edit the resulting images. The image editor could use additional options like specifying the blur level or the compression level when saving images.
Windows users who want to try out Screenpresso can download the screen capture software from the developer's website.
download link: http://www.screenpresso.com/index.html
Screenr is special, as it does not require you to download software to your computer. Instead, it is run in the web browser but does require the Java plugin because of that.
If you do not have Java installed, then you need to do so before you can start using the screen recorder.
The second limitation is that you can only record up to five minutes and no longer than that.
Last but not least, all screen recordings that you make are public.
You can select the resolution that you want to record in with audio being recorded automatically as well as the same time.
The screencasts are saved as Flash video files and can be shared in the end to sites such as Twitter or YouTube.
A Pro version is available that adds private recordings and other advanced features such as analytics or player branding to the application.
download link: retired on November 12, 2015.
![]()
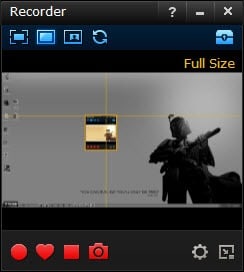
The free video recorder displays links to the main three program options on start up. The recorder and webcam links lead to recording tools, while the producer provides you with options to apply effects, audio and other features to video recordings.
The recorder itself supports the recording of an area of the screen, full screen recordings and web cam recordings. Before you make a selection here you may want to click on the settings icon first to make sure all recording preferences are set the way you want them to be.
Here you can modify recording related preferences such as the frames per second and brightness, whether you want the mouse cursor to be visible, or where videos are saved to.
The hotkey tab is especially useful as it provides you with information about them. You can use F11 to start and pause recordings, F12 to stop or save them and F6 to abort the current video capture.
Videos get saved automatically to the selected directory on the system. The only format available is Flash Video.
download link: http://www.smartpixel.com/

Sometimes you may want to record a video of your desktop, a webcam, another window or specific region of the workplace. This can be handy for presentations, computer training, marketing purposes or entertainment. SMRecorder is a free video recording software for the Windows operating system that offers enough features to make that task as simple as possible.
Users need to pay attention to the program's installation as the standard installation will install a toolbar, change the default search provider, homepage, tab search and page not found errors. All of these changes can be disabled if custom installation is selected.
SMRecorder displays a small video control panel on startup that is always on top. The control panel offers options to create a new recording, pause and stop recordings and open the save folder and help file.

A click on the new recording task button opens the recording configuration options. Here it is possible to change general, video and audio related settings. The general settings define the audio input, capture size, save path and duration of the recording.
The three capture types desktop video, camera video and desktop / microphone sound can be selected here as well.
Desktop video records part or all of the Windows desktop, camera video records footage of a webcam and desktop / microphone sound saves only the sound of the computer or cam.
Video and audio settings offer additional options. Users can change the video compression quality and frame rate or the audio volume and quality. It is furthermore possible to disable audio recording completely in case it is not needed or if the user plans to add audio to the video separately.
Videos are automatically saved in avi format once the recording is stopped by the user. It may be a good idea to experiment with different video quality settings to find one that's suitable for individual tastes and purposes.
SMRecorder is a convenient video recording software for the Windows operating system. The program is available for download at the developer website. It tested fine on a 64-bit Windows 7 Professional system.
download link: http://www.video2down.com/
Fraps is am application for Windows that lets you capture videos / screens of 3D applications. It is mostly used to record in-game movies. The biggest drawback of Fraps is that it is not freeware, you have to purchase it to use all of its features. The limited test version adds a watermark to the video and is only good for a time-limited recordings.
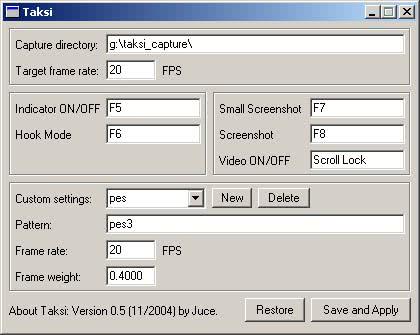
Taksi steps in and provides a similar functionality with the advantage that it is Open Source, free for everyone to use and download.
The unregistered version of Fraps stops after 30 seconds of recording and adds a Fraps watermark automatically to the captured video. It does not make lots of sense to use this version other than for testing purposes. Taksi on the other hand has no such limitations making it an ideal capturing application for users who does not want to buy Fraps.
Taksi uses installed video codecs to compress the recorded videos on the fly so that you can save disk space and record longer video sequences.
The biggest drawback is that Taksi will not record audio as well, you need to find a different way to record the audio (should work with harddisk ogg for example, not tested though). There are no limitations but the space on your hard disk for recording videos.
I hope the Taksi team decides to integrate audio recording to their application, this seems to be the only thing that is missing to make it a great alternative to Fraps.
download link: http://taksi.sourceforge.net/

TinyTake is a free video recording software. An account creation prompt is displayed to you after installation which you can ignore, at least for the time being.
The application is controlled either via its system tray icon, or via shortcuts that it makes available.
It supports screenshot taking and video capturing. As far as video captures go, you use the shortcut Alt-V to start it or click on the system tray link to do so.
A rectangle is then displayed with a transparent area inside of it. You can modify the size of the recording area via drag and drop, and click on the record button afterwards to start it.
Captures are saved as mp4 files locally, and there does not appear to be an option to change that at all.
The program lacks options to change important recording values such as the frames per second. There is also no option to change the audio or video codec or source.
download link: http://tinytake.com

Webinaria is an Open Source screen capturing software for the Microsoft Windows operating system. It comes with options to record video and audio of the entire screen, a selection or the active window which can be initiated by using hotkeys or from the program's interface.
Users who never worked with screen capture software before will be able to start a capturing process in less than a minute as the software program has been designed with ease of use in mind. It takes for example only a click with the mouse button to start the first screen capturing process after installation. The program comes with a few options that change and tune certain aspects of the screen capturing.
It is for example possible to record audio narration (with a connected microphone) or webcam video (with a connected webcam) together in the process. The screen capture software would combine these automatically during the capturing process.
Other available options include the selection of the sound device and webcam if multiple devices are connected to the computer system. It is furthermore possible to set the frame rate of the recording. Available framerates are 5, 10 and 15 frames per second.

Webinaria will display the recording after the screen capturing process has been ended by the user. It is possible to view the recording frame by frame, delete sections and to publish it at the Webinaria website. The recording itself can be saved as an avi or flv video file on the computer system.
download link: http://www.webinaria.com/
1AVCapture is a capturing software that can record video, audio, images and streaming media. The software captures the media which is a different method that most video and audio downloaders use. This makes it more complex to download media that other downloaders can simply download to the local computer system with the click of a mouse button but indispensable for media where those downloaders fail.
1AVCapture can record anything that can be heard or seen by the user sitting in front of the computer. The program displays a list of recording profiles on each startup which can be used to quickly configure a new media capturing session.
Those profiles range from recording the PC screen or region with or without audio, recording audio directly from the microphone, another device or all that can be heard or to broadcast the audio, the PC screen or a region live on the Internet.
The program has not been primarily designed to capture streaming videos but it can be used for that as well. A video on a video portal like Youtube for instance can be recorded regardless of the technology, digital rights management or encryption used on the website. As long as it can be seen and heard it can be recorded.
To record a video on a website one would select the appropriate profile, draw a rectangle around the video area to define the part of the screen that the video plays in, select a 30 fps framerate, start the recording and the video.
Some users might notice a flaw here very soon. The program records what is shown on the desktop. This means that the video or the recording area has to be in the foreground all the time. If something else is placed in front that is recorded instead of the video. The same is true for audio recordings.
1AVCapture can also be used to capture video and audio from video devices such as camcorders. The main application for most users is probably the use as a screen recorder which can be useful for creating demonstration videos or broadcasting part of the screen or the full desktop on the Internet.
Installation
1AVCapture is supplied as a zip file that contains the setup.exe to install the media capturing software, the file activate.exe to activate the program and a readme document that contains installation instructions.
Installation begins with the execution of setup.exe. Do not start the application at the end of the installation as you need to run activate.exe first to activate the software to make it a licensed copy.
The program found a new update during usage and recommended to download it afterwards. Installing this update will turn the licensed version into a trial version. Make sure to not download and install the update.
Positive
Negative
1AVCapture is a complex screen recording software that is especially helpful when standard downloaders or screen recorders fail to capture the video or audio.
The developer's website is accessible here. It contains demonstration videos on how to use the screen recording software.
download link: http://www.pcwinsoft.com/1AVCapture/index.asp

A free limited version of Bandicam is available which has the same restrictions as the free version of Fraps has. It will display a watermark on the recorded video and supports only a limited recording time.
The program can be used to record full screen applications and games that use DirectX or OpenGL, as well as part of the screen only. The main program window displays all recording options in tabs.
Here you select the output folder, set hotkeys to improve the recording experience, disable the frames per second overlay, and set the video and audio format that you want to use.
The program can record screen resolutions of up to 2560x1600 in high quality, and for as long as storage space is there to save the recording.
Another interesting feature is that it can use the gpu, the graphics processing unit, to improve the overall recording performance.
download link: http://www.bandicam.com/

Most Windows video capture software programs have some sort of limitations like a time limit or watermarks when capturing video.
The video capture software works with internal and external video capture cards, webcams and can also capture almost everything that is shown on the monitor screen.
Debut can capture the entire screen or a rectangular area selected by the user plus it can record sound from any source connected to the computer if so desired. It has a wide range of output formats and quality settings. Videos can be captured in avi, mov, flv and several other formats. Several video encoder options can be changed in the program's settings.
Minor video capture editing is supported as well. The user can change the framerate and size of the output video and apply video effects and text annotations which comes in handy for demonstration videos.
It can capture fullscreen which it does ok for desktop applications. Before you can capture applications that hide the program interface of Debut you need to set global shortcuts in the program options.
Debut Video Capture Software is definitely more a software to capture the screen or part of the screen that it would be a replacement for applications like Fraps which is great for games. What I really like is that it can capture the sound from a microphone which means that you can create demonstration videos on the fly without having to record the sound in the editing process.
Download link: http://www.nchsoftware.com/capture/index.html
Fraps is a real-time video capturing software for Windows that has been specifically designed to capture game streams. While it supports screenshot taking and benchmarking as well, it is well known for its recording capabilities.
That said, Fraps is not free and needs to be purchased before it can be used without restrictions. According to the developer, Fraps can record screen resolutions of up to 7680x4800, capture audio and video using various sources for that, and in custom frame rates between 1 and 120 frames per second.
The application itself is easy to use. It is hotkey driven so that you can start and stop video captures of full screen applications without having to minimize the program first.
Before you start you should select a directory for your recordings and make sure that it has enough free space. Video recordings of full screen games use quite a lot of space especially on high resolutions and frame rates.
Fraps will detect the best sound input automatically, which you can modify in the program settings.
download link: http://www.fraps.com/

The PCHand Screen Capture Recorder Suite consists of the screenshot software PCHand Screen Capture and the screen recorder PCHand Screen Recorder.
Both are provided in a suite but can be installed and started separately. PCHand Screen Capture is a sophisticated screenshot taking software that uses profiles for different jobs.
The software displays a list of already configured profiles after startup ranging from taking a screenshot of windows, the full screen, a scrolling window, freehand or rectangle.
Each profile consists of an input method, output setting and effect. Input methods define how and where the screenshot is being taken, output methods where it will be send to our saved and effects can be used to add additional information to the screenshot automatically.
It is possible to add new profiles to the program or remove existing ones in case they are not needed. The different profiles can be activated directly from within the software program or by configuring hotkeys to use the computer keyboard to trigger them.
Most of the preconfigured profiles use the editor that is shipped with the screen capture software. This editor comes with basic image editing options that include adding text, forms or arrows to the screenshot.
Additional options are provided in the file menu on top. There the user can select filters and other image manipulation effects like rotating or resizing the image.
PCHand Screen Capture is a sophisticated screenshot taking software that's easy to work with and expandable thanks to the profiles that can be edited or created.
PCHand Screen Recorder is the second program in the software suite. It can record video and audio of a select region of the computer desktop. The program did not work correctly on our Windows 7 Professional test system.
When it was set to manual saving it seemed to record just fine but there was not an option at the end to save the video. If it was set to automatically save it stopped responding and had to be closed.
We will therefor only evaluate the screenshot taking software and not the screen recorder below.
Installation
The PCHand Screen Capture Recorder Suite comes with two setup files that need to be executed separately giving users the chance to only install one of the programs if that is desired. The programs can be registered by clicking on activate.exe after the installation of one or both programs have been finished.
Positive
Negative
download link: http://www.screen-capture-record.com/index.html

Screen2Exe is a lightweight program that can be used to record a computer screen and save the recording as a executable which makes it easier to distribute it to other users without having to think about video formats that might or might not be installed on the other user's computer. The program has been streamlined to make the recording process as easy as possible. It actually takes only a few clicks to create a recording of the screen.
Screen2Exe comes with the option to create a recording of the full desktop or only part of it. The only two options that are available as well before starting the recording are to include audio in the recording and to set a frame rate for it.
A click on the Start Recording button will start the recording process of the computer screen once the parameters have been set (or the default ones left untouched). The program will display a five second countdown before it starts to record the whole screen or the selected window.
A set of post-recording options are available. It is possible to save the screen recording right away to the local computer system, run a frame optimization script to remove unnecessary frames to reduce the size of the output or to open the editing options.
These basic editing options allow a user to add annotations, images, delays, mosaics, to zoom or focus, cut the clip or to optimize the frames. The screen recording can be played in the interface. Once the editing has been done the recording can be saved.
Screen2Exe is a basic screen recording software that should suffice for demonstrations that do not rely on fast moving objects or images.
download link: http://www.screen-record.com/screen2exe.htm

