Change Windows 7 Library Icons with Library Icons Changer

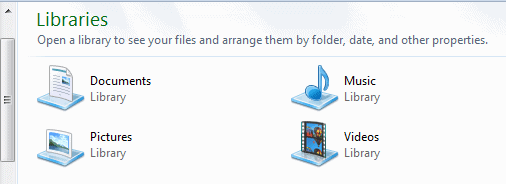
So many users enjoy customizing various features and appearances in Windows 7. Personalizing features and appearances is fun and gives a fresh new look you your Windows 7 experience. Generally, Library icons cannot be changed in Windows 7. Someone always comes up with a way to hack the limitations and overcome them and that part of what this article is about. A free tool called Library Icon Changer from one of the users at deviantART comes to the rescue and gives you the ability to change the boring Library icons. This is the simple way to do it and you can have the custom look to your Windows 7 library icons in no time. Or you could keep the same old icons if you want.
This is the download mirror for Library Icon Changer:
Unzip the folder and launch the tool from the .exe file. You are immediately greeted with a window containing various icons and a list of libraries.
To change the Libraries icons, highlight one of the icons in the right pane and then choose one of the icons in the left pane. When you have found the icon that you would like to replace the Library icon with, select it and then click the button at the bottom of the left pane: “Select Icon from dllâ€. Notice that, after selection, the icons are changed in the right panel and they are changed in the main Library window as well.
There it is. It looks a little better now. You can use any of the icons and change them as desired. You may also restore the default icons by clicking “Restore default Icon†in the main interface for Library Icon Changer. This is the easy way to change Library icons. Now we can take a look at how to change them manually without using third party software.
Changing Library Icons Manually
All it takes it Notepad to change these icons manually. Copy and paste the following line into the Start menu search box. You may also paste it in the Explorer location bar. Either way will work.
%appdata%\microsoft\windows\libraries
Now drag any of the icons from Windows Explorer over to the Notepad window and this will open the file.
The iconReference line will be visible in the file. In the event that it is not there, you will need to add one. For example, it would look something like this:
<iconReference>C:\Windows\System32\shell32.dll,301</iconReference>
Check for the data in the middle of the path. Look for either the .ico file or to reference a DLL files, it is necessary to add the comma and include the number position of the selected icon in the file itself.
Now you know two ways to change library icons. The software method using Library Icon Changer is probably best for the average user. The manual method is better suited to the advanced user or someone learning how to change program files manually to make adjustments to appearances and applications. Both ways get the job done.
Advertisement
The “%appdata%” Folder is in [USER FOLDER]\AppData\Roaming\