How To Take a Screenshot on Windows 11?
People have used screenshots for various purposes. The process of getting a screenshot has changed over the years. Gone are the days when users would use print screen and then modify screenshots. This article will look at a few ways to take a screenshot.
Copying the Entire Screen
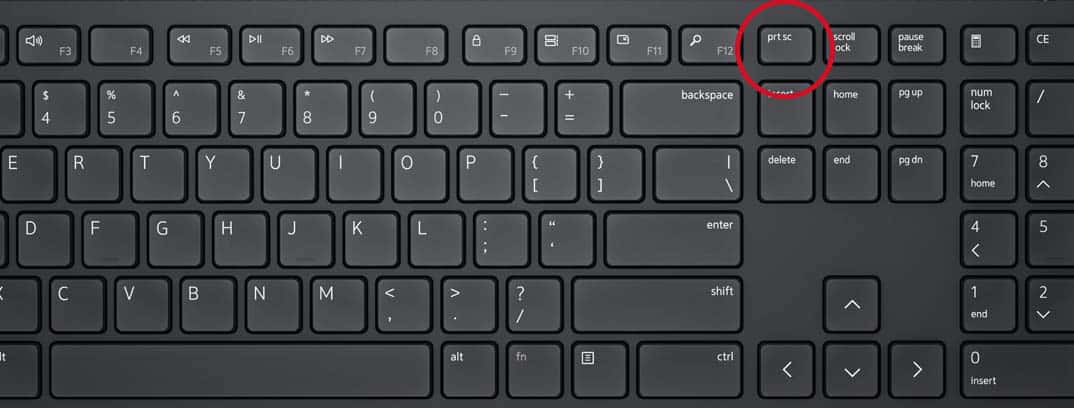
If you want to take a screenshot of the entire screen in Windows 11, you will need to use print screen. This could be different buttons for different keyboards. Some would say PrtScr, while others say PrtScn or PrtScrn.
Most desktop keyboards would have the print screen key next to the F12 key. Some laptops would have the print screen key as part of the Fn function. In this case, you would need to press Fn and then print screen.
When you press print screen, you can paste it anywhere you want. Most paste it on the paint app, while others use Microsoft Word or similar apps.
Saving the Screenshot as a File
If you want to take a screenshot and save it as a file instantly, you need to press the Windows key + print screen. Windows takes a screenshot of the entire screen and saves it as a PNG file. This is saved in the screenshot folder by default. If your print screen is part of the Fn function, you would need to press Windows+Fn+print screen for this to work.
Copy Window to Clipboard
To capture your active window and paste it to the clipboard, you need to press Alt+print screen. Once it has been pasted to the clipboard, you can paste it into any supporting app.
Capture a Portion of the Screen
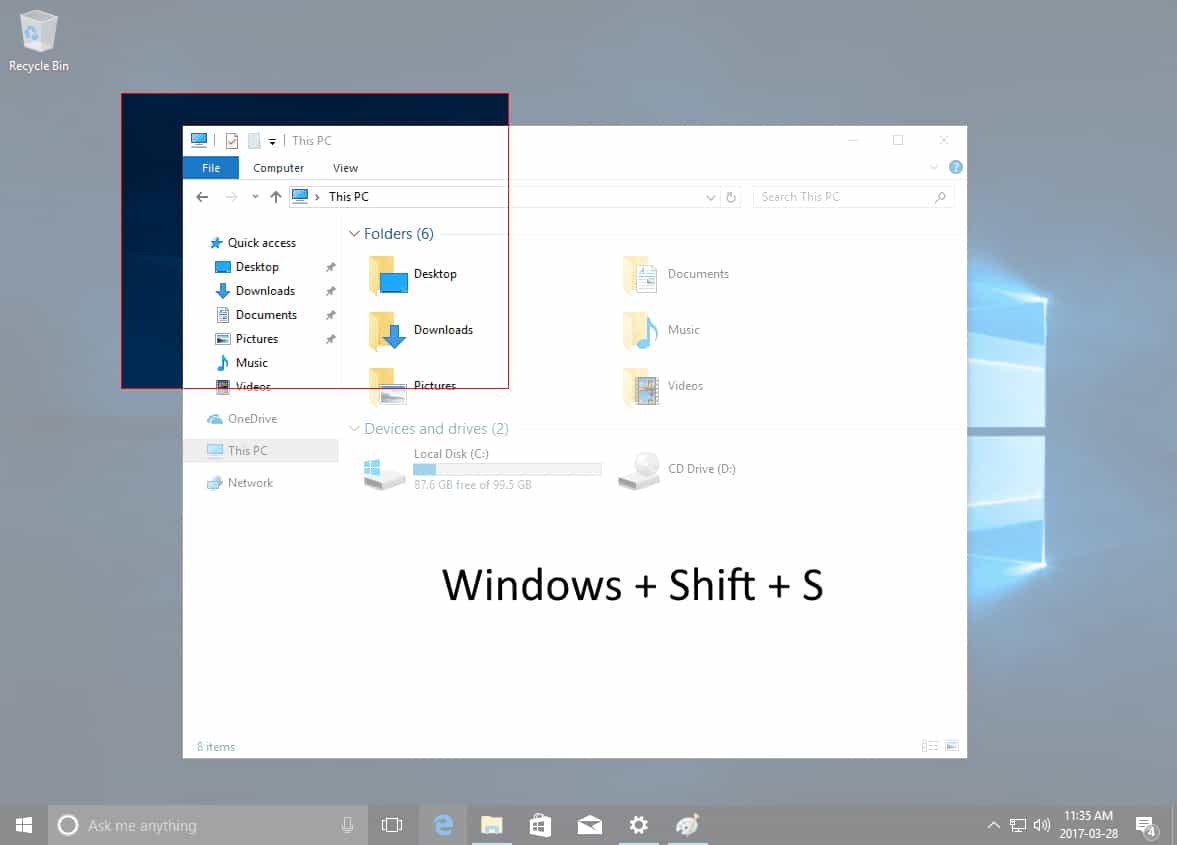
This is one of the latest features on most Windows computers. You can now capture a portion of your screen by pressing Windows+Shift+S. This will open a clipping tool. You need to select the portion of the screen you want to capture and drag the clipping tool across it. From there, you just need to paste in any app you want.
Taking a Screenshot Without the Print Screen Key
On many older Windows computers, there is no print screen button. A classic example is the Microsoft Surface tablet. You can take a screenshot on such devices by pressing the Windows button and Fn+space bar. You can also hold the Windows button and press the volume down button for a screenshot.
Snipping Tool
You can also use the inbuilt Windows snipping tool to take a screenshot. Go to the start menu and search for snipping. You will see the snipping tool app. Open the app and click new to take a screenshot. You can take screenshots of any shape (free form, rectangular, full screen, and window).
Xbox Game Bar
You can also take a screenshot with the Xbox game bar. For this, you need to open the game bar and press Windows+G. You can also press the Xbox logo on your controller. You can then use the capture widget to capture screenshots. This tool can even be used to record videos of your screen.
Snipping Is Very Easy
Now that you know how to take a screenshot, never miss out on important information. A screenshot is a great way to save important information you see on a site. You can even take stills from a video and save these for future reference.
Advertisement





@Tachy:
Everything is sent to M$, unless you use an alternate OS.
Somehow the article failed to mention how to take a screenshot of the Login Window, not the Locked Window.
How? With a third party program unless you want it sent to M$.
Flameshot v12.1.0 is THE winner for me ;)
I use Lightshot, it has a lot of options.
Use greenshot, with a hotkey.
The best software of this kind is Lightshot, it allows a lot of options while selecting the area and also before save the picture. Thanks @Shaun for the article. Happy Christmas day from Spain to you all! :]
Thanks, wish I were there!
Copy of comment made for new article on how to take screenshots on Windows 10. Looks like previous work by Martin and Ashwin is infinitely more valuable as a resource:
@ShintoPlasm
Perhaps, but I perused gHacks for screenshot tools and found some excellent, wonderful ideas. Most of the site’s articles were produced by Martin, but Ashwin contributed to the batch of ideas. Notice the difference in style and depth–
https://www.ghacks.net/2017/04/15/whats-the-fastest-way-to-take-a-screenshot-on-windows-10/
[Note the table at the end of the article that summarized the different Windows commands–brilliant work from long ago.]
Another Martin article covering some great screenshot software; I just fell in love with ScreenShot Captor Portable–for blogging or tutorials it even beat Problem Steps Recorder:
https://www.ghacks.net/overview-best-screenshot-software/
A couple of programs recommended by veteran users of screenshot programs:
https://www.ghacks.net/2019/06/24/auto-screen-capture-for-windows/
and
https://www.ghacks.net/2021/06/23/lightscreen-is-a-minimalistic-screenshot-tool-for-windows/
Aren’t the above articles those that we, the readers, applauded and needed for our own growth?
Addictive Tips was the only other site I found with superb recommendations:
https://www.addictivetips.com/windows-tips/5-best-free-screen-capture-software-for-windows/
and
https://www.addictivetips.com/windows-tips/top-6-free-photo-sharing-and-screenshot-taking-tools-for-windows/
Why the “dummying down” of gHacks? Truly bewildered!
I better have the comment saved since so many of mine are being deleted. I seriously require the information.
I use use print screen and then modify screenshots with Paint app.
All other option are terrible.
Snipping tool works well for me.
Regarding this false statement: “Windows takes a screenshot […] saves it as a PGN file.”
No, Windows doesn’t default to something called “PGN” format for screenshot images, please stop spreading inaccurate information. I suggest consider looking at Portable Network Graphics (PNG): https://en.wikipedia.org/wiki/PNG
Thanks for pointing this out. Typos happen.
Following this article, I am a changed man. Thanks Shaun for making the world a better place, one moronic adverticle at a time!