Sharex: take screenshots and upload local data to remote locations
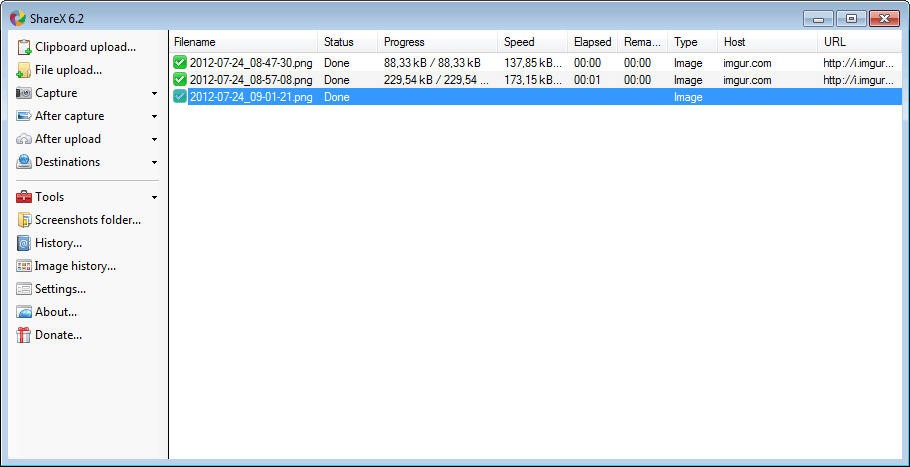
Sharex is not only a screenshot taking application, nor only a file uploader but it supports both of those features and several others on top of that.
With that out of the way, lets take a look at what we can use the program for.
Download and installation should not pose any issues. You have got the option to start the program on Windows start which you can enable or disable in the settings at a later time.
Once you start Sharex you see a list of program features and settings on the left sidebar. The most important ones after installation are the "after capture", "after upload", and destinations preferences, as they define all automatic actions.
- After capture defines the actions that the program will execute automatically when you capture a screenshot on the system. Sharex by default saves the screenshot to a file and uploads it to the Imgur image hosting website. Additional actions include printing the image or copying the image to the clipboard instead. These are then executed in addition to every other option that has already been selected in the configuration menu.
- After upload controls the program's activities after the file has been uploaded. The url of the uploaded file is automatically copied to the clipboard by default, with options to run it through an url shorterner and to post the url to a social networking site.
- Destinations defines the remote locations and Internet services that the program will use by default. Images are uploaded to Imgur, text to Pastebin, and files to Dropbox. The default url shortener is set to Goo.gl, and the social networking site you can post your file links to is Twitter.
Available destinations include a good dozen or so image hosting services, half a dozen text upload services, and nine file uploading options, of which half are file hosting sites, and the other custom solutions including ftp, email or shared folders.
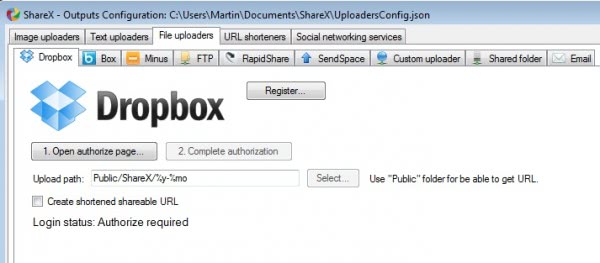
Some of these destinations need to be configured before you can make use of them. This is for instance the case for Dropbox or Flickr which require an authorization process before they allow the software to make uploads to the services.
It also pays to load the general program settings before you start using the program. Here you can modify the default program folders and hotkeys, and image quality settings plus the following interesting features:
- Option to automatically resize images based on percentage, width, height or a specific target size with options to keep the aspect ratio.
- Capturing options to include or exclude cursor or window transparency.
- Option to add external programs that you may want to launch automatically, for instance an image editor or ftp software.
- Watch folders to automatically upload new files that you place in them.
To use the program, you can either control the available options from the sidebar menu or by using keyboard shortcuts. Clipboard and file upload options are straightforward and do not really need to be addressed here. As far as capturing goes, you can take screenshots of the desktop, windows, rectangles, various other shapes and even free hand. The hotkeys for the most part follow conventions: print screen takes a screenshot of the full desktop, Ctrl-Print lets you create a rectangular shaped screenshot, and Alt-Print one from the active window. When you select window you get to pick one of the open windows that you want to take a screenshot of.
Each upload and screenshot gets listed in the program's log in the main interface. Here you see the upload progress if you have configured the program to upload, as well as the host and the file's url on the hosting site. A right-click lets you open the file locally or remotely, or copy its full, thumbnail or deletion path in various ways including as BBCode or HTML.
The information in the application window are cleared when you close the program. You can however use the history and image history tools from the sidebar for a detailed log with lots of options. This includes filtering results by date, type or name, previewing images right in the module, or loading or copying the contents in various ways.
Closing Words
Sharex leaves little to be desired in terms of functionality. During my tests, I did not really find anything that I had an issue with or did not like at all. If you are currently shopping for a screenshot taking or file uploading software that is as versatile as it gets, then Sharex should be one of the first that you take a look at.









Brilliant! The .gif capture is amazing!