Use gvim for a better vi experience

If you edit configuration files by hand, or if you prefer a more "manual" approach to the process of writing, you most likely use a text editor.
Of the available editors there exists everything from bare-bones, no frills editors all the way to highly complex feature-abundant editors (and everything in between).
One of those editors was born out of a need to make one of the most powerful text editors available - vi.
For most users, vi offers too much with too little help. To that end, tools like Gvim were created. Gvim is a strange amalgamation of a standard text-based file editor and a graphical file editor. Its half vi half gedit. Let's take a look at how this editor can help you out.
Installation
The installation of Gvim is simple. I will demonstrate in Ubuntu. Since Gvim is found in the standard repositories, you can follow these steps:
- Open up a terminal window.
- Issue the command
sudo apt-get install gvim. - Type your sudo password and hit Enter.
- Allow the installation to complete.
You can find Gvim in the Ubuntu Software Center (or the Add/Remove Software tool for your distribution), but since Gvim is a text-based editor, why not install from command line?
After the installation is complete, you will be surprise to not find a menu entry for Gvim. So to start up Gvim hit Alt-F2 and enter the command gvim in the run dialog. When the application starts, you will see a nice hybrid tool that will make using vi much easier.
Usage

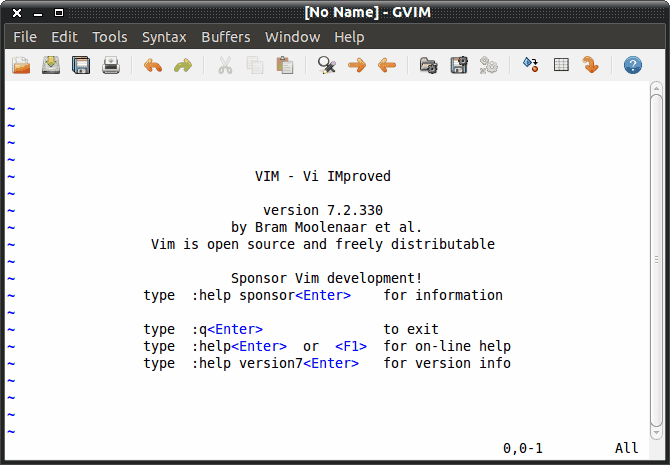
As you can see, in Figure 1, Gvim has the standard editing window, but with a few editions. The most obvious edition is the tool bar. Add to that tool bar a menu bar, and you have the makings for an actual user-friendly vi experience.
If you've never used vi, let me give you the gist of how you type and save a file...step by step.
- Open up vi.
- Hit the "i" key to switch vi to "insert" mode.
- Type your file.
- Hit "Escape" to get out of "insert" mode.
- Hit the Shift ":" to get to the command mode.
- Type "wq" (no quotes) to save the file and exit.
Quite a few steps just to save a text file right? Now, with Gvim, the same task looks like this:
- Open Gvim.
- Hit the "i" key to go into "insert" mode.
- Type your text.
- Hit the Save button.
- Give your file a name.
That's it. Although only one step shorter, but a heck of a lot user-friendlier.
But don't Gvim only aids the simple tasks. Gvim also brings to the user some of the more challenging tasks such as:
- Spell checking.
- Jump to tags.
- Automatic syntax.
- Color testing.
- Window splitting.
And much more...all from handy drop-down menus and tool-bar icons. Â The developers of Gvim even thought to include a handy print button!
Final thoughts
If you have been wanting to give the vi editor a go, you can breathe a sigh of relief and enjoy a helpful hybrid version of vi that will have you editing like a power user.
Advertisement


Your font is ridiculous. I can’t even read this comment as I type it.
I’m going to copy and paste your article and check it out.
Thought I’d say something, I can’t be the only one who can’t read this.
Can you make a screenshot of this? Thanks.
Thanks for the tip – although I couldn’t get gvim via the cli. Thanks to Dotan Cohen I did get Cream.
Gvim is pretty much just Vim in a GUI. If you want a real “strange amalgamation of a standard text-based file editor and a graphical file editor” that is “half vi half gedit” then take a look at Cream!
Thank you for that tip