How To Hide Hard Drives And Partitions In Windows
Hiding a hard drive or partition in Windows can be an effective way of preventing access to a drive's content. The method is not foolproof though, and users with enough time on their hand will eventually find a way to access the content of the drive, for instance by booting from a Live CD. Still, it works pretty well to hide it from inexperienced users and to prevent accidental interaction with drives.
Why would you want to hide a drive in first place? Maybe you have private documents on it, and you do not want to risk the kids editing or deleting them, or you have some nsfw contents that you want to hide. Encrypted drives that are not mounted may have a drive letter assigned to them as well which you may not like.
Better securing options exist in the form of disk encryption, check out our Securing Your PC With True Crypt guide for a walkthrough. (Update: TrueCrypt is no more, use VeryCrypt instead, or use Bitlocker to do that).
There are several options in Windows to hide a disk in the operating system. Lets start:
Hide A Hard Drive or Partition: Command Prompt
This is one of the easiest options to hide drives in Windows. Open the command prompt to start the process. The easiest way is to press Windows-R, type cmd and hit enter.
Now enter diskpart into the command prompt and hit enter. This may display an User Account Control prompt, make sure to allow it by selecting Yes. Diskpart is the built-in Disk Partitioning program in Windows.
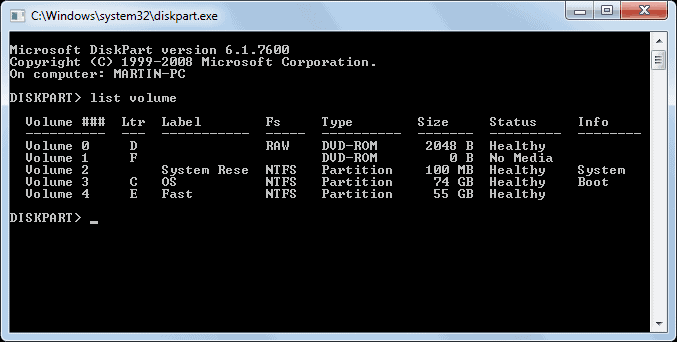
It is a good idea to display a list of all partitions on the drive. To do that type list volume in the prompt and press enter.
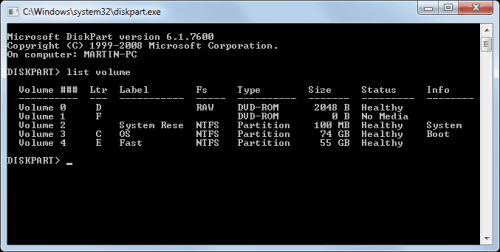
Locate the hard drive that you want to hide and select it in the command prompt. This can be done with the command select volume number, e.g. select volume 4 to select the fourth volume.
You can now use the command remove letter to hide the partition in the operating system. For the above example, remove letter e would remove the drive e from the operating system. The drive becomes inaccessible in Windows Explorer and other programs.
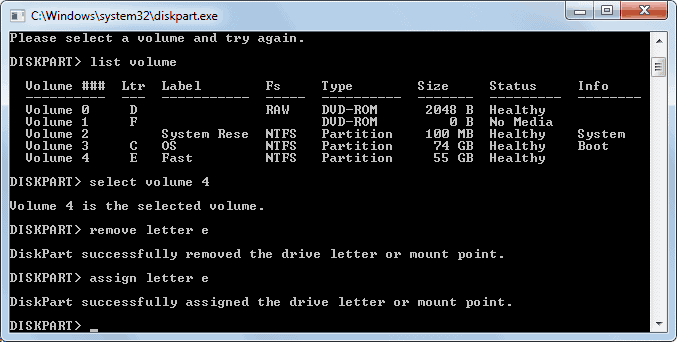
To unhide a drive use the command assign letter, in this case assign letter e. The drive becomes immediately accessible again in Windows. Note that you may need to use "select volume" first so that diskpart knows on which drive to execute the command on.
Hide A Hard Drive or Partition: Windows Registry
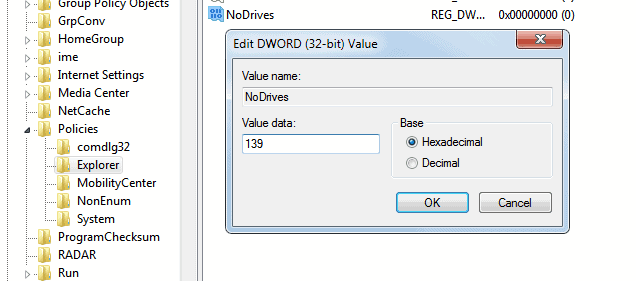
The second method of hiding drives in Windows is by manipulating the Windows Registry. Open the Windows Registry with Windows-R, regedit and enter. You may need to confirm the UAC prompt before the editor opens.
Now locate the key HKEY_CURRENT_USER\Software\Microsoft\Windows\CurrentVersion\Policies\Explorer and create a new DWORD (32-bit) Value by right-clicking in the right pane.
Name the new parameter NoDrives and double-click it afterwards. Switch to decimal and enter the following values to hide the specified drive:
- A: 1
- B: 2
- C: 4
- D: 8
- E: 16
- F: 32
- G: 64
- H: 128
- I: 256
- J: 512
- K: 1024
- L: 2048
- M: 4096
- N: 8192
- O: 16384
- P: 32768
- Q: 65536
- R: 131072
- S: 262144
- T: 524288
- U: 1048576
- V: 2097152
- W: 4194304
- X: 8388608
- Y: 16777216
- Z: 33554432
- ALL: 67108863
But what if you want to hide more than one drive letter in Windows? Simple! Just add the values of the drive letters that you want to hide. If you want to hide the drive letters A,B,D and H you would enter 139 (1+2+8+128) as the Decimal value.
It has to be noted that this will hide the drive for the current user, not all users of the operating system. The changes become visible after restarting the computer, or logging off and on again.
Hide A Hard Drive or Partition: Group Policy
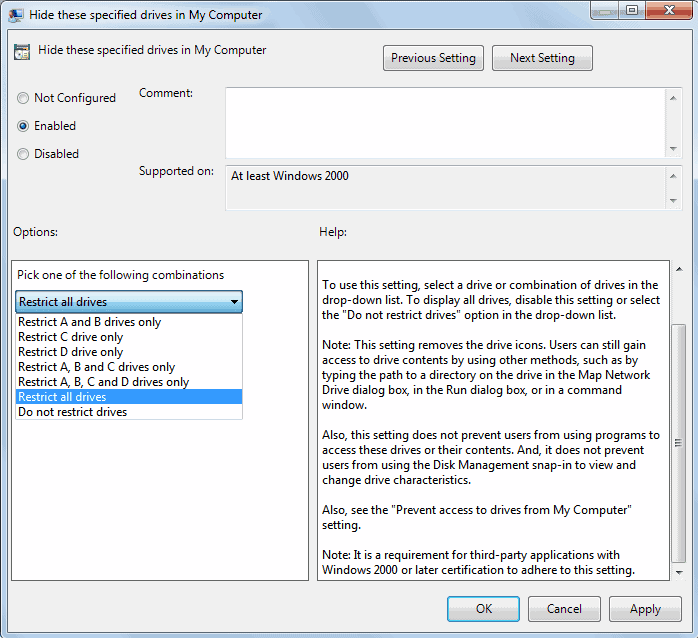
The Group Policy is not available in all editions of the Windows operating system. To find out if it is available, try to launch it. You launch it by pressing Windows-R, typing gpedit.msc and hitting enter.
This will only remove the disk icon, but not access to the drive. Programs can still access the drives.
Navigate to the following template in the Local Group Policy Editor:
- Windows 8.1 and earlier: User Configuration > Administrative Templates > Windows Component > Windows Explorer
- Windows 10: User Configuration > Administrative Templates > Windows Component > File Explorer
Locate the template Hide these specified drives in My Computer. and double-click it.
Removes the icons representing selected hard drives from My Computer and Windows Explorer. Also, the drive letters representing the selected drives do not appear in the standard Open dialog box.
To use this setting, select a drive or combination of drives in the drop-down list. To display all drives, disable this setting or select the "Do not restrict drives" option in the drop-down list.
Note: This setting removes the drive icons. Users can still gain access to drive contents by using other methods, such as by typing the path to a directory on the drive in the Map Network Drive dialog box, in the Run dialog box, or in a command window.
Also, this setting does not prevent users from using programs to access these drives or their contents. And, it does not prevent users from using the Disk Management snap-in to view and change drive characteristics.
Also, see the "Prevent access to drives from My Computer" setting.
Note: It is a requirement for third-party applications with Windows 2000 or later certification to adhere to this setting.
Switch from Not Configured to Enabled and select one of the following combinations from the pull down menu that becomes active afterwards:
There is no option to hide a specific drive with a drive letter of e or up. The only option in this case is to restrict all drives.
Restart the computer, or log off and on to see the changes you have made. The modification can be reverted by disabling the setting in the Group Policy editor.
Software to hide drives in Windows
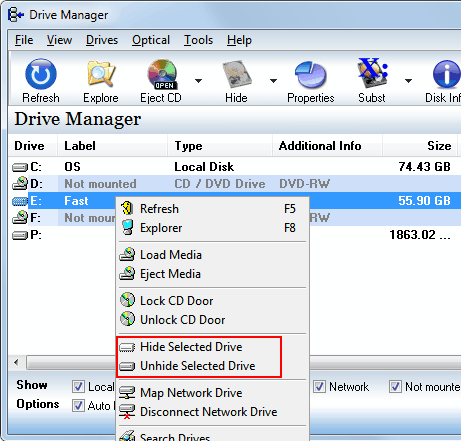
Numerous programs are available to hide drives and partitions in Windows. One of the most convenient applications is the portable software DriveMan.
Simply right-click the drive that you want to hide after starting DriveMan and select Hide Selected Drive from the context menu.








i had written the dword in the registry manually to hide a partition, can i use drive manager or nodrives manager to unhide it?
Thank you very much for this very clear post. I had the problem after having shifted to Windows 10 build 1803 on an ASUS computer: the constructor partition, almost full, was visible, generating very irritating messages from Windows: be careful, your drive D: is almost full.
I used the first method (command prompt). There is a mistake in the post: you must type “remove letter=e”, with equal sign, as suggested in the command prompt help.
thx for your help, with nodriver its easier to unhide it. eventhough its drive C (system)
Thnks, usefull info:)
I found an easy to follow alternate guide here:
http://cyberst0rm.blogspot.com/2007/08/how-to-hide-hard-drives-in-windows-xp.html
sir, i have problem with my system e: Problem is ‘ there are many Folders in it and Folder contains content. but today my system e drive display only folder and when i open any folder i cant see any content. so i have change folder setting and set “show hide folder ” option so , my folder show the content. but main problem is ” the folder is not set as hidden foler” so how cxan i set my all folder as unhide. pls. help me.
This is so much easier in Mac OSX. Simply download a program called SecureFiles.app and it will change any file, folder, or complete drive into a .dmg (installation file) protected by a password. It can be seen, but not opened and, by choosing an innocuous name and saving it in a folder with other .dmg files, generally go unnoticed.
Alternatively, you can download a program called HideFolders.app and it will allow you to hide any folder and also secure it with a password. The folder cannot even be seen until you open the Hide Folders application and unhide it. Also easily protected with passwords.
Just another reason why OSX is far better than Windows will ever be. Now that you can install OSX via the various Hackintosh programs there’s no reason to tolerate Windows at all.
Everything you just said you can do in OSX can be done in Windows. Apps exist for both. But can you make the changes mentioned in this article WITHOUT the need for a third-party app (i.e. someone else doing the work for you), like we can do in Windows?
I am using a batch file to make drives inaccessable & also to hide them
http://tinyurl.com/35kqf7y
Wouldn’t it be easier to use the built in graphical Disk Management utility(diskmgmt.msc) rather than the command line one?
DriveMan makes the task look easy for everyone… thanks for sharing the app..
I use NoDrives Manager. I’ve found it works really well
http://sourceforge.net/projects/nodrvman/
:) Mike