Firewall your Fedora

If you are new to Fedora, or if you are now returning to Fedora from a long haitus (since Fedora 9 for me), Fedora 13 has been a welcoming experience. Not only has it reached near-Ubuntu-like levels of user-friendliness, it includes some of the best tools around for certain jobs. One of those tools is the Firewall tool. For Fedora 13 the firewalling tool is system-config-firewall, release 1.2.25. But what is system-config-firewall? To put it simply, this tool is a graphical means of creating firewall rules for your Fedora installation. Now, don't think this tool is new to Fedora 13 - it's not. But it is installed by default and actually makes creating a firewall quite easy, even for new users.
In this article I will introduce you to the Fedora firewall tool and show you how to secure your Linux distribution quickly and reliably.
Two ways to success
There are two ways to configure the firewall tool to meet your needs. The first method is manually. You can decide what to leave open and what to close up. The other method is with the help of a very easy to use Wizard. What these choices do is allow the system to be useful for both new and seasoned users alike.
What I really like about this tool is that it doesn't take anything for granted. It allows you decide what interfaces, services, ports are all trusted; it allows you to create your own custom rules, do port forwarding, and masquerading. This tool is pretty fantastic and will keep your desktop secure. Now, let's see how this thing works.
The Wizard
The Wizard is where every new user should start. But before you get to the Wizard you actually have to start the tool. To do this click System > Administration > Firewall and the main window will open. From this main window click on the Wizard button to begin the process of creating your firewall.
The steps of the Wizard are as follows:
Step 1: Welcome screen (just click Foward).
Step 2: Select the system you ahve (System with Network access or system without network access).
Step 3: User skill level (Beginner or Expert).
Step 4: Configuration (Desktop or Server).
After you have completed the Wizard click the Apply button on the main window to complete the process. This will clear your current firewall and apply the settings the Wizard has created. Only problem? The wizard really didn't do much as far as customization for your needs. In order to really customize your firewall you have to step outside the boundaries of the wizard. Let's do that.
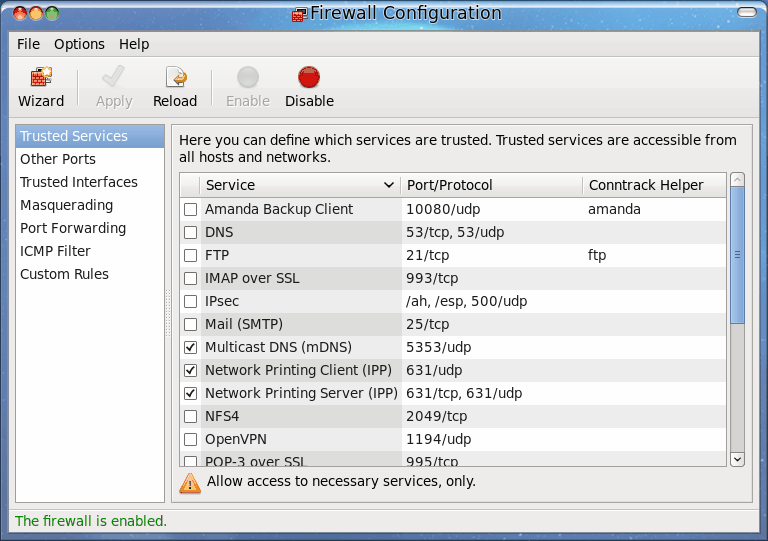
If you look at the main window you can see there is a number of options you can select. If you find the only option in the left pane that is available is Trusted Services, that means you have selected Beginner level. In order to access the other features (Other Ports, Trusted Interfaces, etc) you will have to set yourself up as an Expert by clicking Options > User Skill Level > Expert. Once you have done that all the other options will be available.
At this point you simply need to walk through all of the possible options and select the following:
- Trusted Services: Which services do you want to be made available to hosts and networks.
- Other Ports: Here you can open up any port listed in /etc/services.
- Trusted Interfaces: If you have more than one NIC on your machine this will be especially handy. Define internal and external network interfaces and refine what each has open.
- Masquerading: Need to hide an entire range of private IP address behind a single public address? You might need to configure masquerading.
- Port Forwarding: If you need to configure the host machine to forward a port request to another machine, this is where you do it.
- ICMP Filter: Here you configure error messages between computers. You can block things like ping requests here.
- Custom Rules: This is where you can add your very own custom rules to your firewall. We will discuss this further in another article.
Once you have made any changes make sure you click the Apply button in order to apply the changes.
Final thoughts
That's pretty much the gist of the Fedora Firewall tool. We will take this further soon with an article on creating your own customized rules with this tool. Until then, enjoy hardening your Fedora box with this easy to use firewall tool.
Advertisement


This is a lot. I am going to “Instapaper” this.