Docky: Another OS X-like Doc

OS X users love their Dock..and with good reason. Not only is it a handy way to launch applications, it's also rather stylish. I have covered a tool that had a similar look and feel before (see my article "Avant Window Navigator: OS-X like dock on Linux desktop") and although that tool served it's purpose well, at times it could be a bit buggy.
Docky is a little bit different. Docky is really nothing more than a front-end for Gnome Do (for more information on GNOME Do, check out my article "Don't search, do - with GNOME Do") that also serves as a really solid doc bar for the launching of applications in a very OS X like fashion.
In this article I will show you how to install and use Docky.
Installation
Because this is a front-end for GNOME Do, I highly recommend you install GNOME Do as well. What is really cool about this, however, is that you do not have to install GNOME Do. You can opt to only install Docky and use it as a simple Doc bar. Of course if you install GNOME Do, you will most likely want to work with Docky via the GNOME Do interface. It seems a bit convoluted, so let's install both and you will see what I mean.
We'll install Docky in Ubuntu. You can see how to install Docky in other distributions from the Docky Wiki. In order to install Docky in Ubuntu, follow these steps:
- Add the correct repository with the command sudo add-apt-repository ppa:docky-core/ppa
- Update your sources with sudo apt-get update.
- Install with the command sudo apt-get install docky.
That's it. If Docky doesn't start right away you can then hit <Alt>F2 and enter the command docky to start the application.
Using Docky

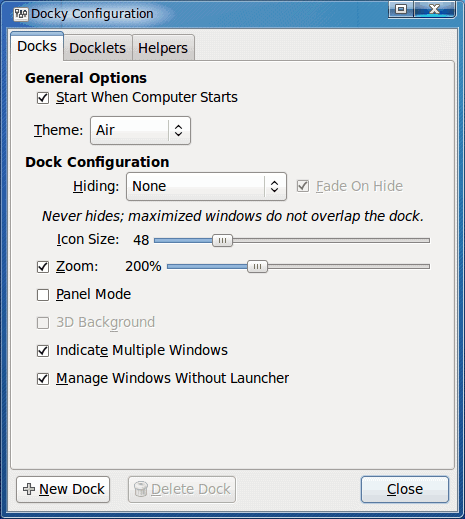
When Docky starts you might find it overlapping your bottom GNOME panel and it will be in Panel Mode (it will stretch all the way across the bottom of your screen). To move Docky click and drag it to one side or the other. Or, if you like it at the bottom, you opt to delete the bottom GNOME panel instead.) Once you have Docky where you want it, you might want to switch it out of Panel mode. To do this click the Docky icon (the anchor) on Docky to open up the settings window (see Figure 1).

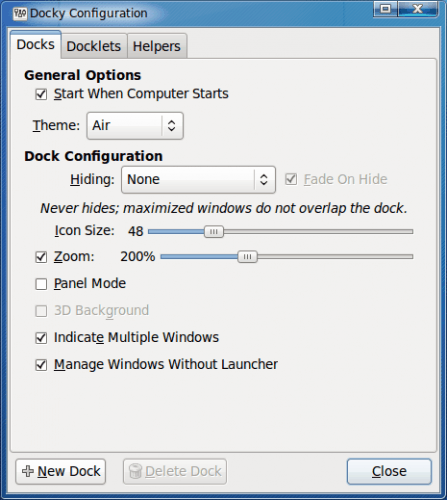
If Panel Mode is checked, uncheck it and Docky will switch from Panel mode to to Dock mode (see Figure 2).
Adding launchers
By default Docky will only contain a few launchers. As far as most of the documentation goes, it would seem all you need to do is open up a GNOME menu, select and item, and drag it to Docky. That doesn't really work. Instead, here's how you add launchers to Docky.
- From the GNOME menu, launch the application you want to add.
- An icon for the launched application will appear on Docky.
- Right click the new icon on Docky.
- Select "Pin to Dock" from the new menu.
Removing launchers
Removing a launcher is simple. Click on the launcher you want to remove and drag it off of Docky. That's it. You can also organize your launchers by dragging and dropping them where you want them.
Docklets and Helpers
From the Docky settings window you can also add Docklets and Helpers. Docklets are similar to applications you will find in the GNOME notification area (monitors, clocks, etc). Helpers are more along the lines of application controls (Banshee, Pidgen, etc).
Final thoughts
Docky is an easy way to extend the functionality and look of your GNOME desktop. But don't forget that Docky does function with GNOME Do. In later articles I will show you how to take advantage of this feature.
Advertisement


Another good reason – docky removed in OpenSuse11.4
another good reason : Cairo-Dock
(ok that was easy ^^ )
A good reason not to use Docky…. Mono!
There are many good Mono-free alternatives, including Kool Dock, AWN, Fancy Tasks (KDE) and Cairo-Dock. I will maybe use Mono the day Microsoft makes its status crystal clear for all distributions, not just Novell’s, and it has a single, simple and free licence. Until then I remain Mono free and feel better for it.