Manage your projects with KPlato

KPlato is one of those tools that could easily get overlooked - but certainly shouldn't. KPlato is project management tool that offers more features that many similar tools costing significantly more money (since KPlato is free as part of KOffice - that's fairly easy to figure out). KPlato was created with the intention of managing moderate to large projects using multiple resources, time constraints, and dependencies. KPlato features various GANTT charts, and tasks can be organized in different ways. Simply put, if you are looking for an outstanding project management tool, KPlato might be the perfect match.
In this article I am going to introduce you to KPlato, its installation and features.
Installation
KPlato is part of the KOffice office suite. So if you have KOffice on your machine, you have KPlato. If you do not have KOffice, follow these steps:
- Open up Synaptic (or your favorite Add/Remove Software tool).
- Do a search for "koffice" (no quotes).
- Select koffice for installation.
- Click Apply to install.
That's it. If you go to the Applications > Office menu you should see KPlato listed. Click on it to fire the management tool up.
The interface
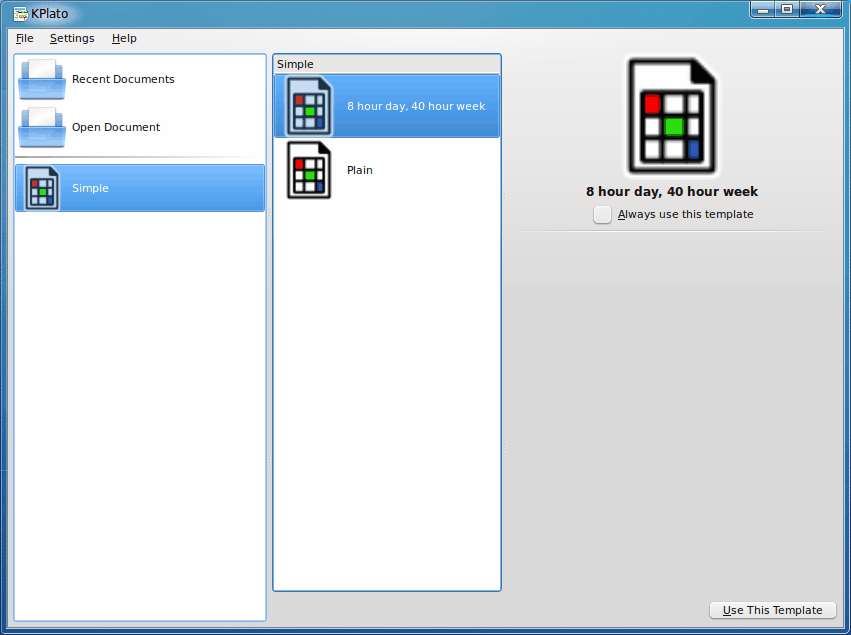
When you first fire up KPlato you will be introduced to a pseudo-wizard (see Figure 1) that will ask you if you want to look at your recent documents, open a previous documents, or start a new document based on a template.
To start a new file, based on a template, click on either the Plain or the 8 Hour Day/40 Hour workweek template. Let's open up the latter and begin a project.
Here are the steps to creating/managing a project:
1. Define tasks
2. Estimate effort to perform each task.
3. Allocate resources for task.
4. Schedule the project according to the dependency network and resource availability.
Let's create a project shall we?
Defining a task
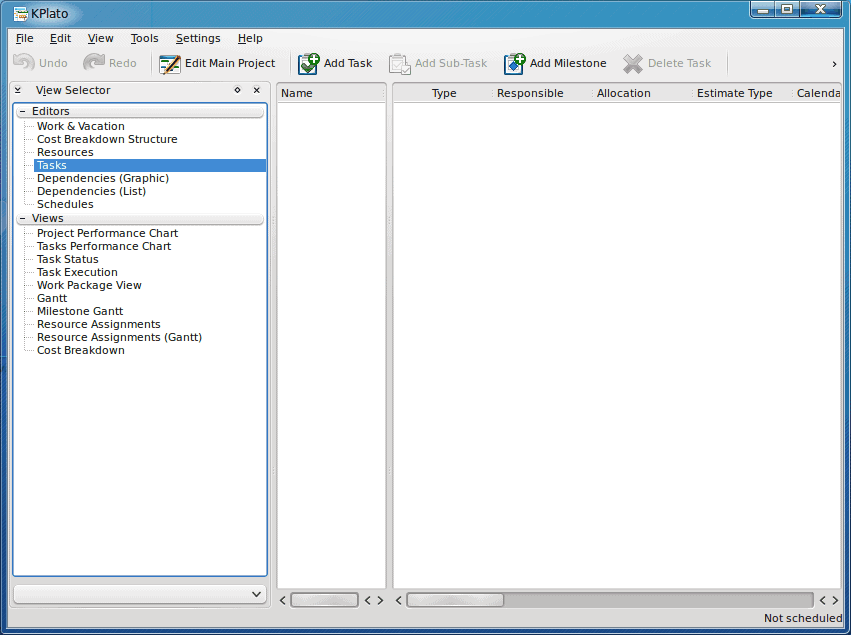
The first thing to do is to click on the Tasks entry in the left pane (after you have selected a Template from the "wizard" screen. Once you have done that click the Add Task button (see Figure 2) which will add a line item across the middle and right pane of the main window. Now do the following:
- Give the task a name.
- Set the Estimate Type to "duration".
- Set Estimate to "8 hours".
- Set Contraint to "As soon as possible".
- Click the Schedules entry in the Left pane.
- Click Add Schedules (which will create a line item).
- Click the Calculate button.
Your task is now scheduled to begin at 12 am and last for 8 hours. This task, of course, is very basic. You can always break the task down into smaller, constituent parts. Say, for example, your project is cleaning house. You can break this down into rooms or chores and then allocate resources (family members for example) to each room. You can then add resources such as mops, wash cloths, brooms, dusters, etc and allocate them to rooms or family members.
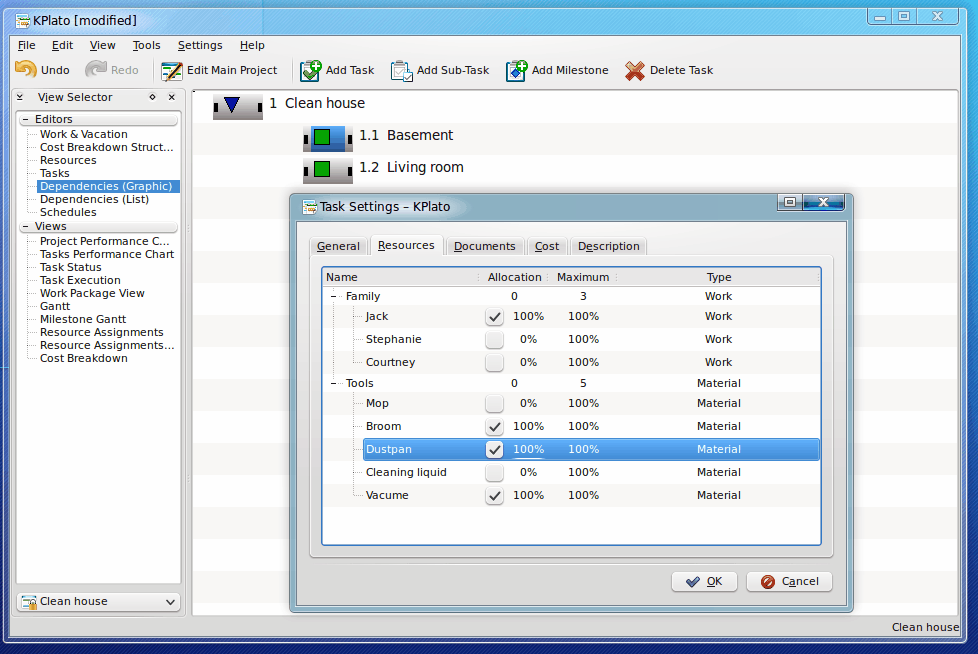
You can allocate these resources by clicking on the Dependencies (Graph), double-clicking on the task you want to allocate resources to, and then clicking on the Resources tab in the new window. As you can see (in Figure 3) I am allocating worker Jack with Tools Broom, Dustpan,and Vacuum for his task in cleaning the Basement.
Final thoughts
There are tons of features offered by KPlato - many of which will only be appreciated by those deeply familiar with project management tools. But even those without a deep understanding of such tools can take advantage of KPlato. It's an outstanding tool that can give a business (or home) a solid project management tool without having to spend any of your fiscal resources to implement.
Advertisement


Chunking out a project can help you focus on certain areas to be completed and organize the tasks and activities into workgroups. These workgroups or phases can be a more effective approach in managing the entire project.
Some of the standard project phases can include:
1. Kickoff
2. Discovery
3. Scope definition
4. Development
5. Unit Testing
6. QA Testing
7. User Testing
8. Migration to Production
The phases listed above represent standard project phases that can be used for different implementations.The list can be expanded or broken down even further, depending on the type of project and the type of project you are managing. Slicing up a project into phases is a sound approach that keeps the overall project running smoothly.
http://gravitygarden.com/project101/phases-of-project.html