Clean up your system with Bleachbit

You never know what is dirtying up your Linux system. Your Bash history, temporary files, usage history, clipboard, free disk space...there's always a chance something is there that you don't want. But how do you go through it all?
Do we really have the time to actually sift through our machines daily or weekly to find those unwanted bits? No. That's why we need tools like Bleachbit.
Bleachbit easily clears out free space, removes junk, and helps to guard your privacy. Bleachbit goes beyond just deleting files. You can set this tool up to shred your files as well...so when they are gone, they are really GONE! It's not just for Linux though. Bleachbit is available for Windows as well - and both versions are open source. In this article I will show you how to install and use Bleachbit.
Installation
Installing Bleachbit is simple. Go to the download page and download the version that is right for your distribution. There are binary files available for Ubuntu, Fedora, CentOS, Mandriva, Debian, OpenSuSE, RHEL, and SLED. Let's take a look at installing in either a Ubuntu or Debian environment. The file you will download will be a .deb package. Save that file to familiar directory and follow these steps:
- Open up a terminal window.
- Change to the directory where the Bleachbit binary is stored.
- Issue the command sudo dpkg -i bleachbit-XXX.deb Where XXX is the release number.
That's it. Bleachbit is now installed.
Usage

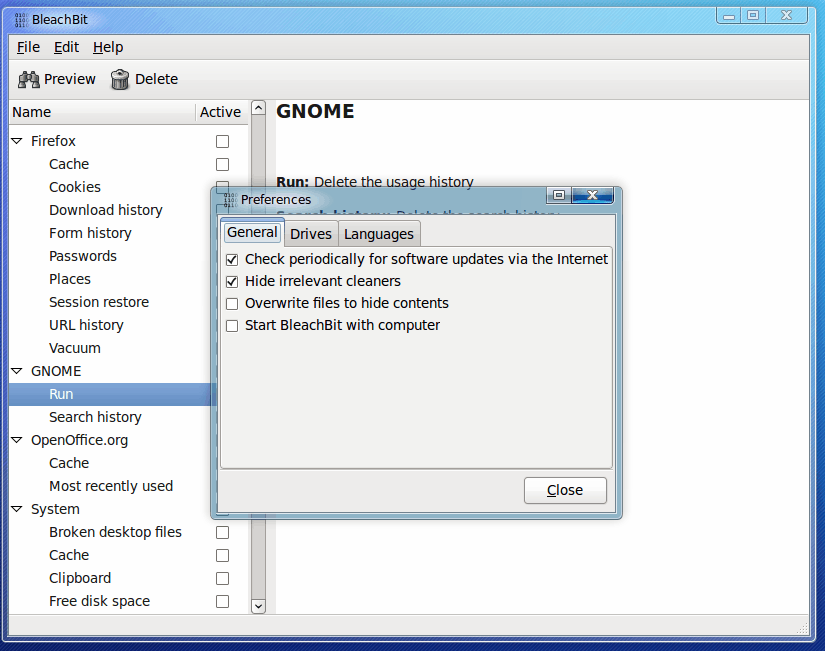
When you first fire up Bleachbit the Preferences window will open up along with the main window (see Figure 1). As you can see there are three tabs to configure:
General: If you are really concerned about privacy you can check the box for Overwrite files to hide contents. What this will do is overwrite deleted files so their contents can not be viewed.
Drives: Add a drive (directory) to be included in the overwriting of free space.
Languages: All languages will be deleted except for those checked.

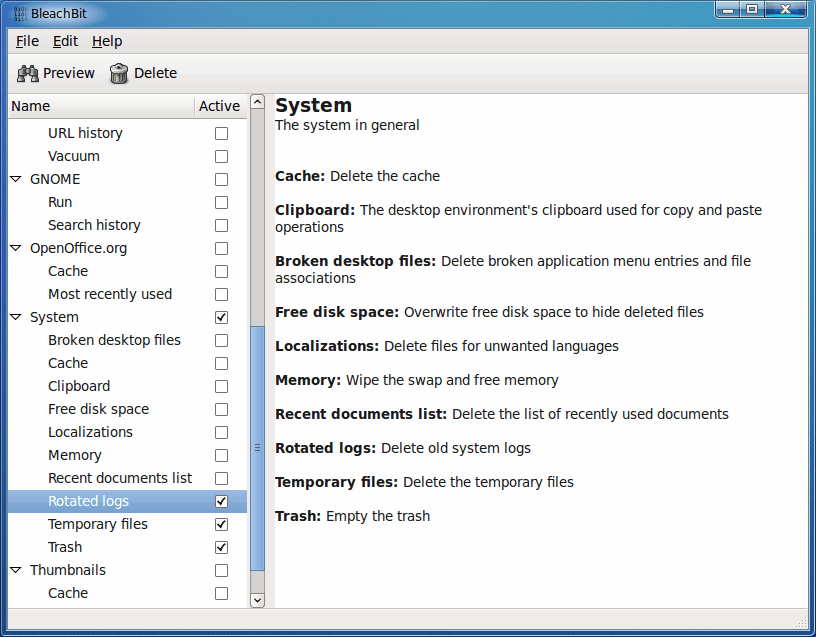
Now let's take a look at the main window. Bleachbit is really quite simple to use. Scroll down to the section you want to set up (see Figure 2), make your selections, and click either Preview (to see what will be done) or Delete (to run the actions).
You may notice, depending upon the sections you mark, that you will get either information or warnings. For example, in the System section if you click Memory you will be warned that this section is experimental and it could cause system problems. If you're working on a production machine you might want to avoid selection this option.
Another warning you might see is the Free Disk Space will alert you that the option is slow. So if you're going to opt to clean the free disk space (this is overwriting deleted files) your system might become a bit sluggish or the cleaning might take more time than expected.
Once you have made your selections click Preview which will then give you a report detailing all of the files it will delete. If you're happy with the report, click Delete and Bleachbit will do it's business.
Final thoughts
If used with caution, Bleachbit will keep your system free of junk and your deleted files free from prying eyes. Just make sure you do use this with caution - especially on production machines, where data loss is tantamount to you losing your sanity or your job.


BleachBit 2.0 Milestone release
https://www.bleachbit.org/news/bleachbit-20