User and group administration in Ubuntu 9.10

Linux is a true multi-user environment. This means that more than one user can be logged on at the same time. Because of this many Linux administrators have to deal with the administration of users and groups.
Fortunately there are tools for this. From both the command line and the GUI, you can do just about anything you need to keep your groups and users maintained.
In this article, I am going to introduce you to an outstanding graphical tool, found in the GNOME desktop of Ubuntu 9.10, that allows you to manage both users and groups.
Because this tool is a part of the GNOME desktop, there will be no need for any installation (that is, if you already have GNOME installed). So getting up to speed is just a matter of firing up the tool and understanding how it works.
Finding the tool

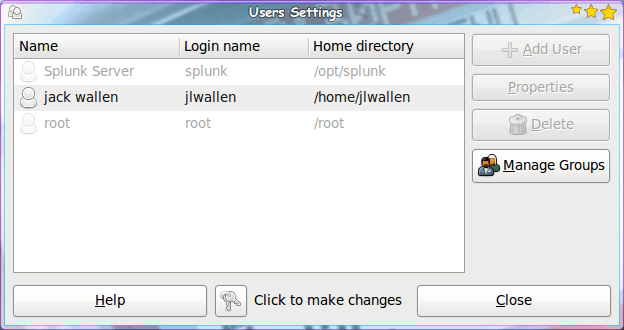
The user and group management tool can be found in the Administration sub-menu of the System menu. The entry is this menu will be labeled "Users and Groups". When you first fire this tool (see Figure 1) up you will notice you can't really do anything. Before you actually use this tool you have to unlock it by authenticating with your users' sudo password. Â To unlock this window click the small "key" button (in between the Help and Close buttons) and then enter your sudo password. When you do this the rest of the buttons will become available. Now you can click on a user and modify that users' properties. But before we look at a users' properties, let's do the following:.
- Create a new user.
- Create a new group
- Add the new user to the new group.
Creating a new user

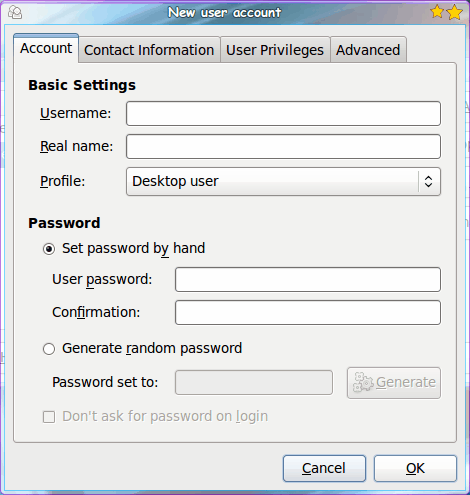
In order to create a new user, first click the Add user button. This will bring up a new window (see Figure 2) where you enter all of the information you you need for your new user. You will want to pay close attention to the User Privileges tab where you can add or remove rights for a user. For example: Say you have VirtualBox installed and you want the new user to be able to use this virtual machine management tool. To give this new user rights you will need to click the check box associated with VirtualBox in the User Privileges tab. Â And say you do not want to allow your users to monitor system logs. You can uncheck that box in the same tab.
In the Advanced tab you can assign the new user to a main group, assign the user a home directory, change the user ID, and change the default shell for the user. Typically the defaults will be just fine.
Create a new group

To create a new group click the Manage Groups button. When the new window opens (see Figure 3) you will see listing of all the groups currently on your system. You can add new groups or edit the properties of an already existing group.
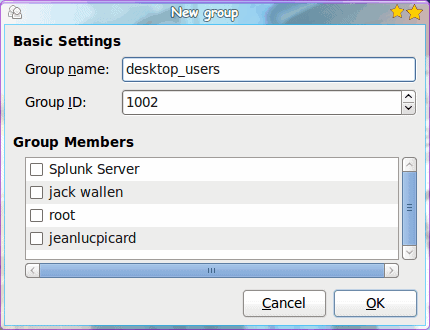
In order to create a new group click the Add Group button, which will open the Add Group window (see Figure 4). Here you can do three things:
- Name a new group.
- Give the group a GID (Group ID number).
- Add users to the new group.

You can add as many users as you like to the new group. Just click the check box associated with the user you want and then click OK. The new group will be added and the users added to the group.
Final thoughts
Of course all of these actions can be handled via the command line, but for many administrators a GUI goes a long way to make the daily grind a little easier. The administration of users and groups is one such task that greatly benefits from this philosophy.


Nice article Jack,
How did you get you GUI to look like figure 1, 2, 3 and 4?
Its real nice.