Manage your MySQL databases with an easy to use GUI
If you've read my Linux content here on Ghacks enough, you have most likely noticed my preference for not using the MySQL command line. That is not to say I don't ever use it, I just prefer tools to help make that aspect of database use easier.
My preference, until recent, has been PhpMyAdmin (see my article "Install PhpMyAdmin for easy MySQL administration"). I have, however, found a new tool I am growing very fond of.
When you are looking to manage a local database, and you're looking for a good GUI tool, look no further than MySQL Navigator for all your MySQL administrative needs. This tool makes for simple database creation, administration, and does so (for most tasks) with a simple to use GUI. That doesn't mean you can get completely away from understanding the MySQL syntax - you may need it. But for much of the functioning, MySQL Navigator can handle the task.
In this tutorial you will see how to install MySQL Navigator and create a database with this simple GUI tool.
Installation
The MySQL Navigator tool should be found in your distributions' repository. So all you will need to do is fire up your software installation tool (such as the Ubuntu Software Center or Synaptic), search for "mysql navigator", select the results, and install. Naturally you will need to have MySQL installed. If you do not, the installation tool should pick up these dependencies for you.
Once installed, you will find the MySQL Navigator executable in the Accessories sub-menu of the Applications menu in GNOME. Now let's start using this tool.
NOTE: I am going to assume you already have your MySQL root user password handy. You will need it in order to connect to your databases.
Usage

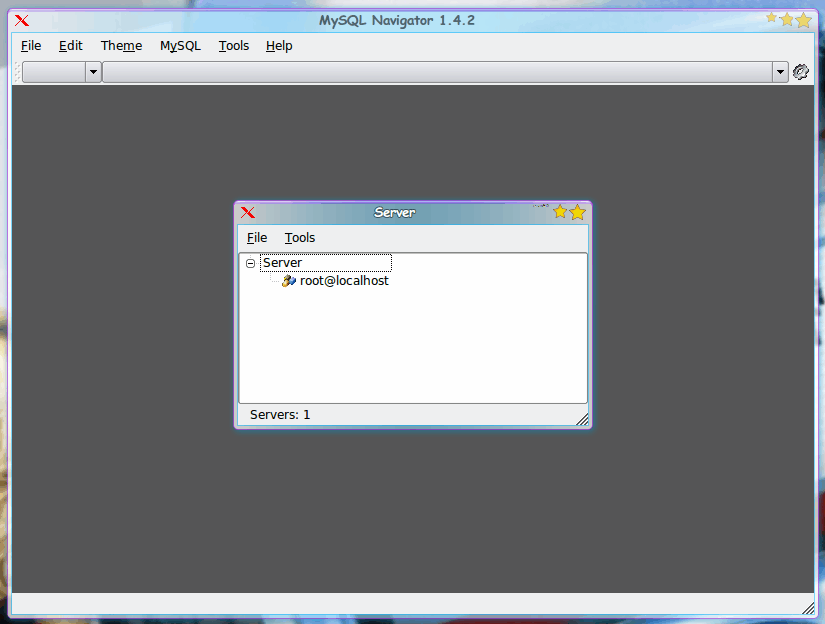
When you fire up MySQL Navigator two windows will appear (see Figure 1). What you have to do is select the database you want to manage. You can manage remote databases if you like, but for the purposes of this article, we will stick with local machines. In order to connect to the default server you need to right click the root@localhost listing and select modify. In this new window you will need to enter the MySQL administrator username (probably root) and password.
NOTE: If you do not see the smaller window when you first fire up the tool you will need to go to the File menu and select New.
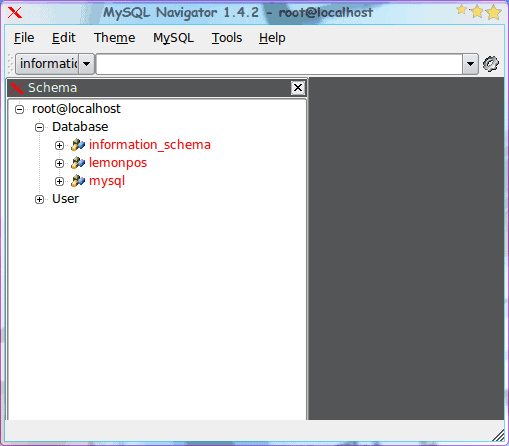
After you enter the proper information, dismiss the settings window and double click the root@localhost entry to open up the listing of databases (see Figure 2).
In order to create a new database, right-click the Database entry and select Create Database. This will open up a simple window with only a text area where you give the new database a name. Enter that name and click OK. I am going to create a sample database called "ghacks".
Let's create a table on our "ghacks" database. From the MySQL menu select the "Tables" entry to open up the Table tool (see Figure 3). In this new window you will first want to select the newly created "ghacks" database from the Database drop-down. Once you have the correct database selected you can go through and fill out the necessary information for the table.
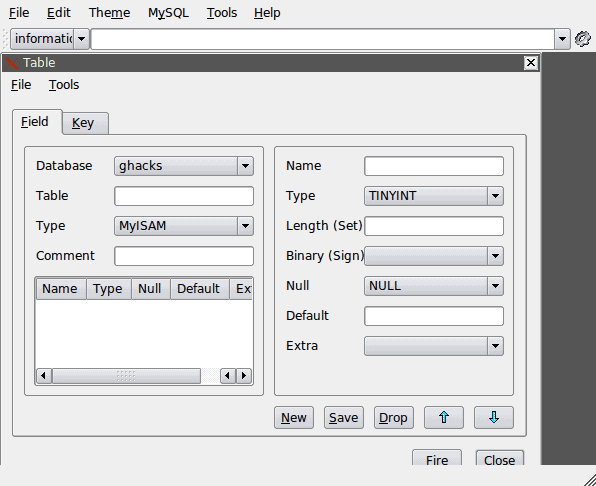
You can create more than one field for your table by adding the field information (in the right pane) and clicking the Save button. When the table info is complete click the Fire button to add your table. NOTE: You must at least create one set of fields or you will get an error when you click the Fire button.
You will also want to click on the Key tab and make sure you create a Primary Key for your table.
When you are finished creating your table, click the Close button to dismiss this window.
You can continue getting more and more granular with this tool. If you go back to the main window you will see the listing of the new database. Expand that database and you will see your newly created table. If you double-click the newly created table a new window will open where you can add data for values in the fields of your table. This isn't as intuitive as the other functions. To insert a value right click inside of the new window and select "Insert". This new window will list your data as a MySQL statement tat looks like:
INSERT INTO categories
(
linux,
windows
)
VALUES
(
"",
""
In this instance you have to actually add your values in the text. So let's say we want to add the following values for the fields:
linux - Ubuntu
windows - Windows 7
To do this the MySQL syntax would look like:
INSERT INTO categories
(
linux,
windows
)
VALUES
(
"Ubunutu",
"Windows 7"
)
When you have made these edits click the File menu and select Fire to execute.
Final thoughts
If you are looking for a simple to use GUI for the management of your MySQL databases, look no further than MySQL Navigator. Although you will need to have a cursory understanding of MySQL, it will make the administration of your databases much easier.






There is a comprehensive mysql gui tool dbForge Studio for MySQL management, administration and development. I like it, but it works only for Windows.
I have no idea about use mysql but i know MS-SQL 2005 very well please guid through the pictur.
thanks
I’ve used it a bit a few years ago, but I’ve been using MySQL Administrator, and MySQL Query Browser, I find these two apps make using MySQL very easy.
Um, the last release was in July of 2003. It’s almost as old as IE6. It’s probably not to safe to use on a current installation and I wouldn’t be recommending it. Find something current and make yourself useful that way.
anything similar for windows?