Create and manage databases in Linux with Glom

If you've ever had to work with a database in Linux you most likely are aware of three or four tools that can handle the task: MySQL, PostgreSQL, PhpMyAdmin, and OpenOffice Base.
These are all outstanding applications, but the first two are complex command-line only tools, the third requires a web server, and the last isn't as robust as some admins will need. But there is another tool that is very flexible and makes creating databases a simple task.
Glom can help you design and create databases as well as a user-interfaces with little to know coding or command line skills. Glom has an easy to use GUI that focuses on helping you get your job done instead of being an hindrance.
Glom uses the PostgreSQL database as a backend, but can only edit databases created internally. In other words, all of those databases you created with PostgreSQL...Glom can not touch them. That is fine, because Glom is very good at creating and managing your databases.
In this tutorial you will learn how to install and get started using Glom.
Installation
If you point your browser to the Glom Download Page you will see fairly concise instructions on how to install Glom on your distribution. You might notice the warning that the default Ubuntu repository holds an out of date, buggy version of Glom.
I installed Glom onto Ubuntu 9.10, using the Ubuntu Software Center (without having to add any extra repositories). The version that installed was 1.12.2. The latest source code available for Glom is 1.12. So this warning is most likely unnecessary for Karmic Koala users.
Once you have Glom installed you will find the menu entry located in the Office sub-menu of the Applications menu.
NOTE: There is a version of Glom for Windows.
Using Glom

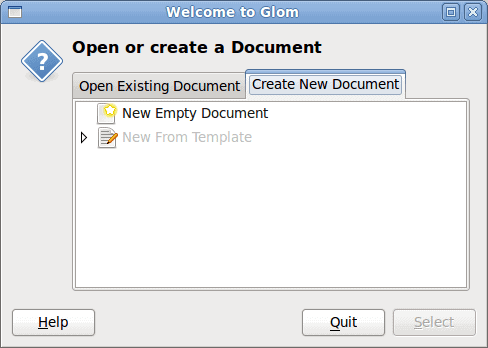
When you first fire up Glom a small window will open (see Figure 1). From that window click on the Create New Document tab. In this tab select New Empty Document and then click the Select button. The next step needs you to input two pieces of information:
- Name: This will serve as the actual file name.
- Title: A human-readable name for your database.
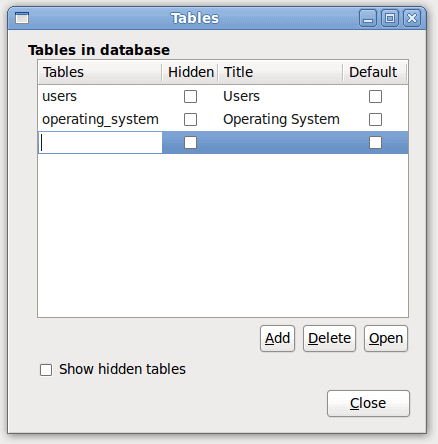
In this same window you can select an option that will save this database to a database server, or to save it locally. If you go with the former, you will have to input the details of the server in a separate step. After you have all of your information configured, click the Save button to continue. Depending upon the speed of your machine, the database initiation phase can take some time. But once the database is initiated, a new window will open (see Figure 2) where you can begin to create tables for your database. When you are working with your database there are two user levels (selected from the User Level menu):
- Developer: This is the level you use to create/edit your databases.
- Operator: This is the level you use to work with your databases.

To create a table click on the Add button which will create a new line for a table. You have to name the table, so double click on the first column of your new table and enter a name. When you do that hit enter and you will see that the Title will auto-fill for you. You can also select if this table is to be hidden and/or default by selecting the check box for either option.
After you have created the tables the Glom window will change to the data entry mode. For each table you have created you will have to enter data in order to fill the tables. Adding data is done the same way as adding a table. The difference is that you have to select which table you want to add data to from the Tables menu in the toolbar.

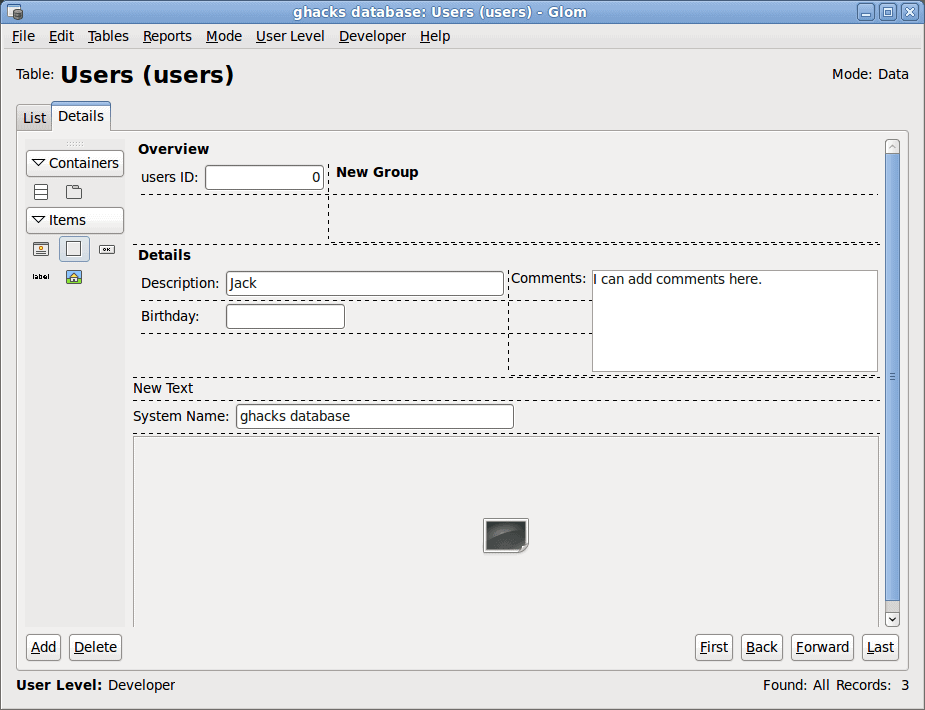
After you have entered your data, you can then switch to the Details view (see Figure 3) where you can view data, add static items and containers to a record. You can also create new Fields to add to your data. These will come in handy as they can add data to a user entry such as their birthday.
To create a custom field go to the Developer menu and select Fields. From this window you can add, edit, and delete all of the fields you need.
After you have completed creating your database, go to the User Level menu, select Operator, and start working with your new database.
Final thoughts
Although this tutorial only scratches the surface of the power Glom offers, you get the idea that this tool could really make a database developers job very easy. Give Glom a try, you will look at PostgreSQL databases in a completely different light.


Wow, this really looks like a great app. Thanks!