Xbox Media Center on Linux

The Xbox Media Center arrived in 2004 and became popular so quickly that it became clear more ports would be needed. So the XBMC team allowed this tool to evolve into a cross-platform media center that would run on just about anything you can think of.
Note: XBMC is known as Kodi now. You find recent installation instructions on the official website.
But, of course, the purpose of this article is to install XBMC on Linux. Although XBMC can be installed on most Linux distributions, the Ubuntu installation is the least painful. I'll first illustrate the installation on Ubuntu and then on Fedora. Once installed, you will find XBMC meets many (if not all) of your media center needs similar to that of Windows Media Center.
Of course, ideally, you will want to install XBMC on a machine intended for multi-media use. It will work on lower-end video cards, but the interface will be somewhat slower. For a complete listing of supported hardware check out the XBMC hardware page. Now, let's get on with the installation.
Ubuntu
I will give you a warning here: The most recently supported Ubuntu is 8.10. That does not, however, mean it will not install on anything later. I have XBMC installed and working fine on Ubuntu 9.04. With that in mind here are the installation steps for Ubuntu.
Open up your /etc/apt/sources.list file and add the following to the end:
deb http://ppa.launchpad.net/team-xbmc-hardy/ubuntu hardy main

deb-src http://ppa.launchpad.net/team-xbmc-hardy/ubuntu hardy main
Save that file and then issue the command:
sudo apt-get update
Once the update is complete issue the following command:
sudo apt-get install xbmc
If you want to install extra skins, issue this command:
sudo apt-get install xbmc-skin-*

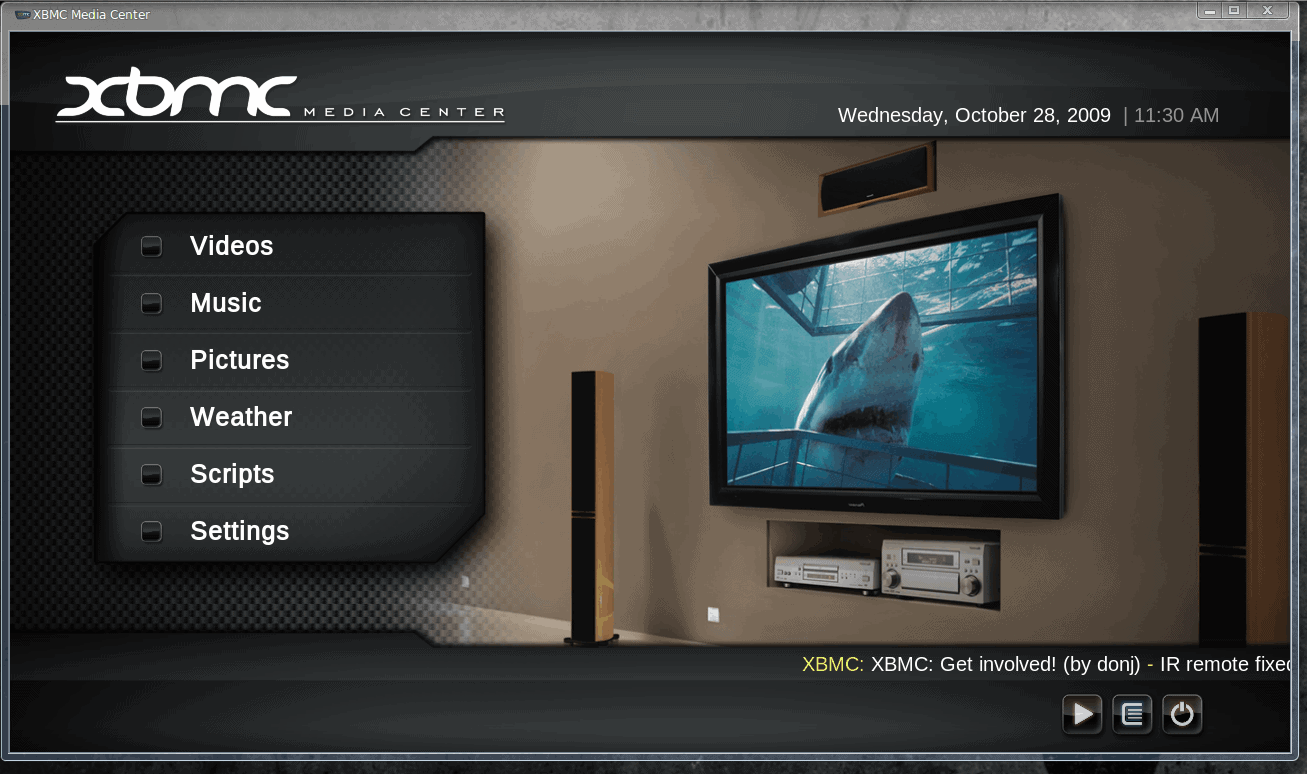
You will find the XBMC menu entry in the Sound And Video sub-menu of the Applications menu. When XBMC opens, you will see a very user-friendly interface (see Figure 1).
Now it's time for a less than user-friendly installation. Because there have been no rpm files created for Fedora, the installation requires some steps which will lead you to compile XBMC. These steps will work for Fedora 8, 9, and 10 as well as CentOS 5.2. Here we go. NOTE: You will need to be the root user for this installation.
If you don't already have Subversion install, do so now with the command:
yum install subversion
Once Subversion is installed, check out XBMC from subversion with the command:
svn co https://xbmc.svn.sourceforge.net/svnroot/xbmc/trunk
Now install the rpmfusion repository with one of the following commands:
Fedora:
rpm -Uvh http://download1.rpmfusion.org/free/fedora/rpmfusion-free-release-stable.noarch.rpm
and
rpm -Uvh http://download1.rpmfusion.org/nonfree/fedora/rmpfusion-nonfree-release-stable.noarch.rpm
CentOS 5 (32 bit):
rpm -Uvh http://apt.sw.be/redhat/e15/en/i386/rpmforge/RPMS/rpmforge-release-0.3.6-1.e15.rf.i386.rpm
CentOS 5 (64 bit):
rpm -Uvh http://apt.sw.be/redhat/e15/en/x86_64/rpmforge/RPMS/rpmforge-release-0.3.6-1.e15.rf.x86_64.rpm
Now the fun begins. This installation command is all one line:
yum install SDL* glew glew-devel libmad-devel tre tre-devel libogg libogg-devel libvorbis libvorbis-devel boost boost-devel bzip2-devel bzip2-libs fribidi* lzo lzo-devel mysql-libs mysql-devel jasper jasper-devel faac faac-devel enca enca-devel hal hal-devel hal-libs cmake gperf nasm libXmu-devel fontconfig-devel freetype-devel libXinerama-devel pcre-devel gcc-c++ sqlite-devel curl-devel mysql-devel libcdio-devel libmms-devel faad2-devel flac-devel libsmbclient-devel libXtst-devel
The next step creates a symbolic link for the libmysqlclient.so file. The command is one of these two (depending upon your architecture):
For i386:
sudo ln -s /usr/lib/mysql/libmysqlclient.so.15.0.0 /usr/lib/libmysqlclient.so
For x64:
sudo ln -s /usr/lib64/mysql/libmysqlclient.so.15.0.0 /usr/lib64/libmysqlclient.so
Now cd into the XBMC directory (should be in the directory you are currently working in) and issue the following commands:
./bootstrap
and
./configure
and
make
If you see an error related to jpegint.h, then you might have to issue the following command:
cp XBMC/xbmx/lib/cximage-6.0/jpeg/jpegint.h /usr/include
If you have to issue the above command, then issue the make command again.
Finally, issue the command:
make install
And XBMC will install.
On Fedora distributions, you might have an issue with SELinux. If so you will need to issue the following commands:
chcon -t textrel_shlib_t '/usr/local/share/xbmc/system/players/dvdplayer/avutil-50-i486-linux.so'

chcon -t textrel_shlib_t '/usr/local/share/xbmc/system/players/dvdplayer/avcodec-52-i486-linux.so'

chcon -t textrel_shlib_t '/usr/local/share/xbmc/system/players/dvdplayer/avformat-52-i486-linux.so'

chcon -t textrel_shlib_t '/usr/local/share/xbmc/system/players/dvdplayer/swscale-0.6.1-i486-linux.so'
That's it for the Fedora/CentOS installation. You should find XBMC in your Video menu. If you can't seem to find a menu entry you can always enter xbmc in either a terminal window or the run dialog.
Final thoughts
XBMC is an outstanding media center software. It will play your CDs and DVDs flawlessly. If you have the hardware for this software, it is a much better solution than most other Linux video solutions.


XBMC is also fully supported on jaunty and will be supported on karmic when it’s released next month.
Beyond linux, they also have a live bootable USB stick version (as Luigi mentioned) as well as Windows and OSX versions. All these platforms are fully functional and usable.
There are also two major XBMC spinoffs/forks; Boxee (windows, OSX, and linux) and Plex (OSX only). Boxee offers “social” features, tons of media plugins, and hulu support. Plex is a more “mac-like” polished product that integrates various apple technologies and look/feel.
Any comments on the Live version?
ChrisW: I left out the scripts installation only because, I believe, for Linux they only have a scripting example available. To install this issue the command:
sudo apt-get install xbmc-scripts-example
There is also this site:
http://www.xbmcscripts.com/
which is currently down.
Nice article. I did this with Ubuntu on a netbook that I use as a media center. I’m a Windows person, so it took me about 2 hours to figure this stuff out.
One thing I haven’t figured out, and I wonder if you can illuminate: how do you get the “Scripts” that are part of a normal Windows install of this? You know, the things that know how to talk to web sites like YouTube to download content…