Change default and preferred applications in KDE

In my last article, "Change default and preferred applications in GNOME", I illustrated how to change the default applications that will launch in association with certain file types. Now it is time to reciprocate for the KDE desktop environment.
Many people assume the KDE desktop environment is just as flexible as the GNOME desktop. In most ways it is. But there are some instances where you might find KDE not quite as intuitive as GNOME.
Does that mean it's less flexible? Not necessarily. But there are certain instances where figuring out how to configure default applications might not be as easy as you would think. That is where Ghacks comes in. And in this article I will show you just how to get KDE icon double clicks to work exactly as you would expect them to.
What to look for
To get all of this working the KDE System Settings will be used for the majority of these tasks. Outside of that you will use, very much like in GNOME, the right click menu from within the file manager Dolphin. You will find the System Settings tool in the Favorites menu of the KDE Kickoff menu.
"Open With"

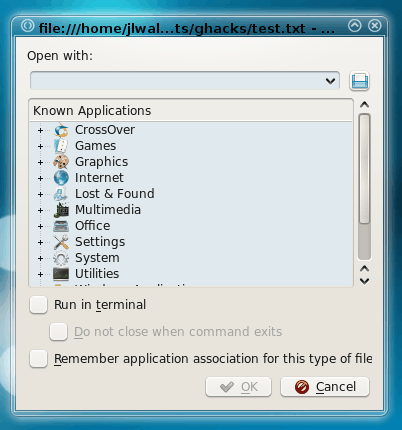
The "Open With" dialog should be familar to most any PC user (regardless of operating system or desktop). To open this menu all you need to do is right click the file type (icon) you wish to act upon. When you click on the entry a sub-menu will appear containing the "standard" installed applications that associate with that particular file type. To open that file with a particular application just select the application from the sub-menu. If the application you want to use is not within that menu select the entry labeled "Other...", which will open up a new window (see Figure 1).
What you need to do here is locate the application you want to associate this file type with. Once you have located the application select it and click OK. Now, if you want to always associate that file type with that particular application make sure you check the "Remember application association for this type of file" check box. Now if you can't find the application in the Known Applications tree you can always just enter the full path to the executable in the text field at the top. For example: If I want to open all .txt files with the Nano editor in the text field I would enter aterm -e nano, check the "Remember application..." check box, and click OK. Now when I double click a .txt file the Nano editor will always open in the aterm console emulator.
File associations

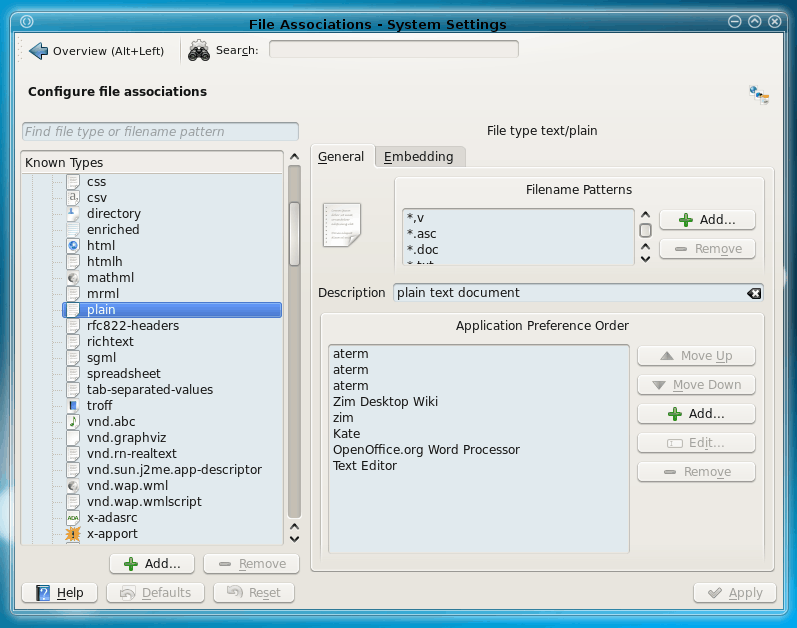
Now for the big stuff. If you open up the System Settings tool click on the Advanced tab and then click on the File Associations button (see Figure 2). In this window you will see quite a bit can be configured. Let's take a look at associating a plain text file with the same editor (just for simplicity).
When you expand the Text section you will see "plain" among the listings. Click on the "plain" entry to reveal everything you can do with this. Take a look at the Filename Patterns. Here you can associate different file extensions with the plain text file type. You can add and remove extensions for further expand (or limit) the type of file that will be associated with this particular file type.
Below the Filename Patterns section you will see the Application Preference Order. Here you can give preference to various applications as well as add new applications to associate with a file type. If you want one particular application to get top priority over all otheres, select that application and click the Move Up button until it is at the top.
One last section to examine is the Embedding Tab. What you can do here is associate an application, embedded inside of another application, that will be used on this file type. In this section you have to make sure the application in question is one that can be embedded.
After you take care of all your configuration needs, click Apply to save your changes.

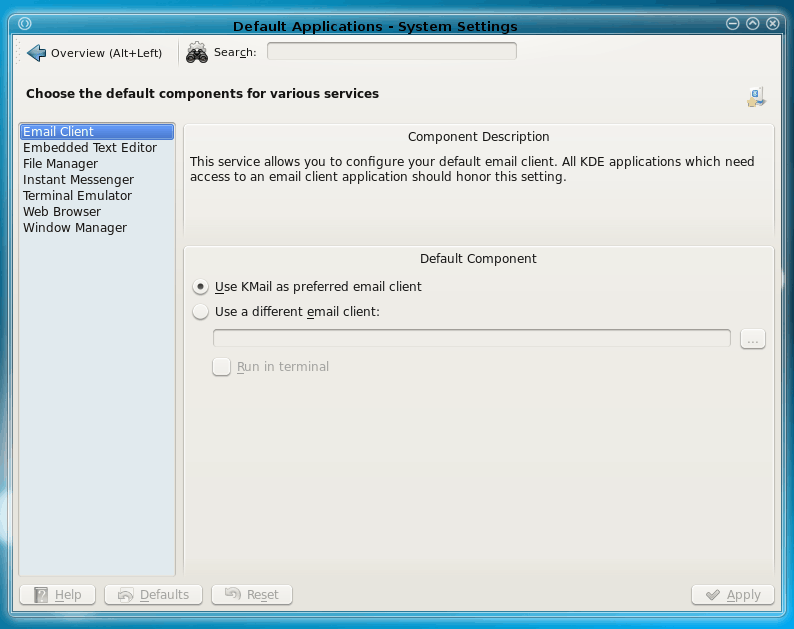
From within the System Settings window you can also take care of the Default Applications for a file type. From within the General tab click on the Default Applications button to open up this configuration window (see Figure 3).
In this window you can configure the following:
- Email client
- Embedded text editor
- File manager
- Instant messenger
- Terminal emulator
- Web browser
- Window manager
For the most part these give you the option of selection one or two options from a drop-down list. Some, such as Terminal Emulator, give you the option of configuring a non-standard emulator. For this option you will enter the explicit path to the emulator's executable file.
After you get through these configurations, click Apply and you're done.
Final thoughts
Although not quite as flexible as the GNOME system, you can certainly make the KDE default application system work as well as you need. With the help of the "Open With" dialog, Default Applications, and File Associations you should be able to make your KDE desktop react exactly how you want.


I am unfamiliar with Gnome, and while I do agree that many aspects of KDE 4 are unintuitive, I never found the subject of this article unintuitive. Where do you see room for improvement? Just let me know and Ill file a feature request. Thanks!