Configure a Linux Firewall with Webmin

Recently I wrote two articles, one on Creating a Linux Firewall with fwbuilder, and one Webmin: One Stop Linux Configuration. So I thought it might be a good idea to do an article that combined the two and illustrated how to configure a Linux firewall with Webmin.
As you would expect, with the help of Webmin, creating a firewall is very simple. And the default Webmin installation comes complete with a firewall module built in, so there is nothing to install (once you have Webmin installed.) All you have to do is point your browser to http://IP_OR_DOMAIN:1000 (Where IP_OR_DOMAIN is the actual IP address or domain hosting your Webmin installation.) If Webmin is installed on your desktop you can point your browser to http://localhost:10000.
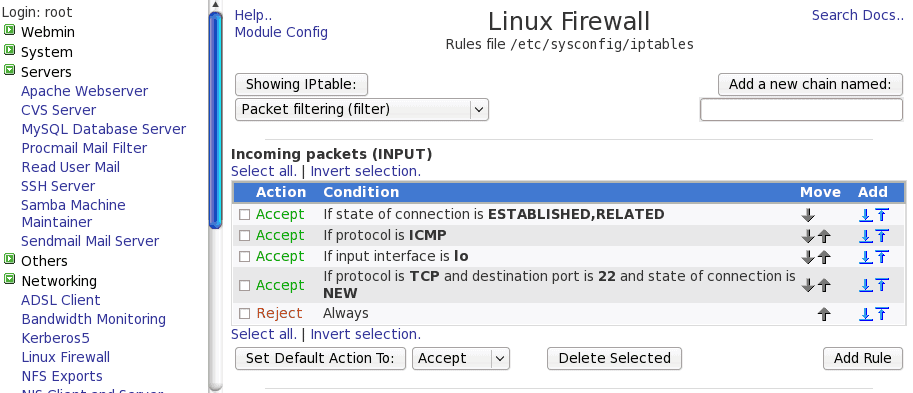
Once you are in the Webmin window you will want to click on the Servers link and then click on the Linux Firewall link. The image to the left is the top portion of the configuration screen. This image is showing a default iptables chain that is installed by default in Fedora. As you can see these chain rules are easily modified, moved, appended, and removed.
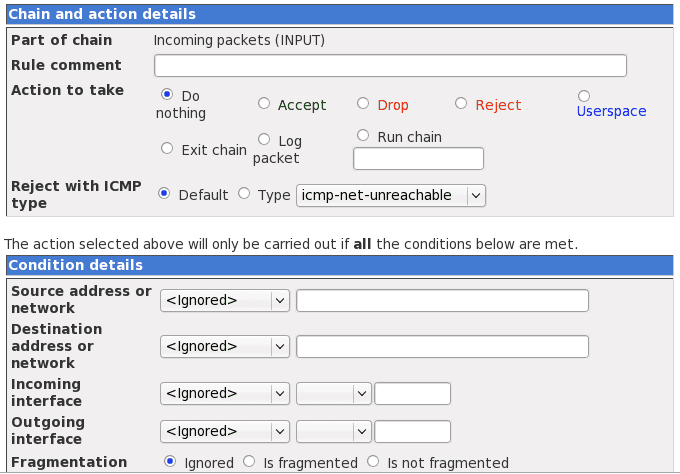
I want to illustrate how easy it is to add a new rule to the already existing chain. Let's say you want to add a rule that denies all incoming connections to port 110 (pop3) to your machine. To do this click on the Add Rule button to reveal the Add Rule window (see image to the right.)
The primary configurations to take for this would be:
- Rule Comment: Give the rule a name.
- Action to take: Drop
- Source Address: Any
- Destination Address: 192.168.1. (This will depend upon your needs. If you have a static IP address for the machine enter that.
- Destination Port: 110
Once you have filled this out, click Create Rule and you will be returned to the main window with your rule listed.
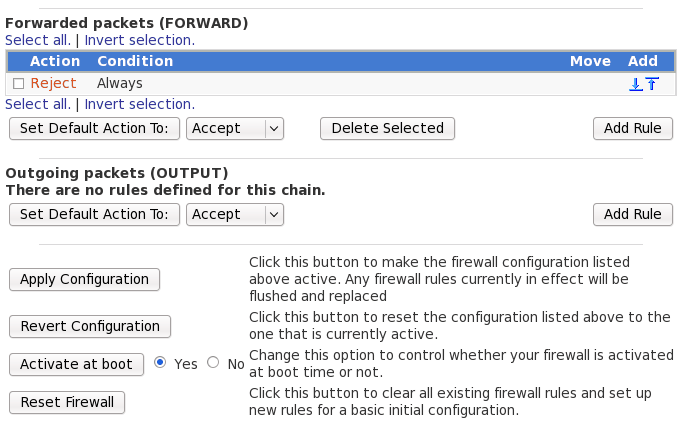
Once you have your new rule(s) created you have to scroll down and click the Apply Configuration button (see the image to the left). You will also notice, near the bottom, buttons that allow you to enable your firewall at boot, reset your firewall, and reset to the currently active firewall.
Once you have applied your configuration, if you want to remove a rule you just created you have to go back to the rule list, select the rule you want to delete, and click the Delete Selected button.
It is also important to make sure you have your rules set up in the right order. It is very easy to arrange your rules with the Webmin Firewall Module. Go to the rule listing and click either the up or down arrow the corresponds to the rule you want to move, The rule is then moved one slot up or down (depending upon which arrow you click). But don't forget to click the Apply Configuration or your move will not stick.
Final Thoughts
If you are looking for a very simple, web-based, solution for creating a firewall the Webmin firewall module might be the answer for you. Not only is it easy to use, you can administer your firewall remotely.
Advertisement


This article lacks enough information to actually setup a secure firewall.
There is no NAT covered at all.
The article is very short on details and barely covers the subject. It covers launching and very very basic operations.
As a person hoping for full fledged examples of properly configured and secure configuration this article leaves me feeling lacking.
n details for the setup?
you wrote : “All you have to do is point your browser to http://IP_OR_DOMAIN:1000 (Where IP_OR_DOMAIN is the actual IP address or domain hosting your Webmin installation.)”
isn’t it a secure http (https) instead of “http”?
for me, just type “[server_IP:[webmin port (default is 10000)]” and there you go…