Connecting to Wireless Networks in GNOME

Connecting to wireless networks in Linux has, for a long time, been a nightmare. Until recently wireless was often a deal breaker in Linux (especially with laptops.) But things have changed. Now more cards than ever are supported as well as more protocols. And with the GNOME Network Manager Applet, connecting to a wireless network couldn't be easier.
How easy you ask? Let me show you.
Locating the applet
The first thing you need to do is find the applet which will be in your system tray either in the top or the bottom panel on your GNOME desktop.

How many bars do you have? As you can see I am already connected to a network. But what if I am not? Simple if you right click the applet a menu will appear which contains the "Edit Connections" entry.

Select the Edit Connections entry to open the Network Connections menu.
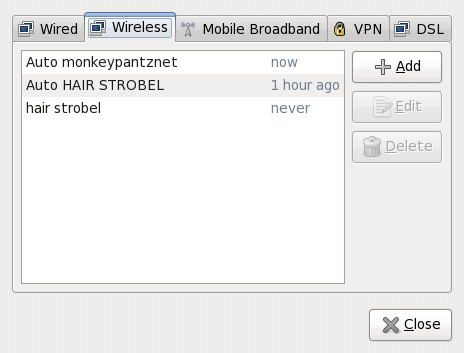
Click on the Add button to create a new network. This will bring up a simple window where you will enter basic wireless information.
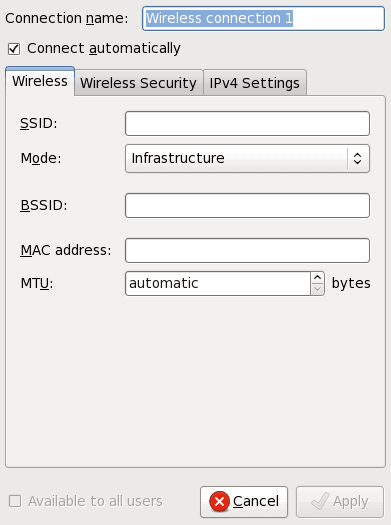
The first bit of information you should enter is the network SSID (the name of the network). Once you have that done you can click over to the Wireles Security tab, select the type of security (WEP, LEAP, WPA, etc), enter the Password, and click Apply.
Once you have created the network you can select the network by left clicking the applet to reveal the network listing.
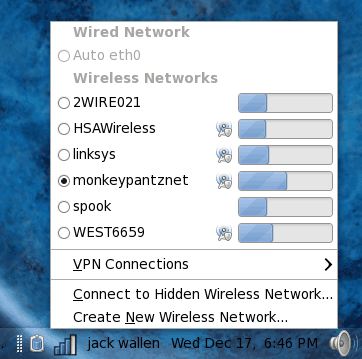
Of course the system will scan the surrounding networks and any network found will be listed in the Wireless Network listing.
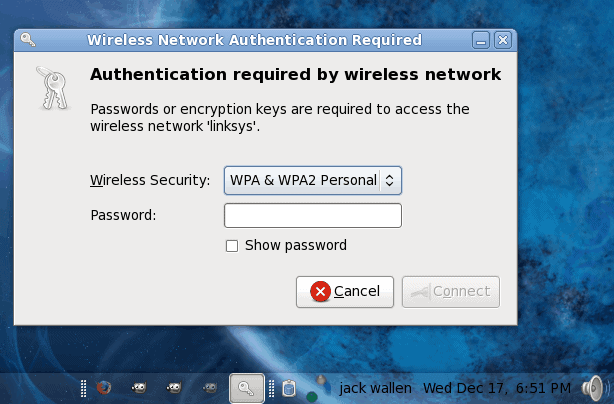
If you select an already discovered network you will be prompted to enter the networks password.
Final Thoughts
Connecting to a wireless network has become as simple as it is in any operating system. With the GNOME, as long as your card is supported, you should have your wireless connected in no time.
Advertisement


