5 Things to learn how to do in GNU/Linux via Command-Line
GNU/Linux is powerful, very powerful, but truth be told it can also be a daunting experience when trying to learn to utilize the true power behind a GNU/Linux system; the terminal.
Using the CLI, or Command Line Interface, can speed up MANY processes and tasks, once you know how to use it and some of the basic commands for it. This tutorial is not meant to transform you from scared first timer into Linuxbeard poweruser, but rather to give you your first babysteps into the deeper world of your system.
So, let's just jump right into this. This tutorial is assuming you already have a GNU/Linux system installed, and you can access your terminal with su/sudo permissions. If you DO NOT have sudo permissions at the least, you need to contact your systems administrator and get sudo access otherwise certain parts of this tutorial will be impossible for you to follow.
Wait..wait..what ARE sudo permissions?
sudo means "Superuser do". In other words, it's how you perform an action as an administrator, without actually logging into your root account by using the command 'su'
So, if you have sudo permissions (which unless it's a company machine or something...) you will, and can do sudo things.
1. Changing folders, copying, pasting, moving, and renaming files/folders via CLI
So, you have a computer, you installed Ubuntu/Debian/Manjaro/Redhat/OpenSUSE/Gentoo or whatever your flavour of choice is, on it. Great! But don't you find it annoying when you have to open your file manager such as Dolphin or Caja, click fifty times to get to the directory you want, then click a bunch more times to copy some files, then navigate to where you want them to go, and click some more to paste them? Yeah, you can use keyboard shortcuts for copy/paste, but you're still clicking like a maniac...So, let's speed this process up!
Open your terminal of choice. Depending on your Desktop Environment this could be one of a few different options, and also located in a few different places...So, dig it out, and open it.
Now, typically you are starting in your home folder...So, let's change that. Let's navigate to a different folder!
Hint: If you ever used MSDOS back in the day, this first command will be either nostalgia, or an annoyance.
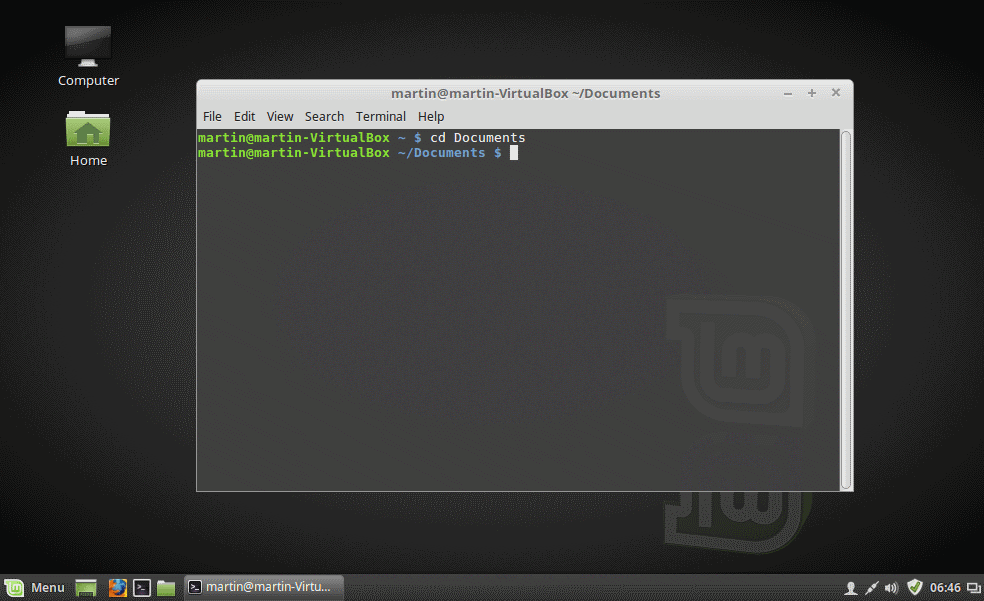
cd Documents
Ta-Da! You are now in your Documents folder!
The cd command, which stands for 'change directory' itself can also be quite powerful however. You do not need to be in the parent folder of a directory you wish to enter. For example. I can be inside my Documents folder which is located at /home/username/Documents, and then I can visit an entirely different folder without having to go back to my Home folder. This can be done by typing the exact path you wish to cd into.
For example
cd /home/username/Downloads
This can be typed from ANYWHERE, and you will pop directly into your Downloads folder. This rule applies to all things, from changing directories (cd) to copying/pasting/moving/deleting/creating/executing files as well!
Moving, copying, renaming files
But what now? Well, let's make a file, and then move it somewhere else...
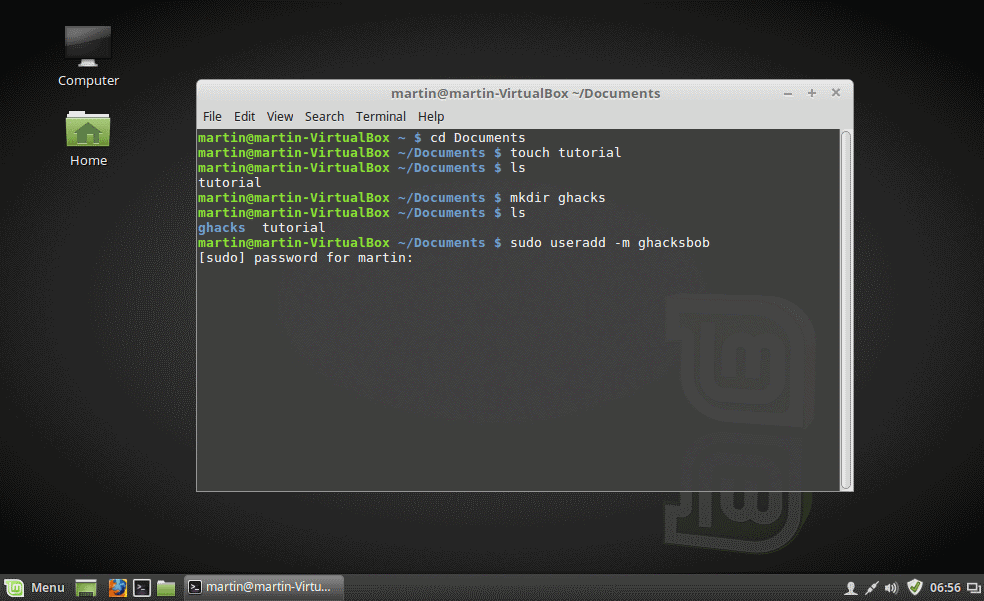
To do this, we are going to use a command called 'touch' that simply creates a blank file. You could use any file you wanted really, but let's just make a blank file for this tutorial, so we aren't moving important things all over the place.
But first, let's see what files are currently already IN our documents folder!
ls
As you can see, the 'ls' command, lists all files and folders in your current directory. And then we will make our blank file...
touch tutorial
And then list the files again...
ls
And as you can see, you now have a file called 'tutorial'
Okay, so we now know how to navigate into directories...But what do we do with files? Let's try a few things. We are going to be utilizing a few different commands here, so I'll break them down before we start.
- cp - copy
- mv - move
- rm - remove
So, let's play with our tutorial file. Make sure you are in the Documents folder
cd /home/username/Documents
Be sure you replace username with your exact CaSe SeNsItIvE username!
Now let's move that file somewhere else:
The syntax for this usually goes as follows for simple commands: COMMAND [LOCATION OF ITEM] [LOCATION DESIRED]
However, if your terminal session is currently inside the folder of the file/item you wish to interact with, you do not need to state the specific source of the root item, only the desired location you wish to copy/move it to.
mv tutorial /home/username/Downloads
cd /home/username/Downloads
ls
You should now find the file inside your Downloads location. Next, we will copy that file back to our Documents folder.
cp tutorial /home/username/Documents
Then remove the one in our Downloads folder:
rm tutorial
And finally cd back to the Documents
cd /home/username/Documents
ls
And voila, our file is back here again, with the other copy gone.
This is the basis of moving things around!
Renaming in Linux
In order to rename a file, you must move it using the mv command, and giving it the new name, or copy it with the cp command and giving it the new name.
Working with folders is slightly different, we must change our command a little. For example:
rm -r /home/username/Documents will remove the entire folder Documents and everything within it.
mv /home/username/stuff will however move the folder 'stuff' and everything within it.
If you ever see the error, "-r not specified; omitting directory" then you must add -r after the initial command, to include other files within the directory. You must also add -r to remove directories.
Creating folders
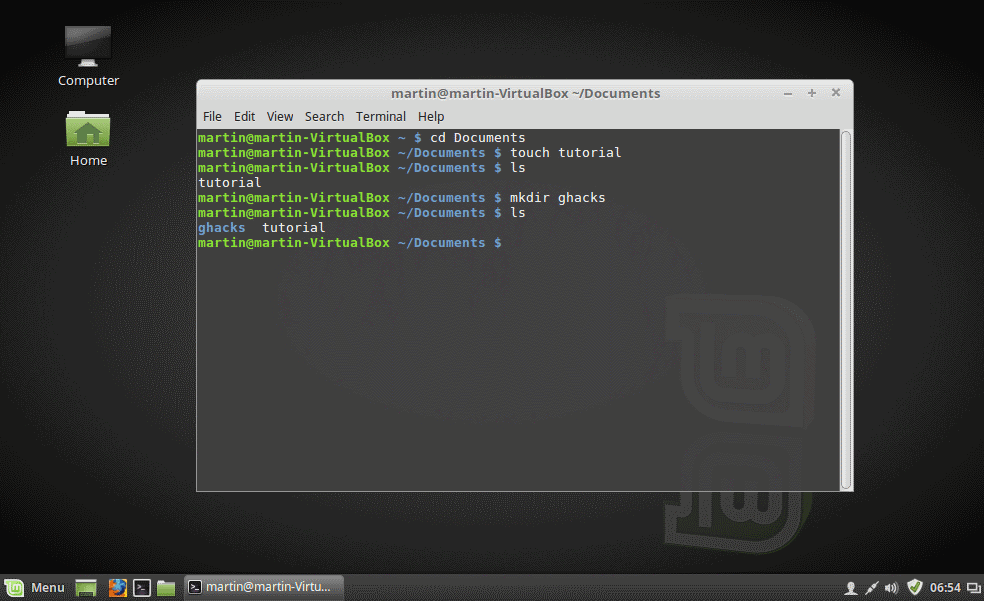
The last thing we will cover in this part, is making a new folder. Simply, it is the command 'mkdir'
Using it could be done for example, like:
mkdir stuff
or
mkdir /home/username/stuff
That's it for the basics of file management within the CLI. It may seem like a hassle now, but given time and practice, it becomes much faster and easier to navigate and do system tasks this way. For example.
cp -r ~/stuff2/* ~/Downloads/ && mv ~/Downloads/* ~/Stuff
The above example uses a couple of shortcuts not explained yet, so I'll give a super quick breakdown to show just how fast you can do things.
- Firstly, ~ can be used to substitute for '/home/username/ to shorten how much you need to type.
- Secondly, && is used when we want to put multiple commands in one line, via CLI.
- Lastly, * is used in CLI as a wildcard. It must be used very carefully, as it tells the your system to include EVERYTHING.
Let's assume that the folder "stuff2" has 400 files inside of it. I just moved all of the files out of stuff2, into the downloads folder, and then move everything inside the Downloads folder into the stuff folder. Obviously, I could have skipped a step and just gone directly from the stuff2 to stuff folders, but for example sake, that line took me about 7 seconds to type out, and did what would have taken a minute or two to click around and do!
2. Creating a new user
Making a new user is extremely simple via Command Line. Yes, you could click through your Desktop Environment, find the settings, the user accounts area, and click through the procedure of setting up a new user...or....
sudo useradd -m bob
Done. Yes, really, that's it. You could now theoretically log out and change accounts over to 'bob'.
The -m (LOWER CASE!) gives bob a home directory.
useradd makes the user
And obviously bob is the username.
3. Change passwords for a user
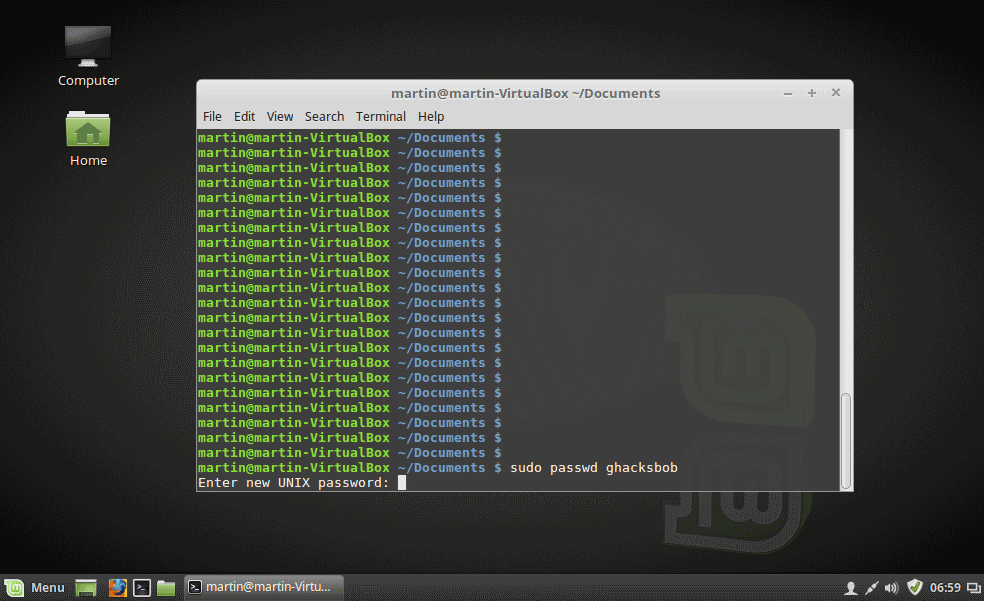
So, we made bob. But what if bob wants to add or change a password? Or what if you want to change your password, or change bobs password FOR him?
passwd
passwd is the command we use. It can be used a couple different ways for these examples.
If you are logged in as the user you wish to change the password for, simply enter
passwd and follow the instructions the CLI will give you.
However, if you want to change a different users password, you need to add two things.
sudo passwd bob
sudo, because only an administrator or the user themselves can change someones account (if it's not yours), our passwd command, and the username of the password we are changing.
Simple stuff!
4. Kill processes (And actually kill them dead!...I'm looking at you, Windows Task Manager!
So, you were surfing websites that maybe you should avoid in the future, got a popup that won't close, and won't stop playing an 8bit melody of 'It's a small world' repeatedly? No problem, we can just kill Firefox and that's that.
the commands we are going to be using are:
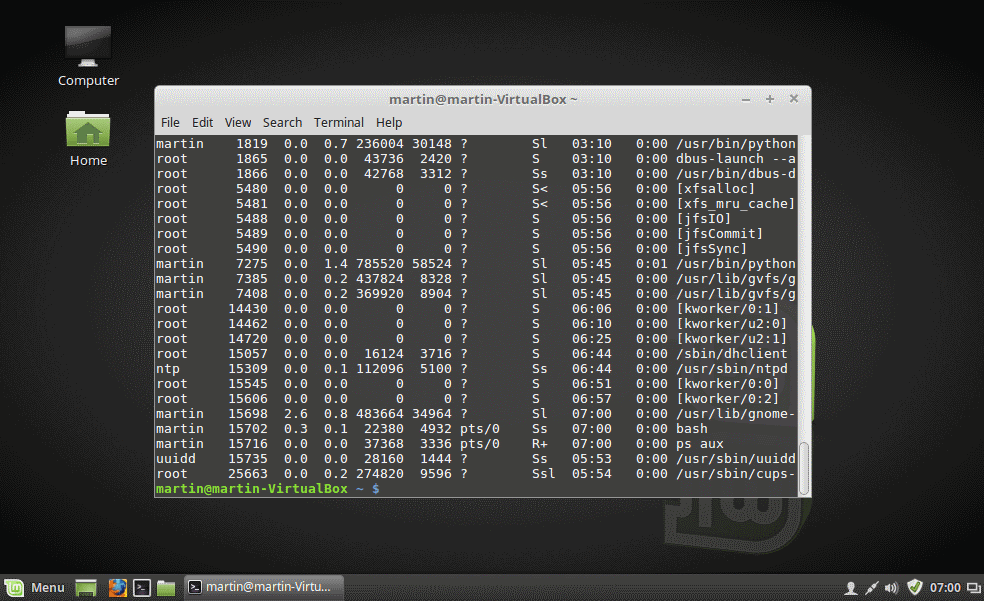
ps aux
kill
The ps aux command is going to list everything running on your machine for you, program and services wise, for ALL users.
putting in the command will spit out a bunch of lines of text for you. One such line, may look like this:
usernam+ 4022 6.3 4.6 2299028 373428 ? Sl 17:33 0:17 /usr/lib/firefox/firefox
The part we want to focus on is called the PID, its the process identfication number. The PID is the FIRST set of numbers you will see on the left.
Once you have figured out which process you want to kill, such as Firefox, and the PID of the process, now we need to kill it.
The command we want to use is the kill command. Most of the time, using it without any options will work fine. However, I've grown to absolutely love the -9 option, with forces the application to kill, forcibly if need be.
So, what we need to do to kill Firefox, is:
kill -9 ####
Replace ##### with the PID of the process and BAM, Firefox for example, is gone!
5. How to check disc space
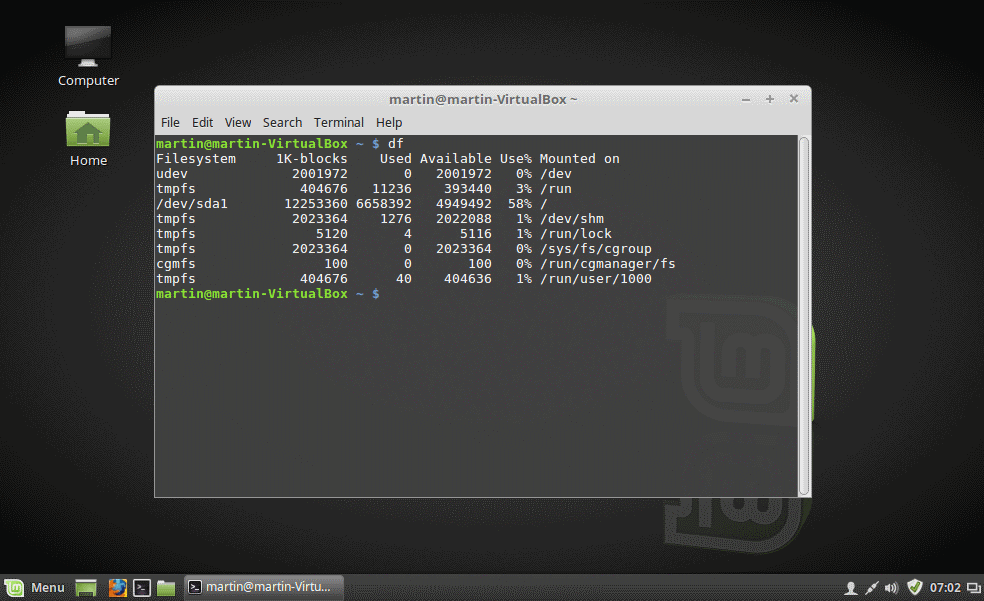
Okay, this one is super simple, and requires about...actually, you could have already been done before you even read this far.
df
BAM. Disc space is listed in detail for you. Well, since that was SO easy, you should have no issues, right?
Stay tuned for more CLI tutorials and 'things every GNU/Linux user should know how to do' type tutorials to come!


Significant note:
> Secondly, && is used when we want to put multiple commands in one line, via CLI.
Actually, && only executes next command if previous returned error 0. If previous command failed (or issued a warning with non-0 error level), other commands will not run.
To write command line with multiple commands which must execute unconditionally, separate them with ; (semicolon)
This is why I love Ghacks!
Nice post Mike. I think the basics need to be and should be iterated again and again – because we were all noobs at one time.
I like the ps aux tip. Gives a nice static display. But I wonder how to make it easier to find a specific process. Perhaps pipe it to grep? With a long list of processes it can be hard to find a specific one – like a needle in a haystack.
Vrai,
Yep! You can do ps aux | grep firefox just for example to filter the list to only show firefox related processes!
‘df -h’ for the win! Human readable format will show the numbers as KB/MB/GB instead of doing the math in your head
Excellent tutorial! I like how you focused on the very basic CLI stuff so that even newbies could pick it up. Very often, as we acquire more and more knowledge, we forget what it’s like for a newcomer to Linux.
ripvanwinkle,
Totally agreed. Even if we have been using a GNU/Linux system for a long time, we started from the basics, and should never forget that; especially nowadays with the penguin getting more and more users moving to it!
One little step I have learned to use along the way that helps speed the command line up slightly are the up and down arrow keys. They automatically display the shell history on the cl. For the uninitiated that means anything you have typed in the past is retrievable on the command line by simply up arrowing. Saves you from going “What was it I typed that let me do that?” without having to go look it up again when you are learning. Keeps you from typing over actions that you commonly use once you know what you are doing. Your user and sudo/root have separate files for that history too. Or should IMHO. Yes I am looking at you Ubuntu unless they changed that.
Another tidbit I use is sudo -s. This sets the terminal you are on to sudo for the session. The “session” is till you type exit or close the terminal. Best to type exit and then close the terminal as most terminals make racket about “you are closing an open session”. Stops you typing sudo/su this or that every command. Just remember sudo can be the destroyer of worlds…
On Linux Mint 17.3 the bash terminal does indeed keep a separate history for user and sudo/root.
sudo -i has separate history is on all Linux terminals, because it starts another shell with another user’s environment, which causes bash to write .history to that other user home.
sudo -s though… well, maybe root have different shell than your user?
“-h” is the swtich for “human readable”.
so “df -h”, “free -h” etc. will display numbers in a nicer format.
hint: most powershell commands have identical aliases:
http://doctordeploy.com/16122_Unix_Tools_in_Powershell.html
zund,
Great tip!
-h does make things rather simple indeed for reading. I forget to use it more often than not myself, I’ve become so accustomed to reading numbers in byte form, so thanks for the reminder!