Remove old Wireless networks in Windows 10

Whenever you connect to a wireless network using a device running Windows 10, a profile is saved to the computer.
That's useful if you need to connect to the network again in the future as it makes that operation easier, especially if the access password is saved as well.
While that is useful, wireless network profiles are not removed from the list of profiles after time has passed. Even if you have not connected to a network in two years, it is not removed from the operating system.
That may not be a big issue either, but if you like things tidy, or prefer to remove old information from the operating system, then you may want to remove these old network information.
It makes little sense to keep profiles around that you know you will never connect to again using the device. Examples are hotel wireless networks, wireless networks at airports, or a wireless network that is no longer available.
It may also help if you have connections problems and believe that it is profile related.
Removing old wireless networks in Windows 10
It is easy to forget wireless networks the device was connected to in the past using Windows 10. Here is what you need to do:
1. Use Windows-i to open the Settings application of Windows 10. It is the main location for network and Internet related settings in the Settings application including Wi-Fi.
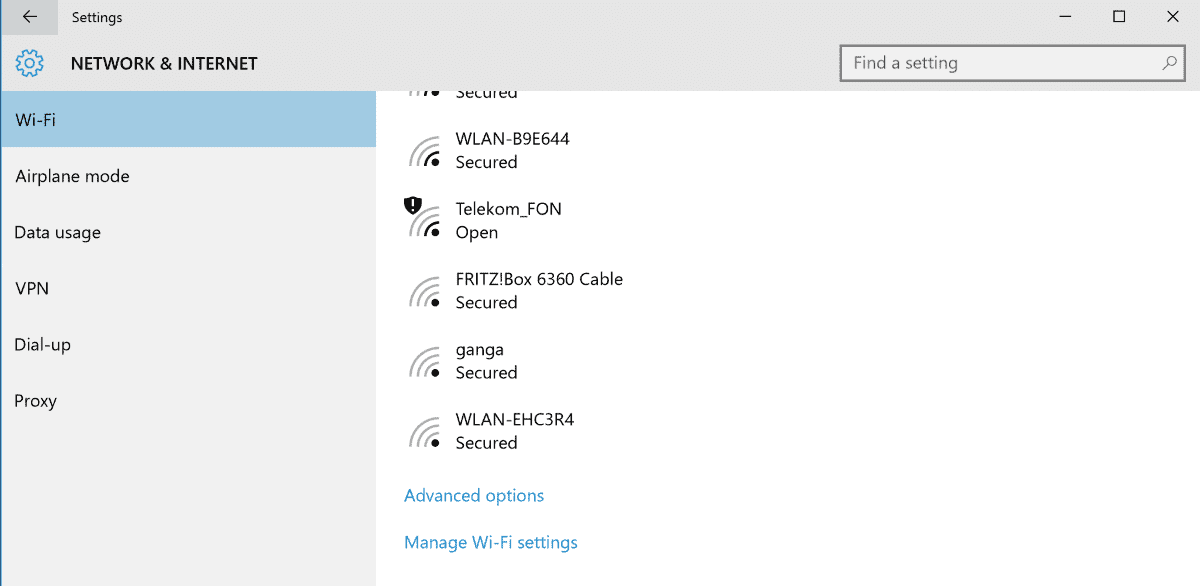
2. Select "Network & Internet" when the app opens and there Wi-Fi from the sidebar. Note that Windows 10 displays Wi-Fi only if the device has wireless networking capabilities.
If you are connected to a wireless network, it is highlighted at the very top. You find several options listed there that you may want to configure if you have never done so, e.g. an option to define whether the online sign-up feature of Hotspot 2.0 is active.
Scroll down on the page until you find "manage Wi-Fi settings" listed on it.
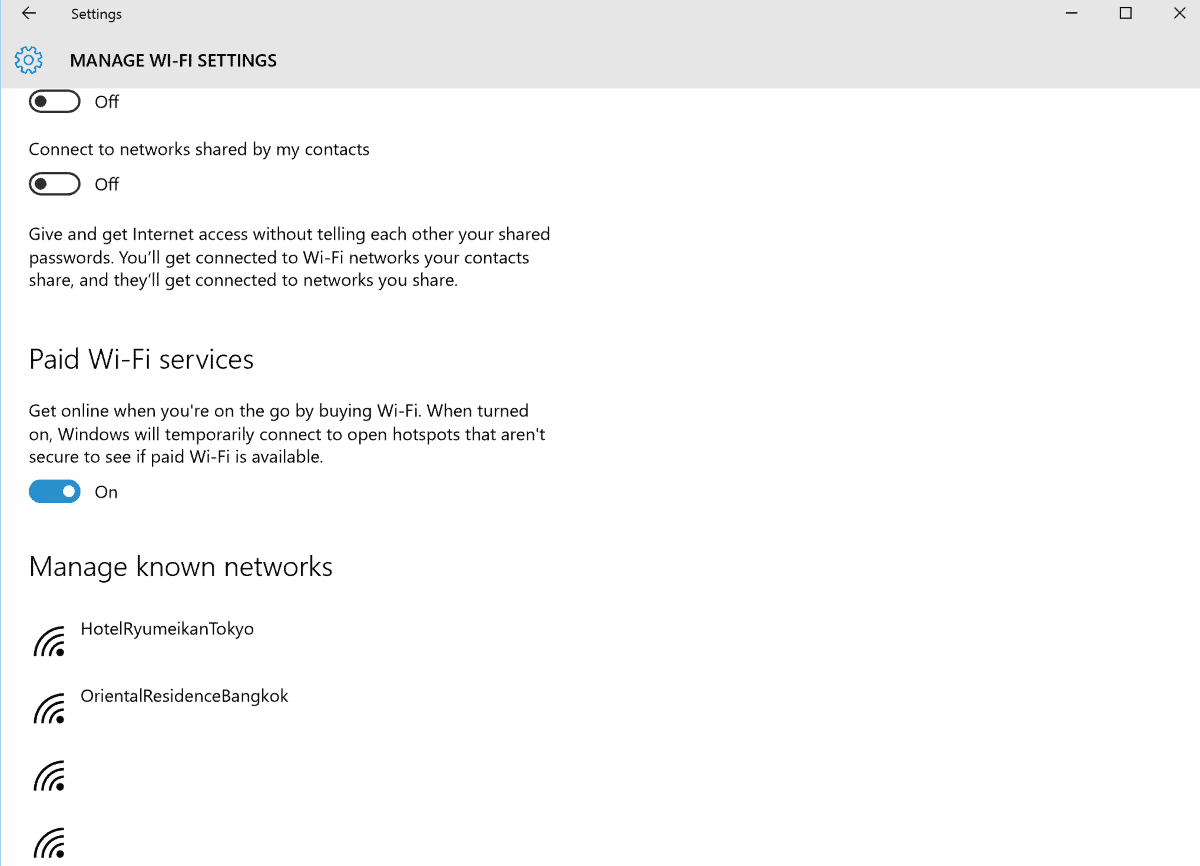
3. Manage Wi-Fi Settings opens. You find a list of all known wireless profiles at the bottom of the page. Each profile is listed with the SSID identifier but no other information.
It would have been useful if Microsoft would have added the last connection date and time to the listing but that is unfortunately not the case.
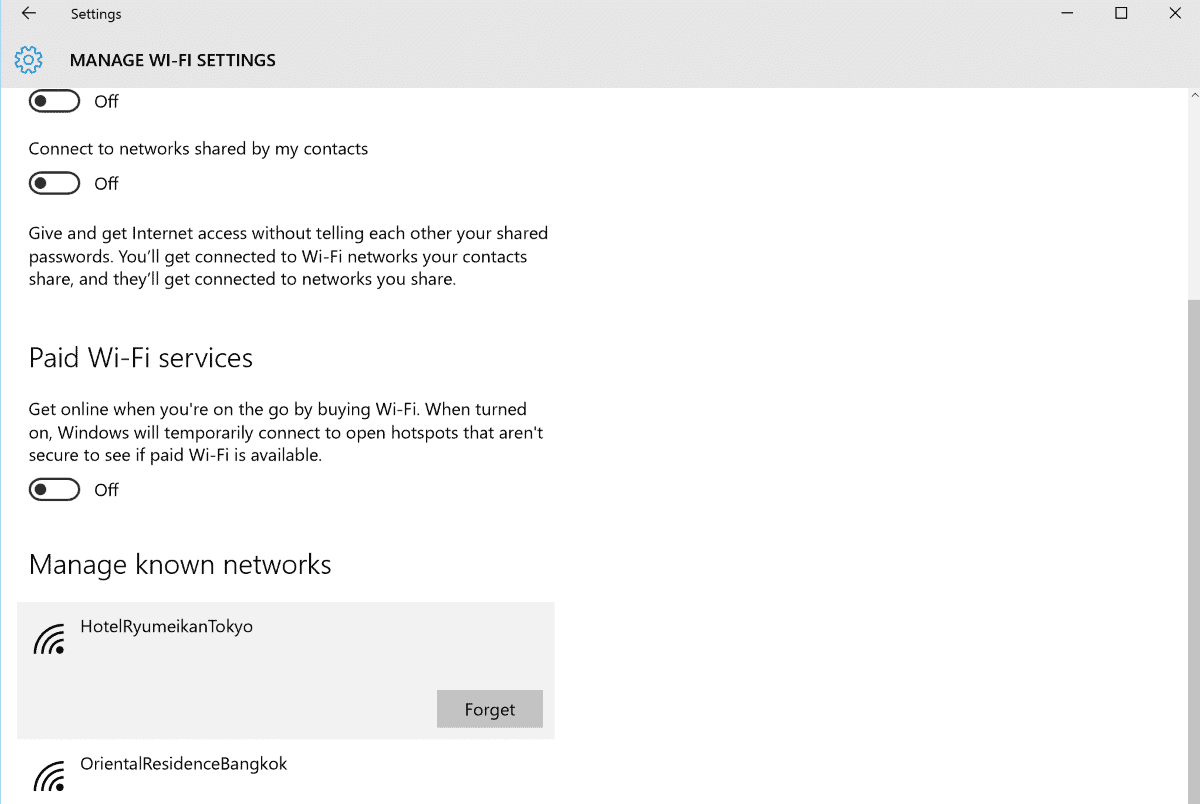
4. Forget any of the profiles
To remove any profile from the machine, click or tap on it and select the Forget button afterwards. This deletes the information from Windows.
Please note that there is no confirmation dialog, and that the data is removed immediately. If you connect to the network again at a later point in time, you will be asked to enter a password if that is required to connect to it.
The Windows 7 way
Windows 7 shipped with options to remove wireless network profiles as well. The removal is handled in the Control Panel since the Settings application was introduced in Windows 8 by Microsoft.
- Click on the Start menu button and select Control Panel.
- Or, use Windows-Pause to open the Control Panel, and select Control Panel Home when the window opens.
- Select "Network and Sharing Center".
- On the page that opens, select "Manage wireless networks".
- All known wireless network profiles are listed on the page. You can use the controls at the top to add or remove profiles, to change the order of them, or open adapter properties.
The "all Windows versions" way
You can remove wireless profiles using the command line as well:
- Activate the Start menu.
- Type cmd.exe and select the result to launch a command prompt.
- Type netsh wlan show profiles to display the list of known wireless profiles.
- To delete a profile, run netsh wlan delete profile name="Name" where Name is the profile name that Windows displays when you run the show profiles command.





I have switched to Sky broadband from BT, I have deleted the BTHUB and BTWI with fon, cmd/netsh wlan show , and the deleted the profiles, I have also deleted the same in htkey/software/microsoft/win NT, current version, network/ profiles., it has now worked and still shows when I try to connect via USB Wifi lan, I have read all articles regarding this issue for the last couple of weeks and phoned some experts, so far no one has been able to give me a proper answer nor solution.
Ps, I have tried more suggestion than I’ve mention above but no cigar:)
“Whenever you connect to a wireless network using a device running Windows 10,… Microsoft copy the password without alerting the owner. Removing old Wireless networks won’t deleted the stored passwords from Microsoft’s servers.
If you are talking about Wi-Fi Sense, that is completely untrue. You have to manually one-by-one allow each network to be shared. It is an opt-in, not an opt-out.
http://arstechnica.com/gadgets/2015/07/wi-fi-sense-in-windows-10-yes-it-shares-your-passkeys-no-you-shouldnt-be-scared/
any source for that?
I tried to disable most MS services in host file / firewall, so I wonder if this got disabled as well…